
Propagation
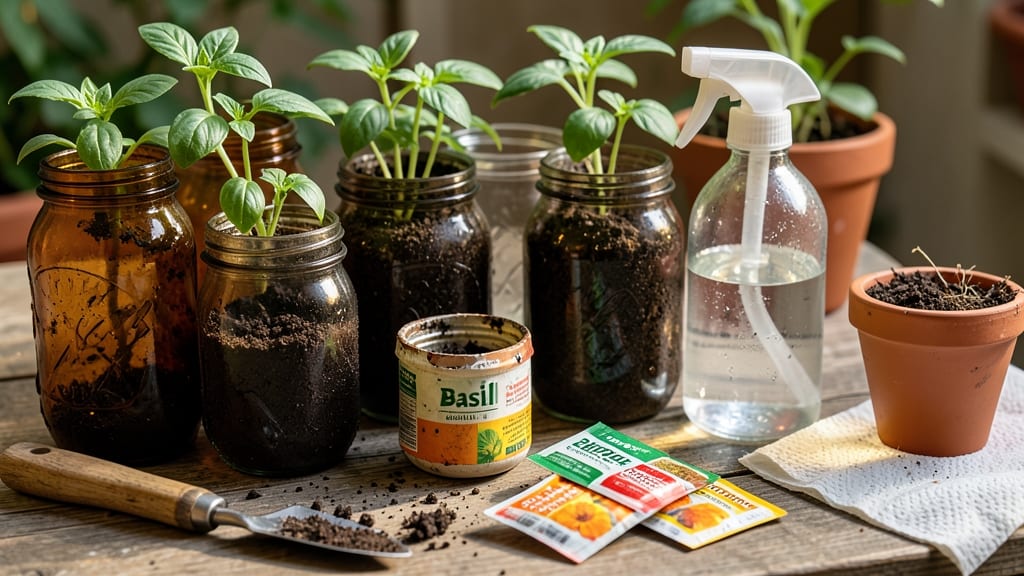
Transforming old jars into seed-starting containers saves money and keeps glass out of landfills—while producing healthy seedlings that rival store-bought ones. 🌱 I’ve turned everything from pasta sauce jars to empty jam containers into thriving nurseries, and the best part? No special equipment needed beyond what’s already in your pantry.
The trick lies in proper prep: sterilize jars with boiling water, poke drainage holes in the lids, and use a mix of potting soil and perlite for airflow. Place seeds just below the soil surface—never buried deep—and keep them cozy under a grow light or sunny windowsill.
Humidity is key, so cover jars loosely with plastic wrap until sprouts appear.
By the time you’re ready to transplant, your seedlings will be sturdy and ready for their permanent home. The roots grow straight down the jar walls, making them easier to handle than flimsy plastic pots. Plus, you’ll avoid the heartbreak of leggy, weak starts that collapse when moved outdoors.
Works for almost any seed—tomatoes, peppers, herbs, even delicate flowers—just adjust soil depth and light exposure based on the plant. Here’s how to get started without a single new purchase.
📚 In This Guide
- What you need
- Instructions
- Tips and common mistakes
- Wrapping up and next steps
What you need
- ● Old jars: 4–12 oz (120–350 mL) size, with lids (mason jars, pasta sauce jars, or baby food jars work great). Tip: Ensure they’re clean and free of cracks!
- ● Seed starting mix: 1–2 bags of sterile, well-draining potting mix (avoid garden soil—it’s too dense!).
- ● Seeds: Choose fast-growing varieties (like lettuce, herbs, or marigolds) for beginners.
- ● Spray bottle: 8–16 oz (240–470 mL) with a fine mist nozzle for gentle watering.
- ● Permanent marker: To label your jars (or use masking tape + pen).
- ● Scissors or knife: For cutting drainage holes (if your jars lack them).
- ● Heat mat: Speeds up germination for cool-weather seeds.
- ● Grow lights: LED or fluorescent bulbs (10–12 hours/day) for weak sunlight.
- ● Twine or rubber bands: To secure labels.
- ● Tweezers: For delicate seed placement.
- ● Funnel: Saves mix spills when filling jars.
Step-by-Step instructions for starting seeds in upcycled jars
Turn your old jars into perfect seed starters with this simple, eco-friendly method.
🪴 Step 1: Prepare Your Jars and Drill Drainage Holes
Start with clean, empty jars—mason jars or any glass container with a lid. Use a nail and hammer to drill 2-3 drainage holes in the bottom of each jar. This prevents waterlogging, which is the #1 killer of young seedlings. Place a scrap of mesh or a piece of broken pottery over the holes to keep soil from washing out while still allowing water to drain.
Here's the thing—don't skip this step. Without proper drainage, roots will suffocate, and your seedlings will rot before they even sprout. I like to use a small drill bit for precision, but a nail works in a pinch. Just be careful not to crack the glass.
🌱 Step 2: Add a Layer of Pebbles or Sand
Fill the bottom ½ inch of each jar with pebbles or coarse sand (the kind used for aquariums). This extra layer ensures water drains away from the roots, preventing soggy soil. I keep a bag of clean pebbles on hand for all my upcycled containers—it’s a game-changer for root health.
Pack the pebbles lightly but firmly. You want them to stay in place when you add soil later. If they shift too much, your seedlings might end up sitting in water instead of draining properly. A quick tap on the table helps settle them evenly.
🌿 Step 3: Fill Jars with Seed Starting Mix
Add your sterile seed-starting mix (never garden soil—it’s too dense and can harbor diseases) until the jar is ¾ full. Press the mix down gently so it’s firm but not packed. You’ll want air pockets gone, but the mix should still feel light enough for roots to push through easily.
Moisten the mix with a spray bottle until it’s damp but not dripping. Overwatering now will just make the soil clump together, which can suffocate your seeds. I like to work in batches—fill two jars, water them, then move to the next pair. This keeps everything consistent.
💧 Step 4: Plant Seeds at the Right Depth
Follow the seed packet’s instructions for depth—usually twice the diameter of the seed. For tiny seeds like lettuce, that’s just a light sprinkle on top. For larger seeds like beans, press them ½ inch deep. I tap the seed packet gently to release one seed at a time—planting too many in one jar leads to weak, crowded seedlings.
Cover the seeds lightly with a sprinkle of additional mix, then mist the surface again until it’s evenly damp. A heavy watering can will bury your seeds too deep, delaying germination. Once planted, place the jars in a warm, bright spot—70-75°F is ideal for most seeds.
☀️ Step 5: Provide Light and Monitor Germination
Seeds need 12-16 hours of light daily to grow strong. A south-facing windowsill works, but if your light is weak, add a grow light within 3-4 inches of the jars. You’ll see the first sprouts in 5-14 days, depending on the plant. Watch for first true leaves (the second set after the initial cotyledons)—that’s your signal to start thinning if needed.
Keep the soil consistently moist but not soggy. Stick your finger in the mix—if the top ½ inch feels dry, it’s time to water. But don’t overdo it. Damping-off (a fungal disease) will wipe out seedlings overnight if the soil stays too wet. Once sprouts appear, remove the jar lids to prevent humidity buildup.
Tips & tricks for perfect seed starting in upcycled jars
Here's what nobody tells you about getting the most out of your repurposed containers—these tricks make all the difference for strong, healthy seedlings.
Drainage is Non-Negotiable: Those 2-3 drainage holes in Step 1 aren't optional—they're your seedlings' lifeline. I've seen too many jars with "just a few holes" where roots still suffocate. Use a nail to make holes slightly larger than your mesh scrap, and test drainage by pouring water in. It should flow freely without soil escaping. If you're worried about glass shards, wrap the nail with electrical tape for a safer drill.
Pebble Packing Pro Tip: When adding that ½-inch layer of pebbles in Step 2, don't just dump them in. Spread them out first, then tap the jar firmly on the counter to eliminate gaps. I like to use aquarium pebbles because they're smooth and won't compact over time. If you can't find them, clean river rocks work too—just rinse them well first. This layer prevents what I call "the soggy bottom syndrome" that kills seedlings before they even sprout.
Soil Moisture Secret: In Step 3, when you're moistening that sterile seed-starting mix, think "damp sponge" not "wet towel." The top ½ inch should feel like a wrung-out washcloth—not dripping, but not bone-dry either. I use a spray bottle with a fine mist setting because it gives me control. Overwatering at this stage is the #1 reason seedlings develop damping-off disease. Trust me on this—once you see that fuzzy gray mold, you'll wish you'd been more careful.
Lighting Hack: For that crucial 12-16 hours of light in Step 5, position your grow light so it's just skimming the tops of your seedlings. I use a simple LED bulb on a timer for 14 hours daily. The key is keeping it close—within 3-4 inches—but not so close it overheats the soil. You'll know it's working when your seedlings grow tall and sturdy rather than leggy and weak. If they stretch toward the light like they're reaching for salvation, you need more intensity or more hours.
Pro Tips for Seed Starting Old Jars
- Here's what nobody tells you about getting the most out of your repurposed containers—these tricks make all the diffe...
- Drainage is Non-Negotiable: Those 2-3 drainage holes in Step 1 aren't optional—they're your seedlings' lifeline. I've...
- Pebble Packing Pro Tip: When adding that ½-inch layer of pebbles in Step 2, don't just dump them in. Spread them out ...
Frequently asked questions
Got questions about repurposing old jars for seed starting? You’re not alone—here are answers to the most common ones!
Can I use any old jar, or do I need specific types?
Most clean, food-grade jars work—mason jars, pasta sauce jars, or even baby food containers. Avoid jars with cracks or cloudy glass, as they can trap moisture and promote mold. Pro tip: Remove labels thoroughly to prevent residue from affecting germination.
When is the best time to start seeds in jars?
Timing depends on your plants! For cool-season crops (like lettuce or peas), start indoors 6–8 weeks before the last frost. Warm-season plants (tomatoes, peppers) need 8–12 weeks. Check your local frost date and seed packets for guidance.
What if my jars don’t have drainage holes? Can I still use them?
Yes! Poke 2–3 small holes in the bottom with a nail or drill to prevent root rot. Line the jar with a coffee filter or paper towel for extra drainage. Warning: Overwatering is still a risk—always empty excess water from the saucer.
How do I transition seedlings from jars to the garden?
Hardening off is key! Move jars outside for a few hours daily, increasing time over 7–10 days. Before transplanting, water the soil in the jar to loosen roots. Gently squeeze the sides to ease seedlings out—no need to disturb the root ball too much.
What are some creative alternatives if I don’t have jars?
Egg cartons, toilet paper rolls, or even plastic yogurt cups work great! Just ensure containers have drainage and are at least 2–3 inches deep. Bonus: Repurpose plastic containers by cutting the bottom off and adding a mesh screen for airflow.
Wrapping up and next steps
Starting seeds in old jars is a creative, budget-friendly way to give new life to everyday items while nurturing healthy seedlings! Whether you’re repurposing pasta sauce jars, mason jars, or even baby food containers, this method is perfect for gardeners of all levels.
With just a little care and the right setup, you’ll have thriving plants ready for transplanting in no time.
Now that you’re armed with the knowledge, why not give it a try? Grab those jars, gather your seeds, and let your green thumb shine! 🌱 Next, experiment with different plants or even share your newfound skill with fellow gardening enthusiasts—your upcycled garden journey is just beginning!