
Propagation
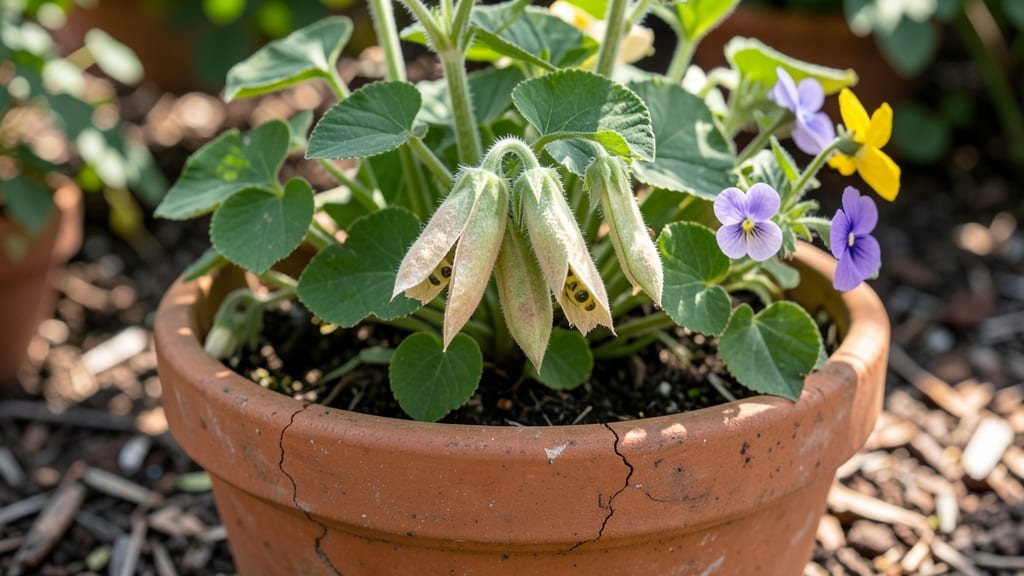
Harvesting viola seed pods before they burst saves you from a messy, scattered mess next spring. 🌿 I’ve learned the hard way—those tiny seeds fly everywhere when pods dry on the plant, and half get lost to squirrels or rain.
The secret is timing: wait until pods turn from green to brown but haven’t split open yet. You’ll need just a few tools: clean scissors or pruners, a paper bag for drying, and a dry, dark spot to store them.
Snip pods when they’re firm but not brittle, then lay them out on paper towels to finish drying. This keeps seeds viable for 2-3 years if stored properly. Once dried, crack open the pods and sift out the tiny black seeds.
They’re so small you’ll need a fine-tooth comb or even a paintbrush to collect them all. A little patience here means a richer harvest next season when you sow them. This method works for pansies too, and it’s especially useful if you grow heirloom varieties.
No more scrambling to find seeds at the store—just a quiet afternoon of prep for next year’s garden.
📚 In This Guide
- What you need
- Instructions
- Tips and common mistakes
- Wrapping up and next steps
What you need
- ● Viola seed pods: Mature, dried pods (typically brown or tan) from your garden or local violas. Aim for at least 10-15 pods for a decent seed yield.
- ● Pruning shears or sharp scissors: Clean, sterilized tools to snip pods from stems without damaging the plant.
- ● Paper bags or brown lunch bags: 2-3 medium-sized bags (one per batch of pods) to prevent moisture loss and seed spillage.
- ● Labeling tags or masking tape + marker: To mark pods by variety (e.g., "Viola ‘Sunny Yellow’ – 2024").
- ● Drying surface: A flat tray, cardboard box, or mesh screen to lay pods out for 1-2 weeks in a dry, shaded spot.
- ● Small funnel or paper cone: For transferring seeds into storage containers later.
- ○ Air-tight containers: 2-4 small jars, envelopes, or seed packets with silica gel packets (optional but helpful for long-term storage).
- ● Magnifying glass: For inspecting pods and ensuring seeds are fully mature before harvesting.
- ● Desiccant packets: Extra silica gel to keep containers dry and seeds viable longer.
- ● Notebook or garden journal: To log pod collection dates, varieties, and germination notes.
- ● Humidity monitor: If storing seeds long-term, to ensure 30-40% humidity in your storage area.
- ● Gloves (nitrile or cotton): To keep hands clean while handling pods and seeds.
Step-by-Step instructions for harvesting viola seed pods
Here's how to collect viola seeds without damaging plants—no twisting required.
🌿 Step 1: Identify Mature Seed Pods
Viola seed pods form after flowers bloom and wither. Look for pods that have turned brown and papery—this means they're fully mature and ready to harvest. They'll feel dry to the touch and may split open slightly at the seams. I like to check plants every 2-3 days in late summer or early fall when pods appear.
Don't harvest green or greenish-brown pods—they won't contain viable seeds. Mature pods often hang below the foliage, so you might need to gently lift leaves to spot them. If you see a pod that's already split open, collect the seeds immediately to prevent them from scattering.
✂️ Step 2: Harvest Without Damaging Plants
Use clean, sharp hand pruners or small scissors to snip the seed pod just above where it meets the stem. Cutting too close to the stem can leave a wound that invites disease. Hold the plant gently with one hand while cutting to avoid tugging or breaking stems.
Place harvested pods in a paper bag or small envelope to prevent seeds from spilling out. I label each bag with the viola variety and harvest date—this helps track which plants produce the best seeds. Handle pods carefully; they're fragile and can crack open if squeezed.
🪴 Step 3: Dry and Store Seed Pods Properly
Spread the harvested pods on a clean, dry surface in a shady, well-ventilated area for 1-2 weeks. This allows any remaining moisture to evaporate and ensures seeds are fully dry. Avoid direct sunlight, which can cause pods to overheat or dry too quickly.
Once pods are completely dry, gently crush them between your fingers or use a small hammer to release the seeds. Store the seeds in a small glass jar or envelope with a silica gel packet to absorb excess moisture. Label the container with the harvest date and viola variety before sealing it tightly.
⏰ Step 4: Test Germination Before Planting Next Year
Before sowing seeds, test their viability by placing 10 seeds in a moist paper towel, then sealing them in a ziplock bag. Keep the bag in a warm, dark place (around 70°F) for 7-10 days. Check daily for sprouts—if at least 50% germinate, your seeds are ready for planting.
If germination rates are low, try storing seeds in the fridge for another 2-3 months before testing again. Viola seeds often need a period of cold stratification to break dormancy. Once viable, sow seeds ¼ inch deep in well-draining soil and keep them moist until germination occurs in 2-4 weeks.
Tips & tricks for perfect viola seed pod harvesting
These simple strategies will help you collect viola seeds efficiently without harming your plants.
Timing Secret: The 2-3 day check interval in Step 1 is perfect for catching pods at their prime. I've found that late summer mornings are ideal—dew keeps pods moist, making them easier to spot against the foliage. If you're harvesting multiple varieties, prioritize the ones with pods that have already started splitting open; these release seeds fastest.
Harvest Technique: When using hand pruners in Step 2, I angle the cut slightly downward to minimize stem damage. This small trick prevents the plant from splitting later, which can happen if you cut too close to the base. Also, avoid harvesting on rainy days—wet pods stick to tools and hands, making cleanup a mess.
Drying Wisdom: For Step 3, I spread pods on a mesh screen rather than paper towels to improve airflow. This cuts drying time from 2 weeks to about 10 days in my experience. Just place the screen in a spot with gentle air movement, like near an open window with a fan blowing lightly across it.
Germination Hack: In Step 4, I've found that placing the ziplock bag with seeds on top of my fridge (not inside) maintains that perfect 70°F temperature without needing a thermometer. The fridge's heat output creates an ideal warm spot. If you don't see sprouts after 10 days, don't give up—some viola varieties need up to 14 days to germinate.
Pro Tips for Viola Seed Pods
- These simple strategies will help you collect viola seeds efficiently without harming your plants.
- Timing Secret: The 2-3 day check interval in Step 1 is perfect for catching pods at their prime. I've found that late...
- Harvest Technique: When using hand pruners in Step 2, I angle the cut slightly downward to minimize stem damage. This...
Frequently asked questions
Got questions about harvesting and saving viola seed pods?
Here are some of the most common queries—plus quick, practical answers to help you avoid common pitfalls and get the most out of your violets!
When should I collect viola seed pods?
Harvest seed pods when they turn tan or brown and start splitting open—usually late summer to early fall (after flowering). Avoid collecting pods that are still green or have burst open, as the seeds may not be viable. Morning harvests work best when pods are dry.
How long do viola seeds stay viable?
Viola seeds typically stay viable for 1–2 years if stored properly in a cool, dry place (like a paper envelope in the fridge). For best results, plant them within 6–12 months—freshness = higher germination rates!
Can I save seeds from store-bought viola flowers?
Yes, but with a caveat: Seeds from hybrid or F1 violets (like those sold in nurseries) may not grow true to parent—you might get wild-type or mixed colors. For consistent blooms, opt for heirloom or open-pollinated varieties or buy seeds from specialty growers.
Why aren’t my viola seed pods forming?
Missing pods? Check these common culprits:
- Lack of pollinators: Hand-pollinate with a soft brush if bees aren’t visiting.
- Poor light or heat stress: Violets need full sun to partial shade and consistent moisture.
- Over-fertilizing: Too much nitrogen = more leaves, fewer flowers (and thus fewer pods). Use a balanced fertilizer instead.
Do I need to dry viola seed pods before harvesting?
Yes! Never harvest wet pods—moisture causes mold. Let pods dry on the plant or on a paper towel for 1–2 weeks in a shady, well-ventilated spot. Once fully dry, gently crush the pod to release seeds (they’re tiny—like dust!). Store in a labeled envelope for next season.
Wrapping up and next steps
Harvesting viola seed pods is a simple yet rewarding way to ensure vibrant blooms next season!
By following the right steps—like waiting for pods to turn brown and dry—you’ll collect viable seeds with ease. Don’t let hesitation hold you back: grab those tweezers, store the seeds properly, and get ready to watch your garden burst with color again!
🌱 Next step: Mark your calendar for planting season and start prepping your soil now. Your future violets will thank you!