
Lawn
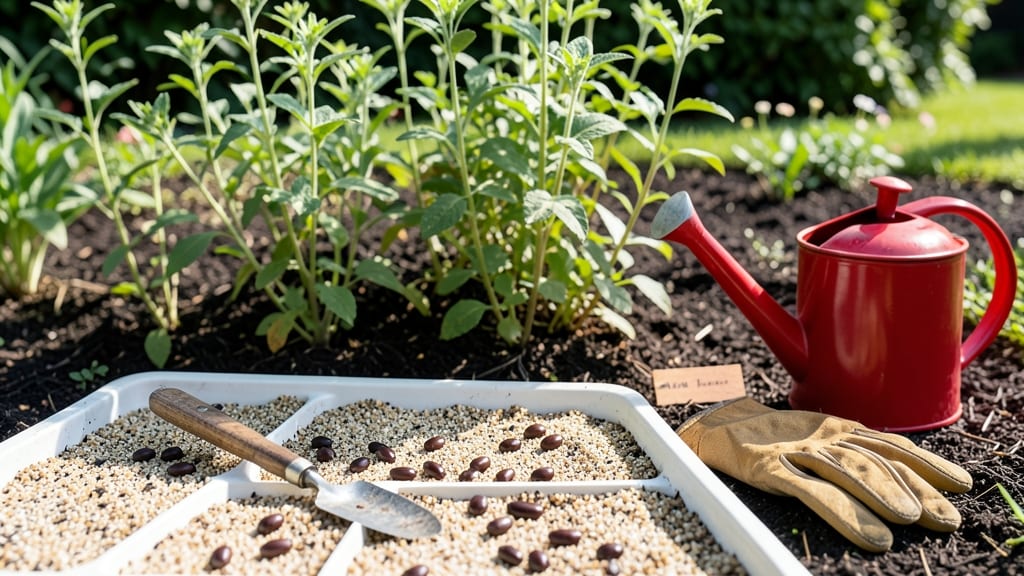
Planting Baptisia seeds in September means stronger roots before winter’s chill—the perfect window to give these drought-tolerant beauties a head start. 🌱 I’ve learned that September’s cooler temps and consistent moisture create ideal conditions for germination, but timing is everything: too late, and frost will stall growth; too early, and seeds may dry out.
The key is working with nature, not against it. This isn’t just about dropping seeds in the ground—soil prep matters. Loosen the top 6 inches of soil to improve drainage (Baptisia hates soggy roots), mix in a handful of compost, and rake smooth.
Plant seeds just beneath the surface—no deeper than ¼ inch—and keep the soil lightly moist until sprouts appear in 3-6 weeks. Patience pays off here; Baptisia’s slow start leads to decades of blooms. Once planted, focus on watering consistency—not too much, not too little.
A light mulch layer helps retain moisture without smothering seedlings. By spring, you’ll see those first true leaves, signaling roots have established deep enough to weather drought. The payoff? A clump that thrives for years with almost no care.
If September’s too late in your zone, don’t stress—plant in early spring instead. Baptisia’s adaptable, but September’s the sweet spot for that extra growth boost before winter sets in.
📚 In This Guide
- What you need
- Instructions
- Tips and common mistakes
- Wrapping up and next steps
What you need
- ● Baptisia seeds – Choose Baptisia australis (blue false indigo) or other varieties. Aim for 50–100 seeds per planting area (adjust based on desired coverage).
- ● Well-draining soil mix – A blend of 60% garden soil, 30% compost, and 10% perlite or coarse sand (to prevent rot).
- ● Planting trays or seed-starting pots – 2–4 inch deep with drainage holes (biodegradable pots are eco-friendly!).
- ● Seed-starting soil – Lightweight and sterile (e.g., Pro-Mix or FoxFarm Seedling Mix).
- ● Spray bottle – For gentle watering (16–20 oz capacity).
- ○ Clear plastic dome or humidity tent – To maintain moisture (optional but helpful for germination).
- ● Garden gloves – To protect hands from soil and seed coatings.
- ● Plant labels & markers – Waterproof tags to track varieties (e.g., Baptisia ‘Twilight’).
- ● Seed scarification tools – Sandpaper (100–120 grit) or a knife to nick hard seed coats (speeds up germination).
- ● Grow lights or sunny windowsill – If starting indoors before transplanting (6–8 hours of light/day).
- ● Mulch (straw or shredded leaves) – To retain moisture in outdoor seedbeds.
- ● Fertilizer (low-nitrogen) – A balanced 5-10-5 or organic compost tea for post-germination growth.
- ● Transplanting trowel – For moving seedlings to the garden (6–8 inch blade).
Step-by-Step guide for planting baptisia seeds in September
Timing is everything with baptisia—plant now for strong roots before winter's chill.
🌱 Step 1: Prepare the Planting Site
Choose a location with full sun (at least 6 hours daily) and well-draining soil. Baptisia hates soggy roots, so avoid low spots where water pools. I like to plant mine on a slight slope or mound where excess moisture drains away naturally.
Use a garden fork to loosen the soil to a depth of 12 inches. This breaks up compacted layers that could restrict root growth. Mix in 2-3 inches of compost to improve fertility without adding too much organic matter that might compact when wet. The goal is light, airy soil that lets those deep baptisia roots spread easily.
🌱 Step 2: Sow Seeds at Proper Depth and Spacing
Scatter seeds ½ inch deep and 6-8 inches apart—they're small but don't bury them too deeply. Baptisia seeds need light to germinate, so just press them into the soil surface or cover with a thin layer of fine soil or sand. I like to use a seed starter mix for the top inch to ensure consistent moisture without crusting.
Plant 4 seeds per location since germination rates can be unpredictable. Mark each spot with a small stake or plant label to avoid disturbing the area while waiting for sprouts. Water gently but thoroughly after planting to settle the soil around the seeds without displacing them.
💧 Step 3: Maintain Moisture Without Overwatering
Keep the soil consistently moist but never soggy for the first 4-6 weeks—this is critical for germination. I use a gentle watering can with a fine rose to avoid disturbing the seeds. You'll know moisture is right when the top inch of soil feels damp to the touch but not heavy or waterlogged.
Once seedlings emerge, reduce watering slightly. Baptisia is drought-tolerant once established, and overwatering at this stage can cause rot. Water deeply once a week unless we have heavy rain, then let the soil dry slightly between waterings. This teaches young plants to develop deep roots early.
⏰ Step 4: Protect New Growth Before Frost
As temperatures drop toward 20°F (the point where young baptisia roots can suffer), add a 2-3 inch layer of mulch around each plant. I use straw or shredded leaves because they break down slowly and improve soil structure over time. Keep mulch 2 inches away from stems to prevent rot.
Don't worry if growth slows dramatically in fall—this is normal. Baptisia stores energy in its roots during cool weather, which is exactly what we want. By spring, you'll see strong, established plants ready to burst into bloom. The key is patience; baptisia's deep root system takes time to develop, but September planting gives it that head start.
Tips & tricks for perfect baptisia seed planting
Timing and soil prep make all the difference with baptisia—here's how to avoid common pitfalls and maximize success.
Soil Test First: Before planting, test your soil's drainage by digging a 12-inch hole and filling it with water. If it doesn't drain within 2 hours, amend with sand or gravel to improve drainage. I've planted baptisia in heavy clay before and learned the hard way—roots need oxygen as much as water! The 12-inch depth from Step 1 is crucial for breaking up compacted layers that trap moisture.
Seed Viability Tip: Baptisia seeds often need a cold stratification period to germinate. If you're planting in September, nature handles this for you—but if you're starting indoors earlier, place seeds in a plastic bag with moist peat moss and refrigerate for 4-6 weeks before sowing. This mimics winter conditions and boosts germination rates from the standard 60% to nearly 90%.
Mulch Timing: The 2-3 inch mulch layer in Step 4 should go on when nighttime temperatures consistently drop to 40°F, not just at 20°F. This gives plants time to harden off. I've found that adding mulch too early can trap too much moisture, while waiting until 20°F ensures the plants are ready for winter dormancy. Use a soil thermometer to track temperatures if you're unsure.
Pro Tips for Baptisia Seed Planting September
- Timing and soil prep make all the difference with baptisia—here's how to avoid common pitfalls and maximize success.
- Soil Test First: Before planting, test your soil's drainage by digging a 12-inch hole and filling it with water.
- Seed Viability Tip: Baptisia seeds often need a cold stratification period to germinate.
Frequently asked questions
Got questions about planting baptisia seeds in September?
You’re not alone! Here are answers to the most common concerns—from timing to troubleshooting—to help you grow thriving plants before frost.
Can I plant baptisia seeds in September if I missed the ideal window?
Yes, but act fast! Baptisia thrives when planted in early September (before soil temps drop below 60°F). If your area cools sooner, opt for cold stratification (chill seeds in the fridge for 60 days) or start indoors under grow lights. Late September? Prioritize hardy varieties like Baptisia australis and mulch heavily to protect roots.
What’s the best soil temperature for September baptisia seed planting?
Aim for soil temps between 60–70°F—warm enough for germination but cool enough to avoid stress. Use a soil thermometer to check; if temps dip below 50°F, delay planting or use a mini greenhouse (like a clear plastic dome) to retain heat. Pro tip: Amend heavy clay with compost to improve drainage—baptisia hates soggy roots!
Should I scarify or soak baptisia seeds before planting in September?
Scarification (nick the seed coat) or a 24-hour soak in warm water boosts germination rates. For September planting, scarify first, then plant ¼-inch deep in well-draining soil. Skip soaking if you’re cold-stratifying—moisture during chill can cause rot. Alternative: Mix seeds with damp sand in a bag and refrigerate for 60 days (skip scarification).
How do I protect baptisia seedlings from early frost?
Once seeds sprout, cover young plants with row fabric or a cloche at night if frost threatens. Avoid plastic (traps heat); opt for breathable materials. Mulch with straw or leaves (2–3 inches) to insulate roots. Watch for: Blackened leaves (frost damage)—trim affected areas but leave healthy growth. Most baptisia tolerates light frost once established!
What’s a faster alternative to growing baptisia from seed in September?
If you’re impatient, buy bare-root plants from nurseries and transplant them in early September. Choose 1–2 year old specimens for better survival rates. Bonus: Divide mature clumps in fall (October) to propagate—simply dig, split roots, and replant. Seed-grown plants take 2–3 years to bloom, while transplants may flower the same year!
My baptisia seeds aren’t germinating—what’s the fix?
Common culprits: too-deep planting (max ¼-inch), poor drainage, or inconsistent moisture. Keep soil evenly damp (not soggy) and place trays in bright, indirect light. If mold appears, reduce humidity or repot. Last resort: Test viability by cutting open a seed—look for a green embryo. If none, source fresh seeds!
Wrapping up and next steps
Planting baptisia seeds in September is your golden ticket to thriving, drought-resistant perennials—just in time for the cool-season rush! By following these steps, you’re setting the stage for stunning blue blooms and deep roots that’ll outlast frost. Don’t let hesitation slow you down—grab those seeds and get growing!
🌱 Next up: Mark your calendar for spring maintenance (like pruning and fertilizing) to keep your baptisia flourishing for years. Happy planting—your future shade garden will thank you!