
Lawn
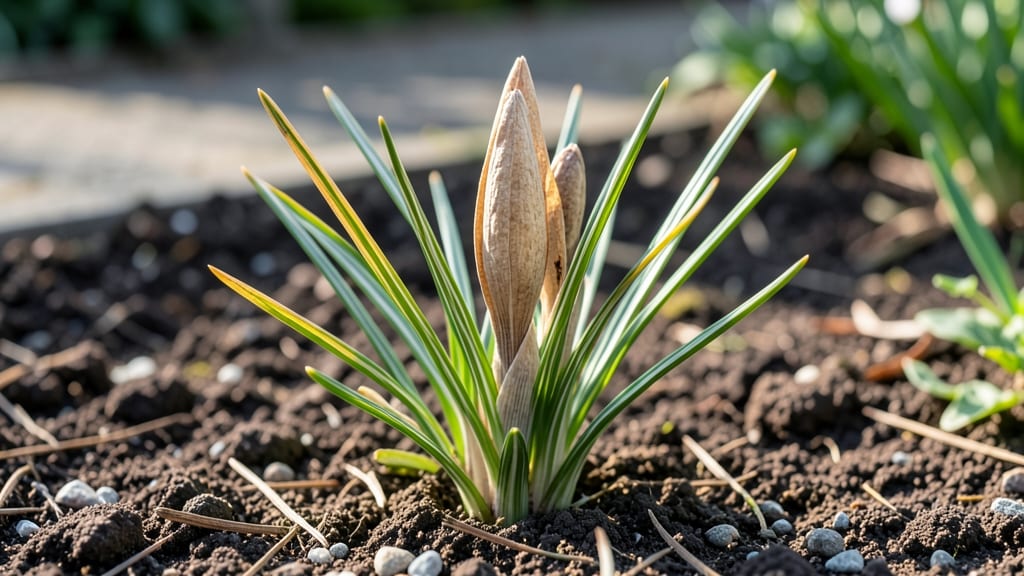
Harvesting crocus seed pods means unlocking a secret garden of unexpected colors and patterns—far beyond what you'd find in store-bought bulbs. 🌱 These delicate pods hold the promise of new varieties that might bloom earlier, later, or in shades you've never seen before.
The key? Timing your harvest just right and storing them properly so they stay viable for planting months later.
You'll need only a few simple tools: sharp scissors or pruners, breathable paper bags for drying, and a cool, dark spot for storage. The real magic happens when those dried pods crack open to reveal tiny, papery seeds that can sit dormant for years if stored correctly.
Most gardeners skip seed-growing because crocuses are usually bulb-propagated—but that's exactly why this method rewards patience with rare surprises.
Once you've dried and stored the seeds, sowing them becomes a delicate dance of timing and soil. Plant them in well-draining mix in fall, just as natural dormancy would begin, and keep them barely moist until spring.
The first green shoots might take their time emerging—sometimes weeks—but when they do, they'll prove every moment of waiting was worth it for those first delicate blooms.
Low germination rates? Don't worry—it's normal. These seeds often need a cold stratification period, so mimicking winter conditions (like chilling them in the fridge for 6-8 weeks) can double your success.
With the right approach, you'll end up with a patch of crocuses that's uniquely yours, blooming reliably year after year from seeds you nurtured through their first growing season.
📚 In This Guide
- What you need
- Instructions
- Tips and common mistakes
- Wrapping up and next steps
What you need
- ● Fresh crocus seed pods: Harvest only fully mature pods (when they turn brown and dry, typically late spring to early summer). Aim for 10–20 pods, depending on your storage goals.
- ● Paper bags or brown lunch bags: 1–2 per pod (breathable material prevents mold). Avoid plastic—it traps moisture!
- ● Scissors or pruning shears: For cleanly snipping stems (sterilize with rubbing alcohol first).
- ● Drying rack or mesh screen: Elevate pods to improve airflow (a wire cooling rack or even a wooden frame with chicken wire works).
- ○ Desiccant packets (optional but helpful): Place 1–2 packets in your storage container to absorb excess moisture.
- ● Air-tight storage container: A glass jar with a lid or a resealable plastic bag with a zip lock (label with the date!).
- ● Permanent marker: For labeling pods/containers with the harvest date and variety (if applicable).
- ● Fan or dehumidifier: Speed up drying in humid climates.
- ● Silica gel packets: For long-term storage in dry climates (swap out every 6 months).
- ● Notebook: Track germination rates and storage conditions for future reference.
- ● Gloves: Protect hands from prickly pods (though crocus pods are usually gentle!).
How to dry and store crocus seed pods for next season
Here's my foolproof method for saving and storing crocus seed pods so they stay viable until planting time.
🌿 Step 1: Harvest Mature Seed Pods at Peak Ripeness
Wait until the seed pods turn a deep brown and begin to split open naturally—this usually happens 4-6 weeks after flowering. If you harvest too early, the seeds won't be fully developed. Gently twist the pods off the stem when they're dry and crispy to the touch, but don't pull—they'll snap off cleanly when ready.
I collect pods on a dry day and place them in a paper bag (not plastic) to prevent moisture buildup. The paper allows airflow while keeping pods contained. If rain is forecast, harvest immediately and dry them indoors instead.
💧 Step 2: Dry the Seed Pods Thoroughly
Spread the pods out in a single layer on a wire mesh screen or paper towel in a warm, dry location with good airflow. A sunny windowsill works well, but avoid direct sunlight which can overheat them. They need 2-4 weeks of drying time until they feel completely dry and papery.
You'll know they're fully dry when the pods rattle when shaken and the seeds inside move freely. If any pods still feel slightly damp, leave them out for another week. Proper drying prevents mold and preserves seed viability for 2-3 years in storage.
🪴 Step 3: Extract and Clean the Seeds
Once completely dry, gently crush each pod between your fingers to release the seeds. I place the pods in a small paper bag and shake them over a clean surface—this catches any tiny seeds that might otherwise get lost. Discard any pods that crumble into dust or show signs of mold.
Remove any debris or empty seed casings by winnowing them in a light breeze or by gently tapping them onto a piece of white paper. The good seeds will be plump and firm, while shriveled or discolored ones should be discarded. Store only the best-quality seeds for planting.
⏰ Step 4: Store Seeds in Ideal Conditions
Place the cleaned seeds in a small envelope or airtight container with a desiccant packet to absorb moisture. I label each container with the variety name and harvest date—this helps track seed age and viability. Store them in a cool, dark place (like a refrigerator) where temperatures stay between 35-45°F.
Check the seeds every 6 months for signs of mold or pests. If stored properly, crocus seeds remain viable for 2-3 years, though germination rates drop slightly after the first year. For best results, plant them within 12 months of harvest.
🌱 Step 5: Prepare Seeds for Planting
When ready to plant, soak the seeds in lukewarm water for 12-24 hours to soften the outer coating and speed up germination. This step is especially helpful if your storage conditions weren't perfectly dry. After soaking, plant them ¼ inch deep in well-draining soil, keeping it lightly moist until sprouts appear.
Crocus seeds germinate best in fall, mimicking their natural growth cycle. If planting in spring, chill the seeds in the refrigerator for 4-6 weeks before sowing to break dormancy. Patience is key—germination can take 3-6 weeks, depending on conditions.
Tips & tricks for perfect crocus seed pod preservation
These little-known details make all the difference between seeds that thrive and ones that fail.
Timing is Everything: The 4-6 week window after flowering is critical—don't rush it! I've learned the hard way that harvesting too early means immature seeds that won't germinate. Look for pods that split naturally and feel crispy to the touch. Confession: I skipped this step once and ended up with seeds that never sprouted.
Drying Strategy: That 2-4 week drying period might seem long, but it's non-negotiable. I use a mesh screen over my kitchen counter where it gets good airflow but no direct sun. The pods need to rattle when shaken—that's your cue they're ready. If you're impatient, just remember: moldy seeds are worse than waiting.
Storage Wisdom: The 35-45°F range in your fridge is perfect for long-term storage. I always add a desiccant packet and label containers with the harvest date—this helps track viability. Real talk: I once forgot to label my containers and had to guess which seeds were freshest. Don't make my mistake!
Planting Prep: The 12-24 hour soak is your secret weapon for breaking dormancy. I use lukewarm water because it's gentler than hot water and works faster than cold. For spring planting, that 4-6 week fridge chill mimics winter conditions and tricks the seeds into thinking it's time to grow.
Pro Tips for Crocus Seed Pods
- These little-known details make all the difference between seeds that thrive and ones that fail.
- Timing is Everything: The 4-6 week window after flowering is critical—don't rush it! I've learned the hard way that h...
- Drying Strategy: That 2-4 week drying period might seem long, but it's non-negotiable. I use a mesh screen over my ki...
Frequently asked questions
Got questions about harvesting, storing, or using crocus seed pods? You’re not alone! Here are some of the most common queries—and straightforward answers—to help you master the process like a pro.
When is the best time to harvest crocus seed pods?
Harvest seed pods when they turn brown and papery (usually 4–6 weeks after flowering). Avoid harvesting if they’re still green or splitting open—this means the seeds are ready to disperse naturally. Early morning is ideal for collecting them before humidity sets in.
How long can I store crocus seed pods before planting?
Properly dried and stored seed pods stay viable for 1–2 years in a cool, dry place (like a paper envelope in the fridge). For best results, plant them within 6 months. Pro tip: Label pods with the harvest date to track freshness!
What’s the best way to dry crocus seed pods?
Spread pods in a single layer on a mesh screen or paper towel in a warm, dry, well-ventilated spot (like a sunny windowsill or attic). Avoid direct sunlight or heat sources—it can crack the pods. Turn them occasionally for even drying (about 1–2 weeks).
Can I use crocus seed pods from store-bought flowers?
Unfortunately, no. Most commercial crocuses are sterile hybrids and won’t produce viable seed pods. Stick to seeds from open-pollinated varieties grown in your garden for successful germination. Check seed catalogs for “open-pollinated” labels!
What should I do if my seed pods get moldy or infested?
If you spot mold or pests (like weevils), discard the affected pods immediately. To prevent issues, store pods in a sealed container with silica gel packets or a breathable fabric bag. Pro tip: Freeze pods for 48 hours before storing to kill any hidden pests!
Do crocus seed pods need stratification before planting?
Yes! Crocus seeds benefit from cold stratification—mix them with damp sand in a sealed bag and refrigerate for 4–6 weeks before planting. This mimics winter conditions and boosts germination rates. Skip this step, and you might see slower or irregular sprouting.
Wrapping up and next steps
Harvesting and storing crocus seed pods is a rewarding way to ensure a vibrant garden year after year! With the right tools, timing, and care, you’ll unlock a steady supply of fresh blooms—whether you’re a seasoned gardener or just starting out. Don’t let those seeds go to waste! 🌱
Ready to take the next step? Start small—try storing just a few pods this season to perfect your technique. Once you’ve mastered the process, expand your collection and share the joy of growing crocuses with fellow gardeners. Happy planting! 🌸