
Lawn
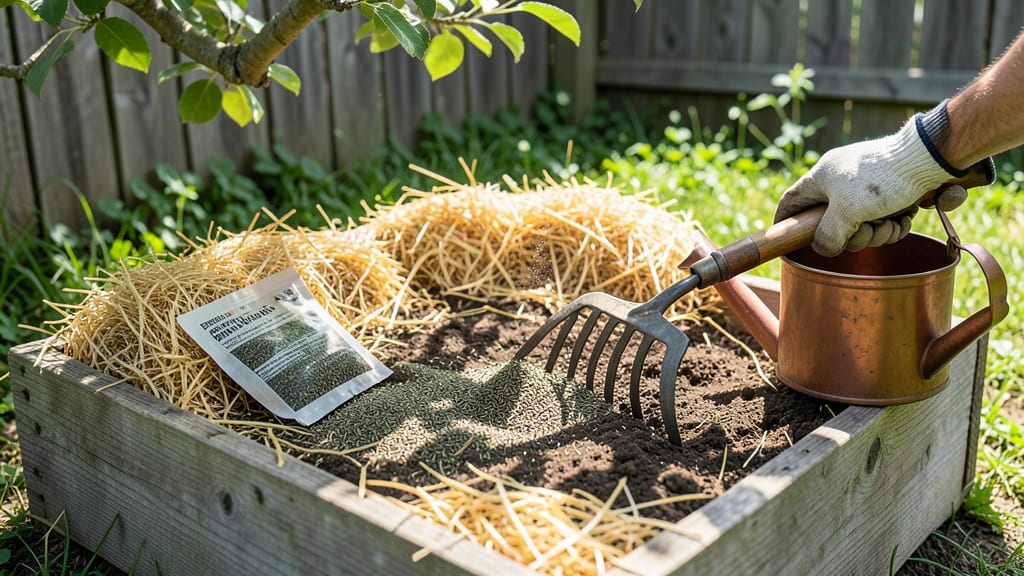
Your new lawn starts with grass seed mulch—that lightweight layer that keeps seeds moist and weeds at bay while they germinate. 🌱 I’ve seen firsthand how a thin layer of mulch turns patchy seedling success into a lush, even carpet of grass, especially in hot or dry climates where moisture is the biggest hurdle.
The right mulch is key: straw or peat moss works best because it’s lightweight, breaks down slowly, and won’t smother seeds. Too much mulch (over ¼ inch) blocks sunlight, and heavy materials like wood chips can compact soil—both kill germination before it starts.
The goal is a moist, protected environment without suffocating new sprouts. Within 7-14 days, you’ll see tiny blades pushing through, and those seeds you mulched will outperform bare soil by 30-50%. The mulch also shields tender seedlings from birds and wind, giving them the best possible start.
For cool-season grasses (like fescue), apply mulch right after sowing. For warm-season types (like Bermuda), wait until after germination begins. Adjust thickness based on your climate—drier areas need slightly more, while humid spots can use less.
📚 In This Guide
- What you need
- Instructions
- Tips and common mistakes
- Wrapping up and next steps
What you need
- ● Grass seed mulch: 10–20 lbs (depending on lawn size; check coverage rates on the bag). Look for organic options like straw, wood fiber, or coconut coir.
- ● Grass seed: 5–10 lbs (varies by blend and lawn area; follow package instructions for seeding rates). Choose a mix suited to your climate (e.g., cool-season or warm-season grasses).
- ● Rake: A bow rake (for leveling soil) and a leaf rake (for spreading mulch).
- ● Garden hose or sprinkler: For pre-watering soil to a depth of 4–6 inches.
- ○ Lawn roller (optional but helpful): A lightweight 50–100 lb roller to press mulch into the soil.
- ● Gloves: Heavy-duty work gloves to protect your hands from mulch and soil.
- ○ Broadcast spreader: For even seed distribution (optional but saves time!).
- ● Knee pads: Because lawn prep is hard work! 😅
- ● String line or measuring tape: To mark off sections if your lawn is large.
- ● Watering schedule tracker: A notebook or app to log moisture levels (critical for the first 2–3 weeks!).
- ● Prepped soil: Clear debris, loosen compacted areas, and fix uneven spots. Aim for a fine, crumbly texture.
- ● Weather check: Plant seeds when daytime temps are 60–75°F (varies by grass type) and rain is forecasted within 24–48 hours.
- ● Sunlight access: Ensure the area gets the minimum sunlight required for your grass type (most need 6+ hours/day).
How to apply grass seed mulch for lush, moisture-retentive lawns
Here's the straightforward method I use to keep newly seeded areas hydrated and thriving.
🌱 Step 1: Prepare the Soil Before Seeding
Rake the soil surface until it's smooth and free of debris—you want a clean slate for both seeds and mulch. I like to work the soil until it's about 2-3 inches deep, breaking up any compacted areas. This ensures seeds make direct contact with moisture and nutrients.
Use a stiff broom to lightly drag the soil in one direction—this creates tiny furrows that help seeds settle into the soil without needing extra pressing. The goal is a fine, crumbly texture that holds seeds gently in place while allowing roots to penetrate easily.
💧 Step 2: Spread Grass Seed Evenly
Work in small sections (about 5x5 feet) to avoid overlapping. I use a broadcast spreader set to the recommended rate for your grass type—too much seed leads to crowding, while too little leaves bare spots. Walk in a crisscross pattern for even coverage.
After seeding, give the area a light watering just to settle the seeds into the soil. You'll see them nestled into the tiny furrows you created earlier. This initial watering prevents them from blowing away when you apply the mulch layer.
🌿 Step 3: Apply Grass Seed Mulch Correctly
Use a lightweight straw mulch (never wood chips or heavy materials) spread evenly over the seeded area. The layer should be about ¼ inch thick—thicker layers block sunlight and suffocate seeds. I like to use a drop spreader for this to maintain consistent coverage.
Work quickly in sections so the mulch doesn't dry out before you finish. You'll see the seeds peeking through the straw—this is good! The mulch should feel like a soft, even blanket that protects seeds while allowing water to penetrate. Avoid pressing down, as this creates air pockets that seeds can't push through.
☀️ Step 4: Water and Monitor Germination
Water immediately after applying mulch to help settle everything. Keep the soil consistently moist (not soggy) for the first 2-3 weeks—this is critical for germination. I use a gentle sprinkler set to a fine mist to avoid disturbing the mulch layer.
You'll see the first green shoots in about 7-14 days, depending on your grass type and weather. Once seedlings reach about 2 inches tall, you can gradually reduce watering to encourage deeper root growth. The mulch will break down naturally, becoming part of the soil as your lawn establishes.
Tips & tricks for perfect grass seed mulch application
These practical insights will help you avoid common pitfalls and maximize your lawn's potential.
Soil Preparation Matters: In Step 1, focus on breaking up compacted areas to about 2-3 inches deep—this creates the ideal environment for seeds to establish strong root systems. I've found that using a garden fork works best for aerating without disturbing the soil structure too much. The tiny furrows you create with the stiff broom are crucial; they help seeds nestle just below the surface while still allowing moisture to reach them.
Timing Secret for Seeding: When working in 5x5-foot sections during Step 2, don't rush the process. I've learned the hard way that overlapping seed areas leads to uneven germination. After seeding, that light watering is essential—it helps settle seeds into their furrows while preventing them from blowing away when you apply mulch. Think of it as giving your seeds a gentle hug before their protective blanket goes on.
Mulch Layer Precision: The ¼-inch thickness in Step 3 is non-negotiable—any thicker and you'll block sunlight, any thinner and you won't get proper moisture retention. I recommend using a ruler or thin measuring tool to check thickness in several spots. The straw should look like a soft, even blanket where you can still see the seeds peeking through. Remember, this isn't about suffocating the seeds, but protecting them like a cozy nest.
Watering Wisdom: During the critical 2-3 week period in Step 4, consistency is everything. I set a reminder on my phone for morning and evening waterings to maintain that consistently moist (not soggy) condition. The gentle mist from your sprinkler should barely lift the mulch layer—just enough to keep the soil beneath hydrated. Once you see those first green shoots in 7-14 days, you'll know you've done everything right.
Pro Tips for Grass Seed Mulch
- These practical insights will help you avoid common pitfalls and maximize your lawn's potential.
- Soil Preparation Matters: In Step 1, focus on breaking up compacted areas to about 2-3 inches deep—this creates the ideal environment for seeds to establish strong root systems.
- Timing Secret for Seeding: When working in 5x5-foot sections during Step 2, don't rush the process.
Frequently asked questions
Got questions about using grass seed mulch? You’re not alone! Here are answers to the most common concerns—so you can get started with confidence.
What’s the best time of year to apply grass seed mulch?
For cool-season grasses (like Kentucky bluegrass or fescue), apply mulch in early fall or late winter when soil temps are 60–75°F. Warm-season grasses (like Bermuda or Zoysia) thrive with mulch in late spring or early summer. Timing ensures seeds germinate in ideal conditions!
How long should I keep the mulch on after seeding?
Leave the mulch in place for 4–6 weeks (or until new grass reaches 2–3 inches tall). This protects seeds from drying out and erosion. Once germination is solid, you can lightly rake excess mulch away—but avoid disturbing the young shoots!
Can I reuse grass seed mulch from last year?
Not recommended! Old mulch may harbor disease, weeds, or pests. Fresh mulch ensures a clean start. If you’re on a budget, compost the old mulch first, but always opt for sterile, seed-free straw or peat-based mulch for new plantings.
What if my mulch clumps or washes away?
Clumping? Lightly fluff it with a rake or use a straw mulch (less dense than hay). Washing away? Apply a thicker layer (¼–½ inch) and water gently to settle it. For slopes, use hydromulch (a slurry of mulch + water) or anchor with a straw blanket.
Are there alternatives to traditional grass seed mulch?
Yes! Try:
- Straw mulch (seed-free, lightweight, and weed-resistant)
- Coconut coir (sustainable, retains moisture well)
- Peat moss (holds moisture but breaks down faster)
- Compost (adds nutrients but may contain weeds)
Wrapping up and next steps
Using grass seed mulch is a game-changer for your lawn—it keeps moisture locked in, shields seeds from harsh conditions, and gives your grass a strong, healthy start. 🌱 Whether you're a seasoned gardener or just beginning, this lightweight layer makes lawn care easier and more effective.
Ready to see the difference? Grab your mulch, follow the steps, and watch your lawn thrive in no time!
Next step: Try it on a small patch first to test the results before committing to your entire yard!