
Lawn
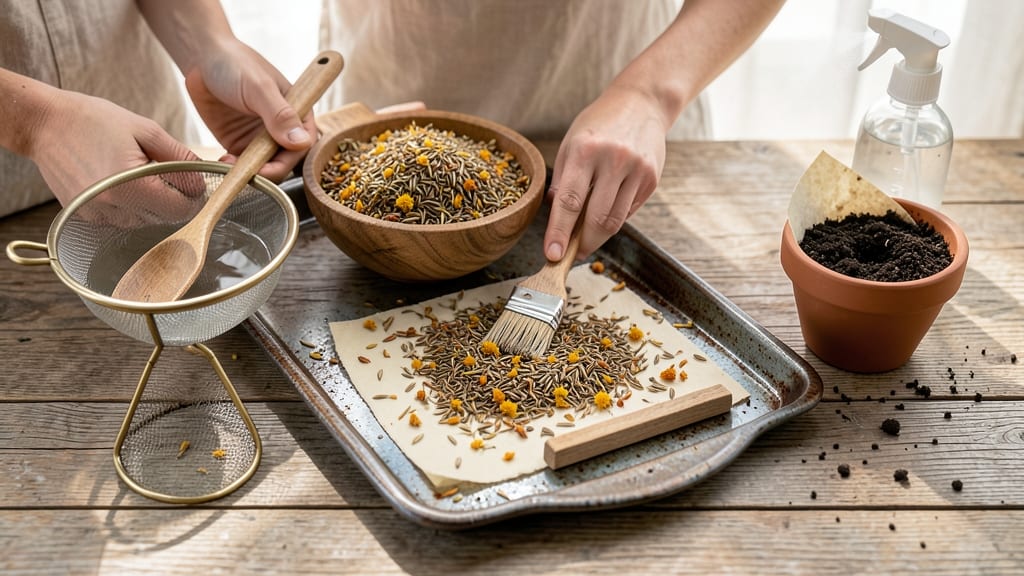
Making plantable seed paper turns old paper and wildflower seeds into gifts that grow into vibrant blooms. 🌸 I’ve crafted these eco-friendly sheets for weddings, birthdays, and even my own garden—each one a promise of future beauty with zero waste.
You’ll need just three simple supplies: wildflower seeds, paper pulp (from recycled paper), and a bit of water. Mix the seeds into the pulp, spread it thin, and let it dry. When ready, plant it directly in soil—no peeling or prepping required.
The results are stunning: delicate wildflowers popping up where you toss the paper, turning any space into a pollinator paradise. Perfect for beginners, this project takes under 30 minutes and costs pennies per sheet. Best part? It’s a gift that keeps giving—literally.
Use it for invitations, bookmarks, or even as a creative way to mark garden beds. Let’s get growing!
📚 In This Guide
- What you need
- Instructions
- Tips and common mistakes
- Wrapping up and next steps
What you need
- ● Seeds: Choose fast-growing wildflower or herb seeds (e.g., marigolds, sunflowers, or basil). Aim for 1–2 teaspoons per sheet (adjust based on seed size).
- ● Unbleached paper pulp: Use recycled paper towels, printer paper, or cardstock (avoid glossy/coated paper). 1–2 sheets per sheet of seed paper.
- ● Water: Enough to soak the pulp and create a slurry (about ½ cup per batch).
- ● Blender or food processor: To break down the paper into pulp.
- ● Mold & deckle (or a strainer + flat surface): For shaping the paper. A ramekin or fine-mesh sieve works in a pinch!
- ● Rolling pin or heavy book: To press out excess water.
- ● Baking sheet or parchment paper: For drying (line with parchment to prevent sticking).
- ● Natural dyes (e.g., turmeric for yellow, beet juice for pink) to color your paper.
- ● Essential oils (like lavender) for a fragrant touch.
- ● A hairdryer or fan to speed up drying.
- ● Decorative elements (dried flowers, glitter) for personalized gifts.
Step-by-Step instructions for crafting plantable seed paper
Here's the eco-friendly method I use—transforming wildflower seeds into biodegradable paper that blooms when planted.
🌱 Step 1: Prepare the Seed and Paper Mixture
Start by blending ½ cup wildflower seeds with 2 cups water in a bowl. Let them soak for 10 minutes to ensure even distribution. In a separate container, mix 1 cup water with 2 tablespoons white glue (PVA glue works best) until fully dissolved. This glue acts as the binder—it’s non-toxic and biodegradable once planted.
Add the soaked seeds to the glue mixture and stir gently. You’ll notice the seeds begin to coat in the glue, forming a thick, paste-like consistency. Here’s the thing—avoid overmixing, or the seeds may break down. A smooth but slightly textured blend is ideal. This mixture will become the heart of your seed paper, so take your time to ensure it’s uniform.
💧 Step 2: Spread the Mixture onto Paper
Lay a large sheet of unbleached coffee filter paper (or recycled paper) on a flat, non-stick surface like a silicone mat or parchment. Using a foam brush or spatula, spread the seed-glue mixture evenly across the paper, leaving a ½-inch border uncovered. The goal is a thin, even layer—about ⅛-inch thick. Press gently to remove air bubbles, which can create weak spots in the paper.
You’ll see the mixture cling to the paper fibers, forming a semi-transparent layer. If it looks too thick, add a few drops of water and redistribute. The paper should feel slightly damp but not soggy. This step is where precision matters—uneven spreading leads to uneven drying and weak spots in the final paper.
☀️ Step 3: Dry the Paper Thoroughly
Let the paper dry completely in a warm, dry place away from direct sunlight for 24-48 hours. I like to prop it up on a drying rack or hang it over a clothesline to allow air to circulate on both sides. The paper is ready when it feels crisp and lifts easily without tearing. If you rush this step, the paper may crumble when handled or planted.
Check for dryness by gently pressing a finger on the paper. It should feel firm, not damp or sticky. Once fully dry, the seed paper will resemble delicate, textured stationery—ready to be cut, folded, or shaped into gifts. This drying phase is critical; it ensures the seeds remain viable and the paper holds its form when planted.
✂️ Step 4: Shape and Store Your Seed Paper
Use scissors or a craft knife to cut the dried paper into your desired shapes—think greeting cards, bookmarks, or decorative tags. For added flair, you can stamp designs or write messages with a non-toxic ink pen. Store the finished seed paper in a cool, dry place, away from moisture, until you’re ready to plant or gift it.
Here’s the moment that matters: when you’re ready to plant, simply place the seed paper on top of moist soil in a garden bed or pot. Water lightly, and within 2-4 weeks, you’ll see the first green shoots breaking through. The paper will biodegrade naturally, leaving nothing but blooming wildflowers behind. Real talk: the satisfaction of watching something you made grow into life is unmatched.
Tips & tricks for perfect plantable seed paper
Here's what nobody tells you about making seed paper that actually grows—these little details make all the difference.
Seed Viability Tip: When blending the ½ cup wildflower seeds with 2 cups water in Step 1, use room-temperature water—not cold from the tap. Cold water can shock the seeds and reduce germination rates. After the 10-minute soak, drain any excess water completely before mixing with glue. I learned this the hard way after my first batch had poor sprouting rates—turns out, soggy seeds don't grow as well!
Paper Selection Matters: For Step 2, I recommend using unbleached coffee filter paper specifically because it's designed to be porous yet strong enough to hold the seed mixture. If you're using recycled paper, choose something with a smooth, uncoated surface—textured papers can create uneven layers. The ½-inch border is crucial; it prevents the edges from curling during drying and gives you clean cutting lines later.
Drying Strategy: The 24-48 hour drying time in Step 3 is non-negotiable for seed viability. If you're in a humid climate, add a small fan to circulate air gently—just don't blow directly on the paper, or it may tear. I've found that hanging the paper over a clothesline at a slight angle prevents pooling of moisture. Test for dryness by gently lifting a corner; if it doesn't crack or tear, it's ready.
Storage Wisdom: Once your seed paper is completely dry, store it in an airtight container with a silica gel packet to absorb any moisture. I keep mine in a cool, dark place until ready to plant. The paper can last up to 1 year this way, though germination rates may decrease slightly over time. For gifting, wrap finished pieces in tissue paper to protect them during transport.
Pro Tips for Make Plantable Seed Paper
- Here's what nobody tells you about making seed paper that actually grows—these little details make all the difference.
- Seed Viability Tip: When blending the ½ cup wildflower seeds with 2 cups water in Step 1, use room-temperature water—not cold from the tap.
- Paper Selection Matters: For Step 2, I recommend using unbleached coffee filter paper specifically because it's designed to be porous yet strong enough to hold the seed mixture.
Frequently asked questions
Got questions about crafting your own plantable seed paper? We’ve got answers! Here are some of the most common queries to help you get started on your eco-friendly project with confidence.
What types of seeds work best for plantable seed paper?
Wildflower seeds, herbs like basil or thyme, or even grass seeds are great choices! Opt for small, lightweight seeds (like clover or marigold) for even distribution. Avoid large seeds (e.g., sunflower) as they may not embed well. Pro tip: Mix seeds for a colorful, diverse bloom!
How long does it take for the seed paper to grow into plants?
Germination time varies by seed type—wildflowers typically sprout in 7–21 days with consistent moisture. Herbs may take 2–4 weeks. Place the paper in soil, keep it damp, and watch your green gifts flourish! Troubleshooting: If nothing grows, check moisture levels or seed viability.
Do I need to water the seed paper differently after planting?
Yes! Mist the paper lightly for the first 3–5 days to help seeds activate, then water as you would regular soil. Avoid soaking it—excess water can cause the paper to disintegrate prematurely. Once sprouts appear, reduce misting and water at the base.
Can I add color or designs to the seed paper?
Use natural dyes (like beet juice or turmeric) or watercolors before pressing seeds into the pulp. For designs, try stencils or hand-painting with eco-friendly, water-based paints. Bonus: Press dried flowers into the paper for a decorative touch!
What if my seed paper doesn’t grow anything?
Don’t worry—it might just need patience! Check these fixes:
- Seed viability: Test a few seeds in soil to confirm they’re still good.
- Moisture: Ensure the paper stays damp but not soggy.
- Sunlight: Most seeds need 6+ hours of light daily.
- Soil quality: Use nutrient-rich soil or compost.
Wrapping up and next steps
Creating your own plantable seed paper is a rewarding way to blend creativity with sustainability—turning waste into vibrant wildflowers! 🌱 Whether you’re crafting gifts, decorating, or simply reducing paper waste, this eco-friendly project proves small actions can grow big impact.
Now that you’ve mastered the basics, why not share the magic? Try experimenting with different seed blends (like herbs or vegetables) or gifting your creations to friends with a note: "Plant me and watch beauty bloom!" 🌸
Ready to take it further? Explore DIY seed paper kits or join eco-conscious communities to swap tips—and maybe even start a seed-paper revolution in your neighborhood!