
Lawn
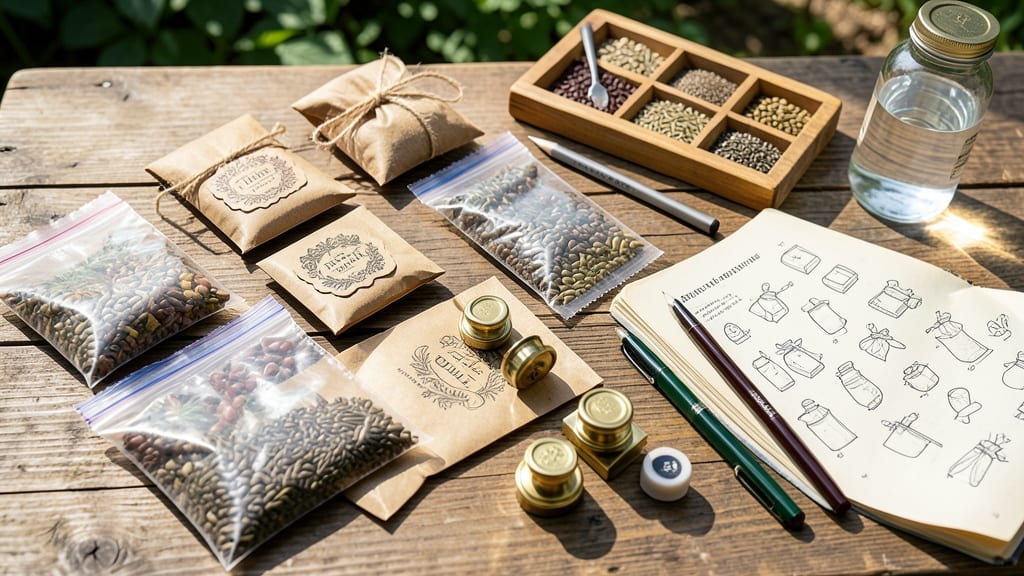
Making seed packets saves money and keeps heirloom varieties alive for years. ✨ I’ve turned last year’s spent blooms into next season’s garden staples—tomatoes, beans, and flowers—using nothing but recycled paper and a few minutes of effort.
The best part? You’ll never buy seeds again for your favorite varieties, and you’ll cut plastic waste from your gardening routine.
You only need three simple supplies: seed-saving envelopes (or even brown paper bags), a permanent marker for labels, and a dry, dark place to store them. I use manila folders cut into small squares—they’re sturdy, cheap, and last for years if kept cool.
Just add a silica gel packet to prevent moisture damage, and you’re set for 5-10 years of seed viability.
Labeling is where most people trip up—write the variety name, date saved, and germination notes right on the packet. Last year, I forgot to mark my ‘Black Krim’ tomatoes, and they ended up as mystery seeds.
Now, I include a tiny color swatch from the flower or leaf to jog my memory. Store them in a cool, dry spot (like your freezer) for maximum longevity.
This method works for vegetables, herbs, and flowers, and you’ll feel like a seed-saving pro in no time. Once you start, you’ll wonder why you ever bought seeds again—especially for rare or heirloom varieties. Let’s get those packets made!
📚 In This Guide
- What you need
- Instructions
- Tips and common mistakes
- Wrapping up and next steps
What you need
- ● Seed envelopes or kraft paper: 4" x 5" or 5" x 7" (standard sizes for seed packets). Quantity: 10–50+ (depending on your seed volume). Tip: Look for unbleached, acid-free paper to prevent seed degradation.
- ● Seed-saving labels: Acid-free, waterproof, and archival-quality (e.g., blank">Avery 5160 or similar). Quantity: Match the number of envelopes.
- ● Permanent markers: Alcohol-based (e.g., blank">Sharpie Fine Point) for writing on envelopes. Avoid: Gel pens—they smudge!
- ○ Desiccant packets: Small silica gel packets (1/4" x 1") to absorb moisture. Quantity: 1 per envelope (optional but highly recommended for long-term storage).
- ● Twist ties or rubber bands: For sealing envelopes (if not pre-sealed). Quantity: 1–2 per packet.
- ● Bone folder or metal ruler: For crisp folds and professional edges.
- ● Clear packing tape: Acid-free (e.g., blank">Scotch 6615) to reinforce seals.
- ○ Envelope sealing machine: (Optional) For a polished, factory-like finish.
- ● Seed storage box: Airtight, opaque (e.g., blank">Mason jars with lids or blank">SeedSafe containers) to store finished packets.
- ● Ruler and pencil: For measuring and marking envelope dimensions.
- ● Printed seed tags: Pre-designed templates (free from blank">Seed Savers Exchange) for a custom look.
Step-by-Step instructions for crafting homemade seed packets
Here's how I preserve heirloom seeds year after year—simple, eco-friendly, and ready for next season's planting.
📄 Step 1: Harvest Seeds at Peak Maturity
Collect seeds only when plants show clear signs of maturity—like fully dried pods or browned seed heads. For tomatoes, wait until the fruit is completely soft and wrinkled; for peppers, the pods should turn papery and crisp. Harvest on a dry day to prevent mold, and lay seeds out on a clean paper towel to dry completely before handling.
I always test a few seeds first by crushing one between my fingers—if it crumbles easily, it's ready. This step ensures maximum germination rates. Harvest in the morning when humidity is lowest, and avoid seeds from plants that showed disease symptoms, as those traits may carry over.
✂️ Step 2: Clean and Dry Seeds Thoroughly
Remove seeds from their pods by hand or gently rub them against a fine mesh screen. For sticky seeds like tomatoes, soak them in water for 24 hours, then rub between your palms to remove the gel. Spread cleaned seeds on a clean, dry paper towel or parchment paper in a single layer—never pile them, or they'll mold.
Place them in a warm, dry spot with good airflow, like a sunny windowsill or a seed drying rack. I use a small fan on low to circulate air without disturbing the seeds. They're fully dry when they feel light and brittle between your fingers, which usually takes 3-7 days depending on humidity.
📝 Step 3: Label Seeds with Variety and Date
Write the plant variety, harvest date, and any special notes (like "heirloom" or "disease-resistant") directly on the packet with a permanent marker. I also include the germination rate if I tested it—this helps me prioritize which seeds to plant first. Use a fine-tip marker to avoid bleeding through thin paper.
For extra organization, I keep a small notebook where I jot down growing conditions and any observations from the current season. This way, I can replicate successful conditions next year. Store labels inside the packet to protect them from moisture, which can make paper labels unreadable.
📦 Step 4: Choose and Prepare Packaging Materials
Use envelope-style seed packets made from acid-free paper or small glass jars with tight lids. For paper packets, fold them into thirds and seal with a small dab of wheat paste or clear packing tape. Glass jars work best for seeds that need extra protection from moisture, like those from tropical plants.
I avoid plastic bags because they trap moisture and encourage mold growth. If using paper, store packets in a cool, dark place like a sealed tin or cardboard box. For glass jars, add a small silica gel packet to absorb any lingering moisture—just make sure the seeds aren't in direct contact with it.
⏰ Step 5: Store in Optimal Conditions
Keep seeds in a cool, dark, and dry environment with 35-40°F temperatures for maximum longevity. A refrigerator crisper drawer works well, as long as it's not too humid. Avoid storing seeds in the freezer unless you're preserving them for 10+ years, as repeated freeze-thaw cycles can damage viability.
Check your seeds annually by testing a few in damp paper towels. Place them in a sealed bag with a spritz of water, then wait 7-14 days for germination. If most seeds sprout, the rest are still good. This simple test saves you from planting outdated seeds that may not grow. Rotate older seeds to the front of your storage so you use them first.
Tips & tricks for perfect seed packet preservation
Preserving seeds properly ensures they stay viable for years—here's how to avoid common pitfalls and maximize germination rates.
Harvest Timing Matters: In Step 1, when testing seed maturity by crushing between fingers, look for a crisp, dry texture—not just softness. Overripe seeds (too mushy) or underripe seeds (too firm) will have poor germination. For tomatoes, wait until the fruit is completely wrinkled and the seeds inside feel like sandpaper when rubbed between fingers. Harvesting at the right moment is everything—this is where most seed-saving mistakes happen.
Drying Strategy: The 24-hour soak for sticky seeds in Step 2 is critical, but don't rush the drying process after. While 3-7 days is the typical range, seeds from tropical plants may need up to 10 days in humid climates. Place a small fan nearby to create gentle airflow—this prevents mold while maintaining even drying. I've ruined batches by piling seeds too thickly; always spread them in a single layer for consistent results.
Labeling System: In Step 3, take labeling seriously—write directly on the packet with a fine-tip permanent marker. Store the label inside the packet to protect it from moisture damage. I've learned this the hard way: faded labels mean lost heirloom varieties. Add a quick note about germination success if you tested seeds, like "90% germ" or "needs scarification." This turns your seed packets into a living record of your garden's history.
Storage Wisdom: The 35-40°F temperature range in Step 5 is non-negotiable for long-term viability. A refrigerator crisper drawer works well, but avoid storing seeds near apples or other ethylene-producing fruits. For extra protection, place silica gel packets inside glass jars—just ensure they don't touch the seeds directly. I've had seeds last 15 years using this method, though most remain viable for 3-5 years with proper care.
Pro Tips for Make Seed Packets
- Preserving seeds properly ensures they stay viable for years—here's how to avoid common pitfalls and maximize germina...
- Harvest Timing Matters: In Step 1, when testing seed maturity by crushing between fingers, look for a crisp, dry text...
- Drying Strategy: The 24-hour soak for sticky seeds in Step 2 is critical, but don't rush the drying process after. Wh...
Frequently asked questions
Got questions about saving seeds and crafting your own packets? Here are some common ones—and their answers—to help you get started with confidence!
How do I know which seeds are best for saving?
Not all seeds are created equal! Focus on heirloom, open-pollinated, or non-hybrid varieties—they’re the easiest to save. Avoid hybrid seeds (like F1 hybrids), as they won’t produce true-to-type plants. Check seed packets for labels like "open-pollinated" or "heritage" to ensure reliability.
When is the best time to harvest seeds?
Timing matters! Harvest seeds when they’re fully mature but before they fall to the ground or split open. For most veggies (like tomatoes or beans), wait until the pods dry on the plant. For flowers (like zinnias), snip them when they’re brown and crispy. A general rule: If the seed pops out easily, it’s ready!
Can I use regular paper or do I need special seed packet materials?
While kraft paper or envelopes are classic choices, you can get creative! Use brown paper bags, manila folders, or even plastic bags with labels. Just ensure your packets are airtight (use wax or tape) and store them in a cool, dry place to prevent mold or moisture damage.How do I prevent cross-pollination if I’m saving flower seeds?
Cross-pollination can mix traits, but you can minimize it by:
- Isolating plants: Grow flowers of the same variety at least 20–30 feet apart (or use row covers).
- Hand-pollinating: Use a paintbrush to transfer pollen between flowers of the same type.
- Choosing self-pollinators: Opt for flowers like marigolds or nasturtiums, which pollinate themselves.
How long can I store homemade seed packets?
With proper care, seeds can last 1–5 years, depending on the type:
Seed Type
Average Lifespan
Tomatoes, Peppers, Lettuce
1–2 years
Beans, Peas, Onions
2–3 years
Carrots, Beets, Parsley
3–5 years
Test viability by placing seeds in wet paper towels—if 50%+ sprout within a week, they’re good to go!
Wrapping up and next steps
Creating your own seed packets is a rewarding way to preserve heirloom varieties, save money, and ensure a thriving garden next season.
With just a few simple materials and a little patience, you’ve mastered the art of organic seed preservation—now you’re ready to share your harvest with future generations! 🌱
Ready to take it further? Start small this year—try saving seeds from a few favorite plants, then expand your collection as you gain confidence. Happy gardening, and may your seeds grow into a bountiful, beautiful garden!