
Propagation
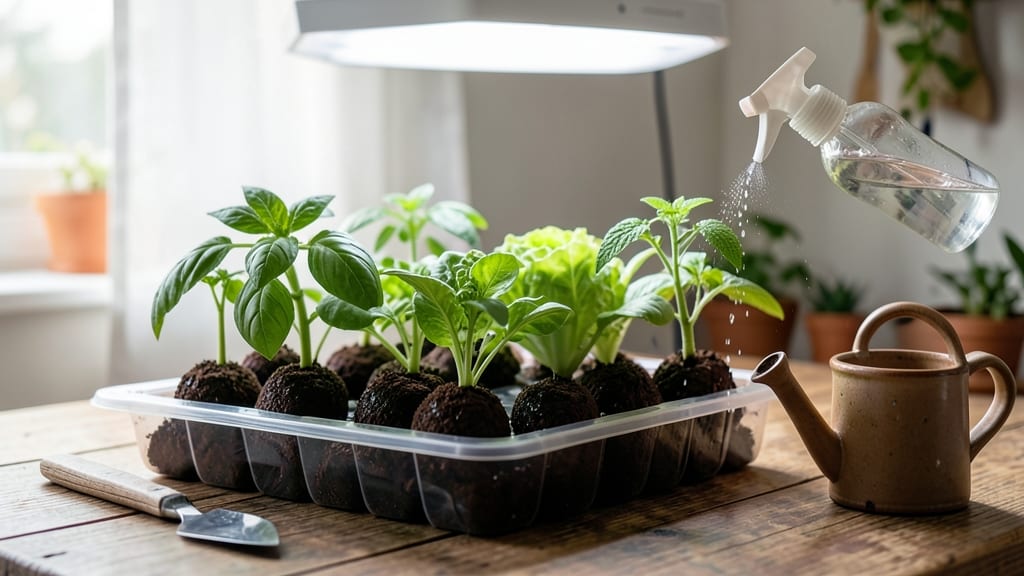
Jiffy seed starting turns finicky seedlings into thriving plants in just 7 days. 🌱 I swore off seed-starting after my first batch of leggy, weak seedlings—until I discovered Jiffy peat pots.
These pre-moistened, biodegradable pots create the perfect environment for seeds to germinate fast and strong, with no transplant shock later. The secret lies in their built-in moisture and air pockets, which mimic a seed's natural conditions.
You'll need Jiffy pellets or pots, a shallow tray, seeds, and a spray bottle—no fancy equipment. Just soak the pellets, pop in your seeds, and keep them warm until sprouts appear. By day 7, you'll have sturdy seedlings ready to harden off.
The roots grow right through the pot walls, so transplanting becomes a gentle matter of popping them into the ground. No root disturbance means healthier plants that take off running. Works for tomatoes, peppers, herbs, and even flowers. Here's how to get every seed off to the perfect start!"
📚 In This Guide
- What you need
- Instructions
- Tips and common mistakes
- Wrapping up and next steps
What you need
- ● Jiffy-7 Peat Pellets – 10–20 pellets (depending on seed quantity; each holds ~7 seeds).
- ● Seedling trays or pots – 1–2 shallow trays (1020 or 50-cell size) or 4–6" pots for larger plants.
- ● Seeds – Choose fast-growing varieties (e.g., lettuce, radishes, herbs, or flowers like marigolds).
- ● Water – Room-temperature, dechlorinated water (let tap water sit for 24 hours or use filtered water).
- ● Spray bottle – 16–20 oz with a fine mist nozzle for gentle hydration.
- ● Grow lights or sunny windowsill – 12–16 hours of light daily (LED grow lights are ideal).
- ○ Humidity dome or plastic wrap – Optional but helpful for retaining moisture.
- ● Seed starting mix – Lightweight potting soil (mix 1 part perlite to 3 parts soil if needed).
- ● Heating mat – For cold climates (keeps soil at 70–75°F for faster germination).
- ● pH testing kit – Ensures soil pH is 6.0–7.0 (ideal for most seeds).
- ● Labels & markers – To track seed varieties (use toothpicks + masking tape!).
- ● Fertilizer (low-dose) – Balanced 10-10-10 or fish emulsion (add after sprouts appear).
Step-by-step instructions for Jiffy seed starting
Here's how I get consistent germination in just a week—no fancy equipment needed.
🌱 Step 1: Soak and Prepare Jiffy Peat Pellets
Fill a clean tray or container with the 4 Jiffy peat pellets you've got ready. The pellets need to absorb water fully—place them in a shallow dish and pour warm water over them until they've expanded to about 2-3 times their original size. This usually takes 10-15 minutes, but don't rush it. You'll know they're ready when they feel firm and springy to the touch.
I like to soak them in the tray where they'll eventually grow because it keeps everything contained. Once expanded, gently squeeze out any excess water—pellets shouldn't be dripping, just evenly moist. This prevents waterlogging, which can suffocate seeds before they even sprout.
🌱 Step 2: Plant Your Seeds at the Right Depth
Make a small indentation in the top of each pellet—just enough to cradle your seeds. For tiny seeds, I use a toothpick to create a shallow dimple. Place 1-2 seeds in each pellet, following the packet's depth guidelines (usually ¼ to ½ inch deep). Press them gently but firmly so they make good contact with the moist peat.
Here's the thing—don't overcrowd the pellets. I've planted too many seeds in one pellet before, and the seedlings compete for nutrients, leading to weak, leggy plants. One seed per pellet is ideal, but two gives you a backup if one fails to germinate.
💧 Step 3: Cover and Maintain Moisture
Once seeds are planted, cover the tray with a clear plastic dome or plastic wrap to create a greenhouse effect. This traps warmth and humidity, which speeds up germination. Place the tray in a warm spot—70-75°F is perfect—like on top of your fridge or near a sunny window. You'll see condensation on the plastic, which is normal and means the humidity is just right.
Check the pellets daily to ensure they stay moist but not soggy. Mist lightly with water if the surface feels dry to the touch. Avoid lifting the dome too often—every time you peek, you release moisture and cool the air slightly. I set a reminder on my phone to check only once a day unless I see condensation dripping.
☀️ Step 4: Provide Light and Monitor Germination
After 3-5 days, you should see tiny green sprouts pushing through the peat. This is the moment that matters: remove the plastic dome immediately once you see the first signs of germination. Too much humidity now can cause damping-off, a fungal disease that collapses seedlings overnight. Place the tray under a grow light or in a bright window, ensuring they get 12-14 hours of light daily.
You'll notice the seedlings will lean toward the light—this is normal. If they start looking leggy (long, thin stems with small leaves), your light source isn't strong enough. Move the light closer or supplement with a second light. Strong seedlings have short, thick stems and dark green leaves.
⏰ Step 5: Thin and Care for Healthy Seedlings
Once seedlings develop their first true leaves (not the initial seed leaves), it's time to thin. Use a pair of clean scissors to snip the weaker seedling at the base, leaving the stronger one. This prevents overcrowding and gives the remaining seedling room to grow. If you planted two seeds and both germinated, keep the healthier-looking one.
Water gently from the bottom by placing the tray in a shallow dish of water for 10-15 minutes. This encourages roots to grow downward and strengthens the seedlings. Avoid watering from above, as it can dislodge the seedlings or cause disease. After thinning, fertilize lightly with a diluted liquid fertilizer (half-strength) to give them a nutrient boost.
Tips & tricks for perfect Jiffy seed starting
These little tricks will help you avoid common pitfalls and get every seedling off to a strong start.
Soaking Secret: The 10-15 minute soaking time for your 4 Jiffy peat pellets is crucial—warm water works best because it speeds up hydration without shocking the pellets. I use a spray bottle to gently mist any stubborn dry spots after soaking. This ensures even moisture distribution without over-saturating, which can cause mold before germination even begins. The firm, springy texture is your cue that they're ready for planting.
Planting Precision: When creating those shallow indentations for your seeds, think of them as tiny cradles—just deep enough to hold the seeds snugly but not bury them. For seeds smaller than a pinhead, a toothpick works perfectly, but I've also used the eraser end of a pencil for slightly larger seeds. Pressing them gently ensures good seed-to-soil contact, which is half the battle for successful germination. Remember, those 1-2 seeds per pellet give you a backup without risking overcrowding.
Humidity Hack: The plastic dome creates a perfect greenhouse, but here's what nobody tells you—condensation on the inside is your friend, not a sign of failure. I check for moisture by lifting just one corner of the plastic rather than removing the whole dome. This minimizes temperature drops and maintains that critical 70-75°F range. If you notice water pooling, prop up one side of the dome to improve airflow slightly while keeping most of the humidity trapped.
Lighting Tips: Those 12-14 hours of daily light don't have to come from a fancy grow light. I've had great success with a simple LED desk lamp placed about 6 inches above the seedlings. The key is consistency—seedlings will grow toward any light source, so rotate your tray daily to prevent them from leaning. If you notice them stretching toward the light with long, thin stems, they're begging for more intensity. This is called etiolation, and it's easily fixed by moving the light closer or adding another light source.
Pro Tips for Jiffy Seed Starting
- These little tricks will help you avoid common pitfalls and get every seedling off to a strong start.
- Soaking Secret: The 10-15 minute soaking time for your 4 Jiffy peat pellets is crucial—warm water works best because ...
- Planting Precision: When creating those shallow indentations for your seeds, think of them as tiny cradles—just deep ...
Frequently asked questions
Got questions about Jiffy seed starting? You’re not alone! Here are answers to the most common concerns—so you can grow with confidence.
How long do Jiffy pellets take to germinate?
Most seeds sprout within 5–7 days in Jiffy pellets, thanks to their ideal moisture and warmth. Fast growers like lettuce or radishes may pop up in 3–4 days, while slower seeds (e.g., tomatoes) could take 10–14 days. Patience is key—just keep them cozy and hydrated!
Can I start Jiffy pellets too early in the season?
Jiffy pellets are perfect for indoor early starts (4–6 weeks before last frost). Use a grow light or sunny windowsill to prevent leggy seedlings. If outdoors isn’t warm enough, transplant after the last frost date—pellets protect roots while acclimating to soil.
What if my Jiffy pellet stays dry or moldy?
Dry? Rehydrate with warm water until saturated (don’t overfill!). Mold? It’s often garden safe but can smother seeds. Prevent it by:
- Using sterilized water (boiled or filtered).
- Avoiding overcrowding seeds.
- Ensuring good airflow (no lids on trays).
Are Jiffy pellets reusable?
Not for seeds—but yes, for transplants! Once seedlings sprout, you can plant the whole pellet into soil (it’ll biodegrade). For new starts, discard used pellets or compost them. Pro tip: Label pellets to track seed types!
What’s a good alternative if I don’t have Jiffy pellets?
No problem! Try:
- Coconut coir discs (similar moisture retention).
- Peat pots (biodegradable but less compact).
- DIY peat/perlite mix in small pots (sterilize first!).
Wrapping up and next steps
Mastering jiffy seed starting is your ticket to a thriving garden in just 7 days! 🌱 With the right materials, patience, and a little care, you’ll watch tiny seeds transform into hearty seedlings ready for transplanting. This method isn’t just efficient—it’s foolproof for beginners and pros alike.
Now that you’re armed with the know-how, it’s time to roll up your sleeves and start your first batch! Pick a seed packet, grab your jiffy pellets, and let the magic of germination unfold. Happy growing! 🌿