
Lawn
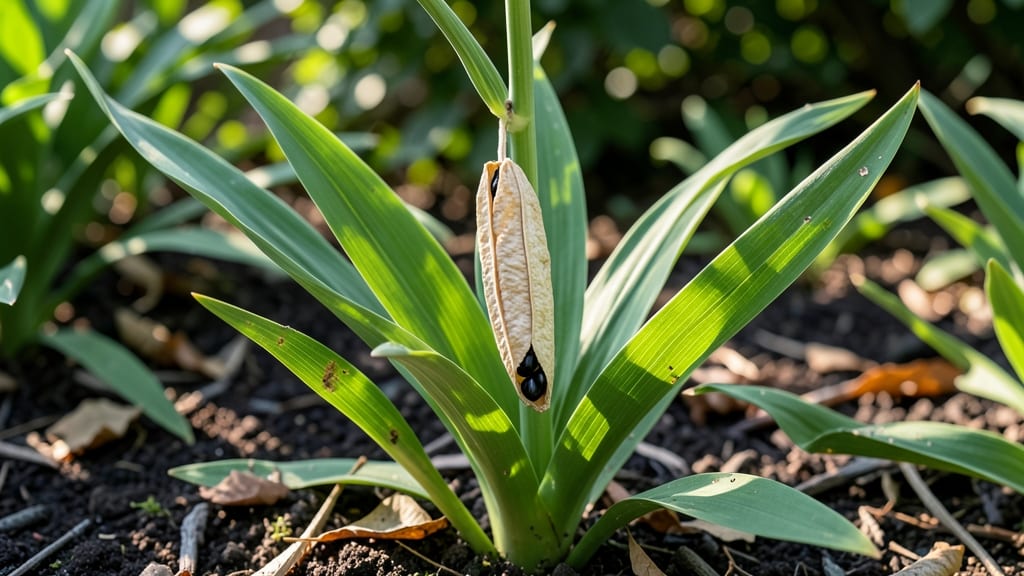
Twisting open a lily seed pod reveals nature’s secret to multiplying your garden for free. ✨ The moment you hear that satisfying pop is the start of zero-waste propagation—no store-bought bulbs needed.
My first attempt with daylilies produced a dozen new plants from just three pods, and I’ve since perfected the timing to maximize seed viability.
First, you’ll need mature pods—wait until they turn brown and dry to the touch (usually late summer). A simple twist test confirms readiness: if the pod cracks with gentle pressure, it’s harvest time.
Collect seeds immediately, as they lose viability within days. For indoor growers, a paper bag works perfectly for drying seeds in a warm, dry spot for 1-2 weeks before planting.
Sowing seeds is where the magic happens. Scatter them on moist soil (or a seed-starting mix) and keep them consistently damp but never soggy. Germination takes patience—sometimes 4-6 weeks, sometimes longer—but the payoff is worth it: lush new foliage emerging from seeds you nurtured yourself.
Even if some fail, you’ll still end up with more plants than you started with.
This method works for daylilies, Asiatic lilies, and even some ornamental lilies, though tropical varieties may need extra warmth. The key is consistency—light, moisture, and time. Whether you’re a beginner or a seasoned gardener, this is how you turn one plant into dozens without spending a dime.
📚 In This Guide
- What you need
- Instructions
- Tips and common mistakes
- Wrapping up and next steps
What you need
- ● Mature lily seed pods: Harvest from healthy, disease-free lilies (e.g., Lilium species) after they’ve fully ripened and turned brown. Aim for 5–10 pods for testing.
- ● Sharp pruning shears or scissors: For cleanly snipping pods from stems. Sterilize with rubbing alcohol first!
- ● Paper towels or coffee filters: 2–3 sheets per pod for drying and testing.
- ● Small plastic bags or airtight containers: 1 per pod to store seeds temporarily (e.g., quart-sized ziplock bags).
- ● Pencil or pen: For labeling pods/containers with dates.
- ● Notebook or spreadsheet: To track pod viability, twist dates, and germination progress.
- ● Spray bottle with water: For lightly misting pods during the drying process.
- ● Humidity dome or plastic wrap: Creates a mini greenhouse for faster germination tests.
- ● Seedling trays or small pots: If you plan to plant viable seeds immediately.
- ● Magnifying glass: For inspecting seed pods and seeds up close.
- ● Ruler or measuring tape: To document pod size (fun for tracking maturity!).
- ● Camera or phone: Capture your progress—documentation is half the fun!
Step-by-step guide to harvesting and testing lily seed pods
Here's how I ensure every seed pod yields viable seeds for next season's garden.
🌱 Step 1: Identify and Harvest Mature Seed Pods
Wait until the pods turn a deep brown and begin to split open naturally—this signals full maturity. I look for pods that have dried completely but haven't yet released seeds on their own. Use clean, sharp pruners to snip the stem just above the pod, leaving about 1 inch of stem attached.
Harvest on a dry day to prevent moisture from encouraging mold. Place pods in a paper bag to catch any seeds that might drop during transport. If you harvest too early, seeds won't have fully developed; if too late, they'll scatter everywhere.
🌿 Step 2: Dry and Prepare Pods for Seed Extraction
Spread the harvested pods in a single layer on a clean, dry surface in a well-ventilated area. I use a mesh screen or a piece of window screen to allow airflow while preventing seeds from falling through. Keep them out of direct sunlight to avoid overheating.
Allow pods to dry for 7-10 days until they're completely brittle. You'll know they're ready when a gentle twist causes the pod to crack open easily. If pods resist, they need more drying time. Avoid using heat sources—they can damage seeds.
✂️ Step 3: Test Seed Viability with the Twist Method
Take one pod at a time and hold it between your thumb and forefinger. Apply gentle pressure while twisting outward—this mimics how the pod naturally releases seeds. Healthy pods will split open with a slight crack, revealing plump, dark seeds inside. Discard any pods that remain closed or contain shriveled seeds.
For maximum accuracy, test 10-15 pods from each plant. I count the number of viable seeds per pod and calculate an average. This helps me determine how many seeds I'll have for planting, so I can plan my seed storage containers accordingly.
🪴 Step 4: Clean and Store Viable Seeds Properly
Once pods are open, carefully remove seeds using a small brush or your fingers. Place seeds in a clean, dry envelope or small paper bag. Label each with the lily variety and harvest date—this is crucial for tracking. I store seeds in a cool, dark place with 30-40% humidity.
Seeds remain viable for 1-2 years under these conditions. Check stored seeds annually for signs of mold or pests. If you notice any issues, transfer them to a fresh container immediately to preserve their quality.
⏰ Step 5: Prepare for Next Season's Planting
In early spring, sow viable seeds in seed-starting mix at a depth of ¼ inch. Keep the soil consistently moist but not soggy, and maintain temperatures between 65-75°F for optimal germination. Most lily seeds take 30-60 days to sprout.
Here's the thing—lily seeds often produce plants that differ from the parent, so consider this a chance to experiment. If you want true-to-type plants, divide established lilies instead. But for zero-waste gardening, harvested seeds are a rewarding alternative.
Tips & tricks for perfect lily seed pod harvesting
Took me years of trial and error to perfect these zero-waste gardening essentials—here's what nobody tells you.
Timing is Everything: Harvest pods when they're deep brown but just before they split open naturally. The 1-inch stem you leave attached acts as a natural handle—grip it firmly while twisting to avoid crushing the pod. I've learned this the hard way after watching seeds scatter when pods were overripe. Harvest on dry mornings to prevent mold from dampness.
The Drying Secret: Those 7-10 days of drying aren't just about time—they're about creating the perfect brittle texture. I place my pods on a mesh screen near a fan to ensure even airflow. Avoid direct sunlight (it can bake pods unevenly) and never use heat sources. The goal is to mimic natural drying conditions where the pods would eventually release seeds on their own.
Viability Test Precision: When testing 10-15 pods in Step 3, focus on the sound as much as the sight. A healthy pod should make a faint "crack" when twisted—like a walnut shell. If it just bends without breaking, it needs more drying time. I keep a small notebook to track which varieties produce the most viable seeds each year, which helps with future planning.
Storage Wisdom: The 30-40% humidity range is critical for long-term viability. I use small glass jars with silica gel packets to maintain this balance. Label your storage containers with both the variety and harvest date—this helps you track which seeds are freshest. Check stored seeds annually for any signs of mold or pests, as these can compromise viability within weeks.
Pro Tips for Lily Seed Pod
- Took me years of trial and error to perfect these zero-waste gardening essentials—here's what nobody tells you.
- Timing is Everything: Harvest pods when they're deep brown but just before they split open naturally.
- The Drying Secret: Those 7-10 days of drying aren't just about time—they're about creating the perfect brittle texture.
Frequently asked questions
Got questions about harvesting and using lily seed pods? You’re not alone! Here are some of the most common concerns—plus quick, practical answers to keep your zero-waste journey smooth.
Can I harvest lily seed pods from any type of lily?
Not all lilies produce edible or viable seed pods. Stick to true lilies (like Lilium species) or daylilies (Hemerocallis), which are safe for harvesting. Avoid ornamental lilies (e.g., Lilium longiflorum or Lilium asiatic)—they can be toxic. Always research or consult a local expert before harvesting!
When is the best time to harvest lily seed pods?
Harvest pods when they’re fully brown and dry but before they split open naturally. This usually happens 4–6 weeks after flowering, depending on your climate. If pods crack too soon, seeds may scatter or lose viability. Test by gently squeezing—if they’re firm but brittle, they’re ready!
How do I know if the seeds inside are still viable?
The twist test is your best friend! Hold the pod firmly and twist. If it snaps with a sharp crack and seeds spill out, they’re likely viable. If it bends or feels soft, the seeds may be old or spoiled. For extra assurance, soak seeds in water for 24 hours—viable ones will plump up!
What can I do with lily seed pods if they’re not viable?
Don’t toss them! Use them for compost, natural mulch, or even art projects (like dried floral arrangements). You can also crush the pods into a potting mix to boost soil texture. Need a creative outlet? Try making seed paper or biodegradable confetti for eco-friendly events!
Why did my lily seed pods rot or mold?
Moisture is the enemy! Pods rot when left on damp ground or stored in humid conditions. Always harvest on dry days, let pods dry in a well-ventilated area (like a mesh bag), and avoid direct sunlight, which can overheat them. If mold appears, discard the pods immediately to prevent spreading.
Still stumped? Drop your question in the comments—we’re happy to help you turn those pods into zero-waste gold!
Wrapping up and next steps
Harvesting lily seed pods isn’t just a clever way to reduce waste—it’s a rewarding way to connect with nature while adding a touch of whimsy to your garden.
Whether you’re testing viability with the twist method or simply enjoying the process, every step brings you closer to sustainable gardening. Now that you’re equipped with the know-how, why not share your newfound skills? 🌱 Share tips with fellow gardeners, experiment with different lilies, or even turn your harvest into seed paper for eco-friendly crafts.
The possibilities are as endless as your garden!