
Lawn
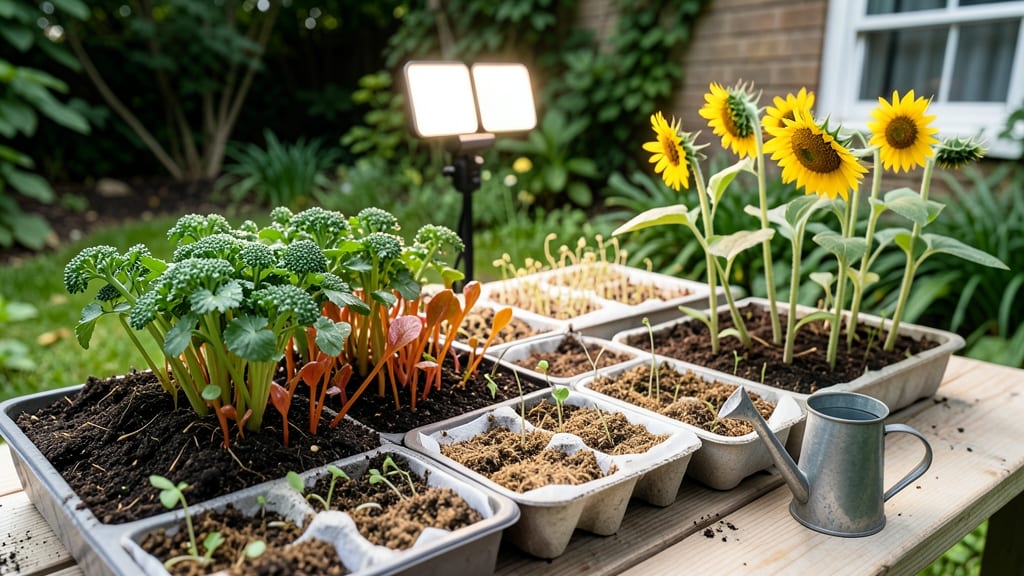
Little seed gardens deserve big harvests—and pollinators love them too. 🌿 My first balcony garden proved that even a 3-foot-wide ledge can produce enough herbs, flowers, and greens for summer salads, while keeping bees and butterflies buzzing happily. The secret lies in choosing the right plants: dwarf tomatoes, bush beans, and compact basil varieties that thrive in containers. Mix in pollinator magnets like alyssum and marigolds, and you’ve got a thriving ecosystem that’s both beautiful and productive. No fancy tools or expensive setups required—just good light, the right pots, and a little creativity. You’ll end up with a garden that’s as charming as it is useful, where every inch works hard. The scent of fresh basil, the sight of bees visiting your flowers, and the satisfaction of harvesting your own food—all in a space that fits neatly into any urban patio or windowsill. Whether you’re working with a balcony, a sunny windowsill, or even a repurposed deck box, these ideas scale effortlessly. Let’s turn that small space into a garden that does double duty for you and the pollinators!
📚 In This Guide
- What you need
- Instructions
- Tips and common mistakes
- Wrapping up and next steps
What you need
- ● Containers: 1–5 grow bags (5–10 gallons each, with drainage holes)
- ● OR 3–10 pots (6–12 inches deep, with saucers for drainage)
- ● OR raised beds (minimum 6" deep, 2' x 4' max for small spaces)
- ● Soil: 1–2 bags of high-quality potting mix (sterilized, organic, with perlite or vermiculite)
- ○ Optional: compost (1–2 cups per container for nutrient boost)
- ● Seeds: Pollinator-friendly varieties (e.g., basil, marigolds, sunflowers, borage, or nasturtiums)
- ● Quantity: 5–10 seeds per container (thin to 2–3 strongest seedlings)
- ● Tools: 1 hand trowel (for planting)
- ● 1 spray bottle (for gentle watering)
- ● 1 measuring cup (for soil/compost ratios)
- ● Drip irrigation kit or self-watering planters (for convenience)
- ● Organic fertilizer (like fish emulsion or worm castings)
- ● Mulch (straw or shredded leaves to retain moisture)
- ● Pollinator hotel (to attract bees and butterflies!)
How to create little seed gardens in tiny spaces
Here's how to transform even the smallest balconies or windowsills into thriving pollinator havens.
🪴 Step 1: Choose the Right Containers and Layout
Start with containers that fit your space—4-inch pots work perfectly for single plants, while 8-inch square planters can hold 4-6 small varieties. I like to use stackable terra cotta pots because they maximize vertical space while keeping roots cool. Arrange them in a grid pattern on a rolling tray for easy movement between sun and shade.
For pollinator appeal, group plants by height: tall varieties like sunflowers in the back, medium plants like zinnias in the middle, and low-growing flowers like alyssum in the front. This creates a natural tiered look that attracts bees and butterflies from multiple levels. Use the 4 containers to create a balanced mini-garden with 2-3 different pollinator-friendly species.
🌱 Step 2: Select Fast-Growing, Pollinator-Friendly Seeds
Pick varieties that thrive in small spaces and bloom quickly to keep pollinators visiting. I always choose cosmos, bachelor's buttons, and marigolds because they germinate in 7-14 days and flower within 6-8 weeks. These annuals self-seed easily, so you'll get free plants next season.
Plant seeds ¼ inch deep—too deep and they won't germinate. Space them 1 inch apart in the container, then cover lightly with soil. Water gently until the soil surface looks slightly damp but not wet. Place the containers in a warm, sunny spot (65-75°F) to encourage fast germination. You'll see tiny sprouts in about 10 days—that's your signal to move them to brighter light.
☀️ Step 3: Provide Consistent Light and Water
Pollinator plants need 6+ hours of direct sun daily to produce abundant flowers. If your space gets less light, supplement with a small LED grow light placed 6 inches above the plants for 12 hours a day. You'll notice leaves turning pale or stems stretching toward the light—this means your plants need more intensity.
Water when the top inch of soil feels dry to the touch. I use a spray bottle for small pots to avoid disturbing delicate seedlings. Once plants are established, water at the base to encourage deep root growth. Avoid wetting leaves to prevent fungal diseases that can kill young plants quickly.
🌿 Step 4: Maintain and Encourage Pollinators
When plants reach 3-4 inches tall, pinch back the tips to encourage bushier growth. This creates more surface area for flowers, which means more food for bees and butterflies. Remove any spent blooms regularly to keep plants producing new flowers all season.
Add a small dish of water with pebbles near your garden to give pollinators a safe place to drink. You'll start seeing visitors within 2-3 weeks after flowers open. Watch for bees collecting pollen and butterflies sipping nectar—it's one of the most rewarding parts of gardening!
Tips & tricks for perfect little seed gardens
Creating your own tiny pollinator paradise doesn't have to be complicated—just a few smart moves make all the difference. Here's what I've learned from turning my own balcony into a buzzing ecosystem.
Container Material Matters: Terra cotta pots are my go-to because they breathe—literally. The porous material helps prevent overwatering by allowing excess moisture to evaporate, which is crucial for those 4-inch pots that dry out faster. If you're using plastic containers instead, water slightly less frequently since they retain moisture longer. For the 8-inch planters, add a layer of small pebbles at the bottom to improve drainage and prevent root rot, especially if your space gets afternoon shade.
Seed Germination Hack: The 7-14 day germination window can feel like an eternity, but here's a trick: Place your seed trays on a heating pad set to 75°F to speed up the process. I've seen sprouts appear in just 5-7 days this way! Just make sure the heat source is consistent—fluctuations can stress delicate seedlings. Once you see those first little leaves, move them to your warm, sunny spot immediately to prevent leggy growth.
Lighting Troubleshooting: If your plants start stretching toward the light or developing pale leaves after 6+ hours of sun, you're dealing with light deprivation. For indoor setups, position your grow light 6 inches above the plants and adjust the height as they grow. I notice the biggest difference when I keep the light on a 12-hour timer—consistency is key. Rotate your containers every few days so all sides get even exposure, preventing lopsided growth that can reduce flower production.
Pollinator Magnet Upgrade: To attract even more bees and butterflies after the 2-3 week mark, add a few extra elements to your setup. Scatter some dried lavender or chamomile flowers around the base of your containers—their scent signals to pollinators that food is nearby. You can also plant a few herbs like basil or dill in separate containers nearby; their flowers are irresistible to beneficial insects. The key is variety—just like your 4 containers should have different heights, your garden should offer different types of flowers for maximum pollinator appeal.
Pro Tips for Little Seed Gardens
- Creating your own tiny pollinator paradise doesn't have to be complicated—just a few smart moves make all the difference.
- Container Material Matters: Terra cotta pots are my go-to because they breathe—literally.
- Seed Germination Hack: The 7-14 day germination window can feel like an eternity, but here's a trick: Place your seed trays on a heating pad set to 75°F to speed up the process.
Frequently asked questions
What’s the best time to start a little seed garden?
Timing depends on your climate, but most pollinator-friendly plants thrive when sown after the last frost (spring) or 6-8 weeks before the first fall frost. Check your USDA Plant Hardiness Zone for guidance. Fast-growing varieties like borage or cosmos can even be direct-sown in early summer for a late-season harvest!
How do I maximize space in a tiny garden?
Think vertical and compact! Use trellises for vining plants (like nasturtiums), stack containers, or try square-foot gardening. Opt for dwarf or bush varieties (e.g., tomato ‘Tiny Tim’) and interplant companion flowers (like marigolds) to deter pests naturally. Every inch counts!
Which pollinator-friendly seeds are easiest for beginners?
Start with hardy, fast-growing favorites: sunflowers (attract bees + birds), calendula (edible petals + pest-repellent), or lupine (nitrogen-fixing soil booster). These tolerate occasional neglect and thrive in small pots or garden beds. Bonus: They’re all self-seeding, so you’ll get free plants next year!
How often should I water a little seed garden?
Consistency is key! Water lightly but daily for the first 2 weeks to encourage root growth, then taper to deep watering 2-3 times per week (morning is best). Use a drip irrigation system or soaker hose to save time and prevent fungal issues. Mulch with straw or leaves to retain moisture—your tiny garden will thank you!
What do I do if pests invade my little garden?
First, identify the culprit (aphids? Slugs?). For mild infestations, try neem oil or a spray of soapy water. Introduce beneficial insects like ladybugs or lacewings, or handpick pests early in the day. Diatomaceous earth works for soil-dwelling pests, but avoid overusing chemicals—pollinators need a safe haven too!
Can I grow a little seed garden in containers or just on the ground?
Containers (like window boxes or hanging baskets) are perfect for herbs, lettuce, or dwarf veggies. Just ensure they’re at least 6-12 inches deep and have drainage holes. For ground gardens, raised beds or in-ground plots work—just amend soil with compost. Succession planting in containers lets you grow year-round in warm climates!
Wrapping up and next steps
There’s no better time to turn even the smallest corner of your space into a thriving little seed garden—especially when it supports pollinators while filling your plate with fresh, flavorful harvests!
Whether you’re working with a windowsill, balcony, or a patch of soil, the key is to start small, choose wisely, and nurture with patience. 🌱
Now that you’re armed with the right tools, varieties, and tips, it’s time to get your hands dirty! Begin by sketching your garden layout, picking your first few seeds, and setting a realistic timeline for planting.
Every tiny step you take today grows into a bigger, greener tomorrow—so why wait? Your future self (and the bees!) will thank you. 🐝✨
- Next step: Mark your calendar for your first planting day—even if it’s just a single pot!