
Lawn
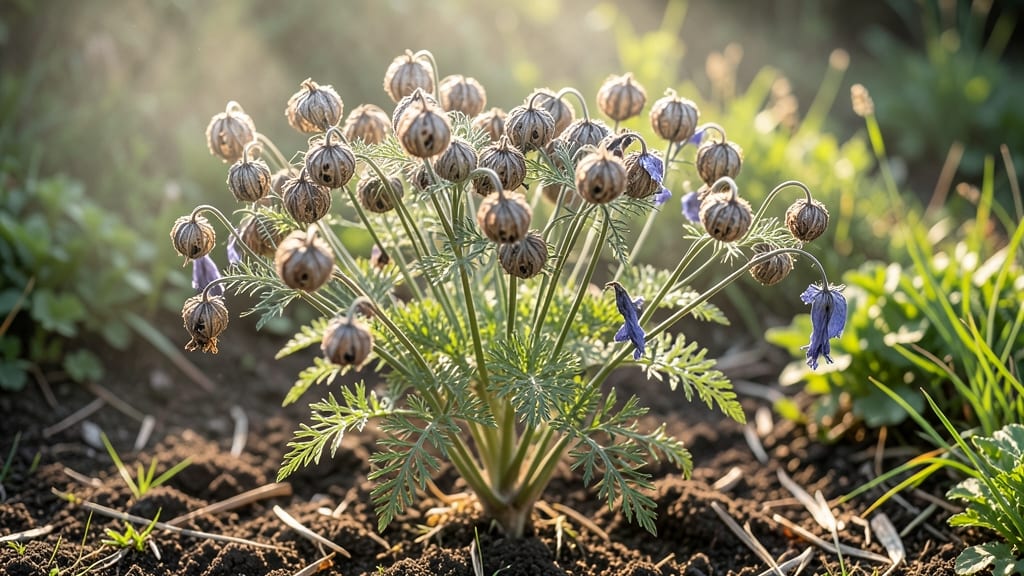
Those lacey Love-in-a-Mist seed pods are nature’s delicate time capsules—packed with tiny treasures for next year’s garden. 🌿 I’ve learned the hard way that waiting too long to harvest means watching them pop open and scatter seeds everywhere, while collecting too early leaves you with underdeveloped pods.
The sweet spot? Harvesting when they turn from green to a deep, papery brown but before they split open—usually in late summer or early fall, depending on your climate.
The magic happens when you let them dry completely before storing. Bundle the pods in small bunches and hang them upside down in a dry, well-ventilated spot for 2-3 weeks. Once fully dry, the seeds will rattle inside like tiny maracas—proof they’re ready for storage.
I keep mine in labeled paper envelopes tucked away in a cool, dark place, where they’ll stay viable for 2-3 years. No fancy equipment needed, just patience and a little space.
When spring rolls around, those same pods will give you a fresh crop of fragrant, pollinator-loving blooms that hummingbirds and bees adore. The secret? Scatter the seeds directly where you want them to grow—they self-sow like crazy, often popping up where you least expect them.
For dried arrangements, leave a few pods to mature naturally; their intricate, spiderweb-like structure adds texture and charm to winter bouquets.
Here’s the thing about Love-in-a-Mist: it thrives on neglect. Too much fussing and you’ll smother its delicate charm, but a little attention to timing—especially when harvesting those pods—means you’ll have a garden full of whimsical blooms and a stash of seeds ready for next season.
The best part? You’ll never have to buy them again.
📚 In This Guide
- What you need
- Instructions
- Tips and common mistakes
- Wrapping up and next steps
What you need
- ● Pruning shears or sharp scissors: For cleanly snipping seed pods (sterilized with rubbing alcohol for hygiene).
- ● Paper bags or breathable fabric sacks: 2–3 medium-sized (10"–12" diameter) for collecting pods.
- ● Drying tray or screen: A flat, elevated surface (like a wire rack or cardboard box with holes) to air-dry pods.
- ● Permanent marker or labels: To tag pods with the harvest date and variety (e.g., Love in the Mist).
- ○ Paper towels or silica gel packets (optional but helpful): For absorbing excess moisture during drying.
- ● Air-tight storage containers: Small jars or envelopes with desiccant packets (e.g., silica gel) to preserve viability.
- ○ Gloves (optional): Protect hands from prickly stems or sap.
- ● Spray bottle with water: Lightly mist pods if they dry too quickly.
- ● Notebook or app: Track pod maturity and storage conditions for future reference.
- ● Seed packet template: Pre-made labels to organize varieties (e.g., free printables).
Step-by-step instructions for harvesting and storing Love-in-a-Mist seed pods
Here's how I preserve these delicate seed pods for next season's garden—simple, hands-off, and perfect for pollinator lovers.
🌿 Step 1: Identify and Select Mature Seed Pods
Wait until the seed pods turn a deep, papery brown color—this means they're fully mature and ready for harvest. I avoid picking pods that still have green stems or are still plump, as they won't store well. The pods should feel dry and brittle to the touch, almost like crinkling paper.
Gently twist or pinch the stem where it meets the pod—this prevents damaging the plant's remaining foliage. I like to harvest on a dry morning after the dew has evaporated, as wet pods can mold during storage. Collect only the pods that have completely dried on the plant; any still attached to green stems won't be viable for next year.
⏰ Step 2: Dry the Seed Pods Thoroughly
Spread the harvested pods in a single layer on a clean, dry surface—like a mesh screen or paper towel—in a warm, dry location. I place mine on my kitchen counter near a sunny window, but avoid direct sunlight which can overheat them. The goal is to air-dry them completely, which should take about 1-2 weeks depending on humidity levels.
Check daily for any signs of moisture or mold. If you notice any pods developing fuzzy spots, remove them immediately and discard. Properly dried pods will rattle when shaken—this sound means the seeds inside are loose and ready for storage. Don't rush this step; even slightly damp pods will spoil during storage.
🪴 Step 3: Extract Seeds and Prepare for Storage
Once completely dry, gently crush each pod between your fingers over a clean piece of paper or into a small bowl. The seeds will spill out easily while the papery husk remains behind. I find it helpful to wear gloves for this step—some people have sensitive skin to the fine dust from the pods.
Use a fine mesh strainer or sift the seeds to remove any remaining pod fragments or debris. Store the clean seeds in a small, airtight container like a glass jar or resealable plastic bag. Label it with the current date and variety name—these seeds will remain viable for 2-3 years if stored properly in a cool, dark place.
☀️ Step 4: Store in Optimal Conditions
Place your labeled container in a cool, dark location like a pantry or refrigerator. I keep mine in the back of my fridge where the temperature stays consistently around 40-50°F. This cool environment slows down seed deterioration and maintains viability longer than room-temperature storage.
Check the seeds once a year to ensure they're still dry and free of moisture. If you notice any condensation inside the container or a musty smell, transfer the seeds to a new, dry container immediately. Properly stored seeds should remain firm and plump—any that feel soft or shriveled should be discarded before planting.
🌱 Step 5: Prepare for Next Year's Planting
When ready to plant, soak the seeds in lukewarm water for 12 hours before sowing to help break dormancy. This step is especially helpful if your climate has cool springs, as it encourages faster germination. I plant mine in well-draining soil and keep them consistently moist until germination, which typically occurs in 2-3 weeks.
Remember that love-in-a-mist thrives in partial shade and moist soil—ideal conditions for attracting pollinators to your garden. The seeds you've carefully preserved will produce stunning, airy blooms that create a perfect habitat for bees and butterflies next season.
Tips & tricks for perfect Love-in-a-Mist seed pod preservation
These simple strategies will help you maximize seed viability and avoid common pitfalls when preserving love-in-a-mist pods.
Selection Matters: In Step 1, when selecting pods, focus on the color and texture rather than just appearance. The pods should be completely brown and feel brittle like crinkled paper—this indicates full maturity. I've learned the hard way that green-tinged pods or those still attached to green stems won't store properly, even if they look close to ready. The slight crinkling sound when you squeeze them is your best indicator of readiness.
Drying Strategy: During the 1-2 week drying period in Step 2, I recommend creating airflow by placing a small fan nearby on low setting. This helps maintain consistent drying without overheating. Watch for that telltale rattling sound when you shake the pods—this confirms the seeds are loose and ready for extraction. If you're in a humid climate, you might need to extend the drying time slightly, but never skip this critical step as damp pods will mold during storage.
Storage Wisdom: When storing your seeds in Step 4, I always use silica gel packets inside the container to absorb any moisture. Place the container in the back of your fridge where temperatures stay around 40-50°F—this cool environment is crucial for maintaining seed viability. I also double-check the seal on my containers before storing to prevent any moisture from entering during the 2-3 year storage period.
Pro Tips for Love In The Mist Seed Pods
- These simple strategies will help you maximize seed viability and avoid common pitfalls when preserving love-in-a-mist pods.
- Selection Matters: In Step 1, when selecting pods, focus on the color and texture rather than just appearance.
- Drying Strategy: During the 1-2 week drying period in Step 2, I recommend creating airflow by placing a small fan nearby on low setting.
Frequently asked questions
Got questions about harvesting and storing Love in the Mist seed pods? You’re not alone! Here are some of the most common queries—and their answers—to help you keep your pollinator paradise thriving.
When is the best time to harvest the seed pods?
The ideal time to harvest Love in the Mist seed pods is late summer to early fall, once the pods turn brown and begin splitting open naturally. Aim for late August through September in most U.S. climates. Harvesting too early may yield immature seeds, while waiting too long risks losing them to birds or wind.
How do I know if the seed pods are ready?
Ready-to-harvest pods will feel dry and papery to the touch, often with a slight crack or split. Gently shake a pod over a brown paper bag—if seeds rattle inside, they’re ready! Avoid harvesting if the pods are still green or moist, as seeds may not store well.
What’s the best way to store the seeds for next year?
Store seeds in a cool, dry place (like a sealed envelope or airtight container) at room temperature. Add a drying agent like silica gel or rice to prevent moisture buildup. Label the container with the harvest date—most seeds retain viability for 1–2 years if stored properly.
Why are birds eating my seed pods before I can harvest them?
Birds love the seeds inside! To outsmart them, harvest pods as soon as they’re mature, or cover plants with lightweight netting. If you miss the window, try collecting fallen seeds from the ground (clean and dry them thoroughly before storing).
Can I save seeds from store-bought Love in the Mist plants?
Store-bought plants may not produce true-to-type seeds due to hybrid varieties. For reliable results, save seeds from open-pollinated plants grown in your garden. If you’re unsure, ask the nursery—some specialize in heirloom or pollinator-friendly varieties!
Wrapping up and next steps
Love in the Mist Seed Pods aren’t just a gardener’s dream—they’re a pollinator’s lifeline! 🌸 From harvesting at the perfect moment to storing them with care, every step ensures a thriving garden next season. Whether you’re a seasoned green thumb or a curious beginner, these tips make the process simple and rewarding.
Ready to plant the seeds of tomorrow’s blooms? Start small—grow a few pods this year, then expand your pollinator haven. Your garden (and the bees!) will thank you.
- Next step: Mark your calendar for next year’s planting season—and watch your garden buzz with life!