
Lawn
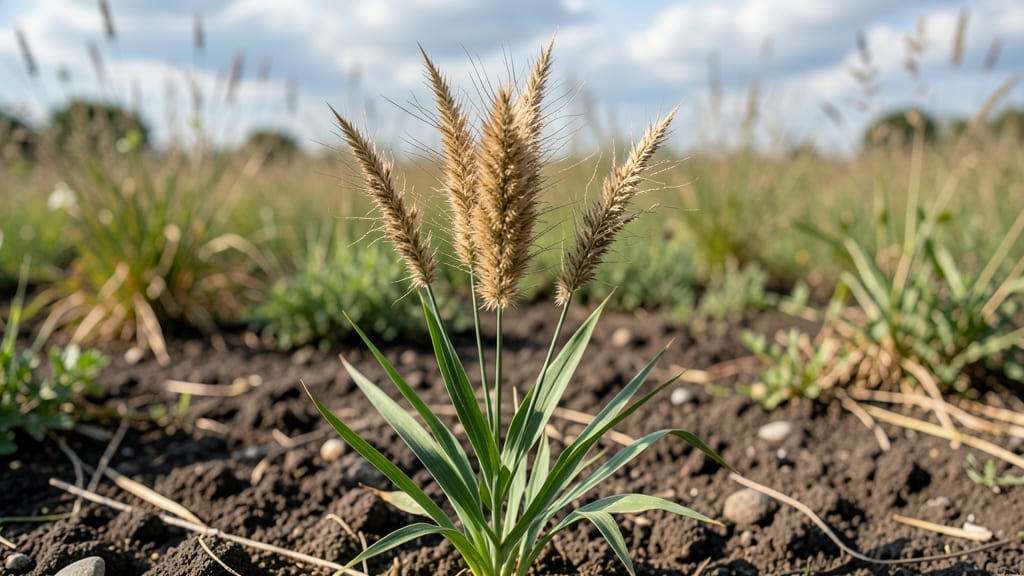
Those feathery millet seed heads are where the magic happens—each one packed with potential for next year’s garden. 🌾 I’ve learned the hard way that harvesting them wrong means wasted seeds, so I’ll show you exactly how to coax healthy seed production without the frustrating tangles.
Millet plants put all their energy into those seed heads once they stop flowering, turning from green to golden-brown over 3-4 weeks. The key is patience: harvest too early and the seeds won’t be viable; wait too long and they’ll scatter before you can collect them.
A gentle twist at the base works best—no yanking, no breaking. You’ll end up with plump, firm seeds ready for storage, and the process becomes second nature after your first successful harvest. The plants themselves stay upright and sturdy, making them perfect for both ornamental borders and seed-saving projects.
Works for all millet varieties—foxtail, proso, or pearl—whether you’re growing them for grain, birdseed, or just the striking seed heads. Let’s get those seeds ready for planting!
📚 In This Guide
- What you need
- Instructions
- Tips and common mistakes
- Wrapping up and next steps
What you need
- ● Millet Seeds: 1–2 lbs (organic, non-GMO preferred for best germination). Choose varieties like foxtail millet or pearl millet for seed heads.
- ● Well-draining soil: Sandy loam or a mix of topsoil + compost (pH 6.0–7.5). Test soil moisture—millet hates soggy roots!
- ● Sunlight: Full sun (6+ hours daily). A south-facing plot is ideal.
- ● Garden trowel or hoe (for planting rows 12–18" apart).
- ● Watering can or hose with a gentle spray nozzle (avoid overwatering!).
- ● Pruning shears or scissors (for harvesting seed heads).
- ○ Optional: Row markers or stakes (to space plants evenly).
- ● Drip irrigation kit (for consistent moisture).
- ● Garden gloves (to protect hands from seed heads).
- ● Patience! Millet seed heads mature in 90–120 days (varies by variety).
- ● Dry, warm weather (ideal temps: 70–90°F) for seed head development.
- ● Knowledge of when to harvest: Wait until seed heads turn golden-brown and dry (but before they shatter!).
Step-by-step instructions for growing millet seed heads
Here's how to grow millet with strong seed heads that harvest easily—no twisting or snapping.
🌱 Step 1: Select and Prepare the Right Variety
Choose a millet variety suited to your climate, like foxtail millet or pearl millet, which produce sturdy seed heads. I always pick certified organic seeds to avoid weak or hybrid strains that may not develop properly. Soak the seeds overnight in lukewarm water—this softens the outer coating and speeds up germination by 12-24 hours. Drain well before planting.
For best results, plant in late spring after the last frost when soil temperatures reach at least 65°F. Cold soil slows germination, and millet seeds need warmth to sprout consistently. I test soil temperature with a thermometer—if it’s cooler, wait a few more days.
☀️ Step 2: Plant in Well-Drained Soil with Full Sun
Millet thrives in full sun (6+ hours daily) and loose, well-drained soil—it hates soggy roots. Mix in compost to improve fertility, but avoid heavy amendments like manure, which can cause rot. Plant seeds ½ inch deep and 6 inches apart in rows 12 inches apart to allow airflow and prevent disease.
Water lightly after planting to settle the soil, but don’t overdo it—millet is drought-tolerant once established. You’ll see first true leaves in 7-10 days. If seedlings emerge unevenly, thin them to 4 inches apart to reduce competition. This ensures stronger stalks that support heavy seed heads.
💧 Step 3: Water and Fertilize for Strong Stalks
Once seedlings reach 4 inches tall, reduce watering to once every 5-7 days unless your area experiences extreme heat. Millet develops deep roots and struggles in constantly wet soil. I use a drip irrigation system to deliver water at the base—this prevents fungal issues on the leaves.
Side-dress with a balanced fertilizer (10-10-10) when plants are 6 weeks old to encourage sturdy growth. Avoid high-nitrogen fertilizers late in the season—they promote leafy growth at the expense of seed development. Watch for tall, upright stalks with dense seed heads forming by 8-10 weeks.
⏰ Step 4: Harvest Seed Heads at Peak Ripeness
The key to twist-free harvesting is timing—wait until seed heads turn golden-brown and seeds rattle when shaken. I test by breaking open a seed head: if the seeds inside are hard and dry, it’s ready. Harvest on a dry, sunny morning when humidity is low to prevent mold.
Cut the entire seed head with clean pruners, leaving 2-3 inches of stem. Bundle 4-5 heads together and hang them upside down in a well-ventilated, dry space for 7-10 days. This allows seeds to fully dry before threshing. Avoid plastic bags—they trap moisture and ruin seeds.
✂️ Step 5: Thresh and Store Seeds Properly
Once seed heads are completely dry, rub them between your hands or use a clean cloth to separate the seeds. I spread them on a tray lined with paper to catch chaff. Remove any discolored or shriveled seeds—these won’t store well. Store viable seeds in an airtight container in a cool, dark place for up to 2 years.
For next season, label your container with the variety and harvest date—older seeds germinate less reliably. This method ensures you’ll always have fresh, twist-free millet seed heads ready for planting or cooking.
Tips & tricks for perfect millet seed head growth
Growing millet with strong, twist-free seed heads takes patience and a few key tricks—here's how to avoid common pitfalls and get the best results.
Soaking Secret: That 12-24 hour soak in lukewarm water isn't just about speeding up germination—it's about breaking down the seed's tough outer coating. I use a fine-mesh strainer to drain seeds completely after soaking, then spread them on a paper towel for 10 minutes to dry slightly before planting. This prevents clumping in the soil and gives you more consistent germination.
Temperature Matters: The 65°F soil temperature minimum is non-negotiable—cold soil is the #1 reason millet seeds fail to sprout. I keep a soil thermometer handy and plant only when the ground warms up consistently. If you're in a cooler climate, consider using black plastic mulch to raise soil temperature 5-10°F before planting. This simple trick can make the difference between success and failure.
Thinning Technique: When you thin seedlings to 4 inches apart in Step 2, don't just pull—use clean scissors to snip at soil level. This prevents disturbing the roots of remaining plants. I also recommend thinning on a cloudy day to reduce stress on the plants. You'll notice much stronger stalks develop when they have proper spacing to grow into their full potential.
Harvest Timing: The golden-brown color and seed rattle test are your best indicators, but I've found that harvesting in the early morning gives you the driest conditions. Cut seed heads when the stem feels slightly woody—this means the plant has fully transferred nutrients to the seed heads. Bundle them with twine rather than rubber bands, which can leave marks that weaken the stems during drying.
Pro Tips for Millet Seed Head
- Growing millet with strong, twist-free seed heads takes patience and a few key tricks—here's how to avoid common pitf...
- Soaking Secret: That 12-24 hour soak in lukewarm water isn't just about speeding up germination—it's about breaking d...
- Temperature Matters: The 65°F soil temperature minimum is non-negotiable—cold soil is the #1 reason millet seeds fail...
Frequently asked questions
Got questions about growing and harvesting millet seed heads?
Here are some of the most common ones—plus quick, practical answers to help you succeed!
When is the best time to harvest millet seed heads?
The ideal time is when 70-80% of the seed heads turn golden-brown and the seeds rattle when shaken. Harvest too early, and seeds won’t be fully mature; too late, and they may shatter or lose viability. Morning harvests (after dew dries) work best to avoid moisture issues.
Why are my millet seed heads twisting or bending before harvest?
Twisting is normal as seed heads mature—they’re preparing to release seeds! If bending is excessive, check for wind stress, overcrowding, or poor soil drainage. Stake taller varieties or thin plants early to improve airflow and support.
Can I grow millet for seeds in containers or small spaces?
Dwarf varieties like Japanese millet or foxtail millet thrive in containers (at least 12 inches deep). Use well-draining soil, space plants 6–12 inches apart, and ensure full sun. Just avoid overcrowding to prevent seed head malformation.
How do I prevent birds from eating my millet seeds before harvest?
Birds love millet seeds—cover seed heads with fine netting (like bird netting) once they start drying. Alternatively, harvest in stages or choose less attractive varieties like teff. Avoid feeding birds nearby to reduce temptation!
What can I do with millet seed heads if I can’t harvest seeds?
Don’t toss them! Use seed heads for ornamental arrangements, bird feeders, or natural dyes. Dry them completely, then store in a cool, dark place for up to a year. You can also compost the stalks—just remove seeds first if you want to save them.
Wrapping up and next steps
Growing millet with twist-free seed heads isn’t just rewarding—it’s a game-changer for sustainable harvesting! 🌾 With the right soil, spacing, and care, you’ll enjoy plump, viable seeds that thrive year after year.
Whether you’re a gardener or a lawn enthusiast, your efforts will pay off in nutrient-rich yields and a healthier landscape.
Ready to take the next step? Experiment with varieties, document your progress, and share your millet successes with fellow green thumbs! 🌱 Start planting today—your future harvests will thank you!