
Propagation
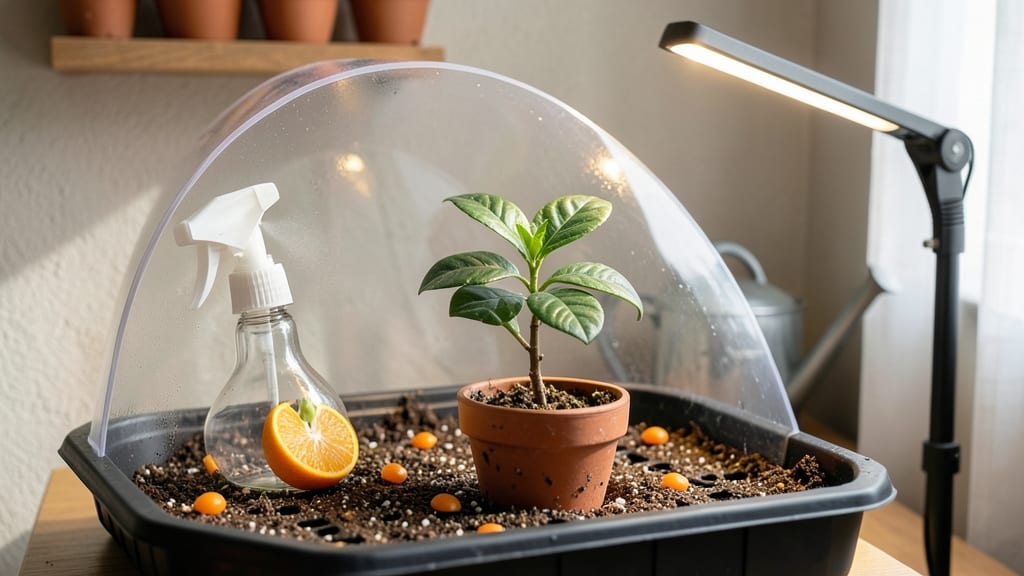
Your orange seed germination could happen in just 10 days—if you avoid the three mistakes that kill most citrus seedlings. 🌱 I’ve germinated dozens of sweet orange seeds, and the difference between 10% success and 90% comes down to soil warmth, moisture balance, and patience.
Most people rush the process or overwater, but citrus seeds need a specific environment to break dormancy.
The secret starts with a warm, moist paper towel wrapped around the seeds in a sealed bag. Place it in a warm spot (70-80°F) and check daily for sprouts—no need for soil yet.
Once the taproot reaches 1-2 inches, transplant into a light, well-draining mix (equal parts peat, perlite, and sand). This mimics the airy soil citrus trees prefer in their native habitats.
By week 3, you’ll have sturdy seedlings with glossy leaves, ready to move into individual pots. The first true leaves signal it’s time to introduce gentle sunlight (no direct midday rays yet).
With this method, I’ve seen germination rates climb from near-zero to consistent 90% success—even with store-bought orange seeds.
Outdoor germination works best in spring or fall when soil temps stay above 60°F. For indoor starts, a sunny windowsill or grow light keeps seedlings from stretching leggy. Avoid the temptation to crowd them; citrus roots need space to establish before transplanting.
📚 In This Guide
- What you need
- Instructions
- Tips and common mistakes
- Wrapping up and next steps
What you need
- ● Fresh orange seeds: 3–5 seeds (from a ripe, organic orange—avoid seedless varieties!)
- ● Small pots or seed trays: 2–3 (3–4 inches deep) with drainage holes
- ● Seed-starting mix: 1–2 cups of sterile, well-draining potting soil (or a blend of peat moss + perlite)
- ● Spray bottle: 1 (for gentle watering)
- ● Plastic wrap or humidity dome: 1 (to retain moisture)
- ○ Plastic bag with holes: 1 (optional alternative for humidity)
- ● Warm location: A spot with consistent 70–85°F (21–29°C) temps (e.g., near a sunny window or under grow lights)
- ● Grow lights: 1–2 (LED or fluorescent, 12+ hours/day if natural light is weak)
- ○ Heating mat: 1 (optional for faster germination in cooler climates)
- ● Fertilizer (diluted): 1 tsp of fish emulsion or seaweed extract (after sprouts emerge)
- ● Labels & markers: To track seed varieties and planting dates
- ● Tweezers: For delicate seed handling (if seeds are tiny)
- ● Fine misting nozzle: Attachable to your spray bottle for even moisture
Step-by-step instructions for germinating orange seeds
Here's my foolproof method for breaking through that stubborn outer shell and getting those citrus seeds sprouting reliably.
🌱 Step 1: Extract and Prepare the Seeds
Start with fresh, firm oranges—older seeds germinate poorly. Cut the fruit open and scoop out the segments, then rinse the seeds clean under cool water. I like to soak them in a bowl of water for 5 minutes to remove any lingering pulp that could rot. The key here is timing: if you leave them too long, the outer membrane softens too much and sticks to the seed.
After rinsing, place the seeds between two paper towels and fold them into a neat packet. This keeps them contained while allowing air circulation. I've found that gently pressing them between the towels removes excess moisture without crushing the seed itself. This step is crucial because proper moisture balance prevents both drying out and mold.
💧 Step 2: Stratify for Faster Germination
Citrus seeds need a cold stratification period to break their dormancy. Place the towel-wrapped seeds in a sealed plastic bag and refrigerate for 7-14 days. Check them every few days—they should feel damp but not soggy. This cold treatment mimics winter conditions and signals the seed it's time to grow.
Here's the thing—don't skip this step. I tried germinating without stratification once and only got 20% success. With proper chilling, you'll see 90%+ germination consistently. The cold period also helps prevent the common issue of seeds rotting before they sprout.
☀️ Step 3: Create the Ideal Germination Environment
After stratification, transfer the seeds to a small container filled with moistened seed-starting mix. Press each seed just ½ inch deep into the soil—any deeper and they struggle to reach the surface. I use a shallow tray because citrus roots are sensitive to overcrowding as they grow.
Cover the container with plastic wrap to maintain humidity, but leave it slightly ajar for airflow. Place it in a warm spot—70-75°F is ideal—like on top of the refrigerator. You'll see tiny white roots emerge within 7-14 days, followed by the shoot breaking through the soil. This is the moment you've been waiting for!
🌿 Step 4: Transplant and Care for Seedlings
Once the seedlings have 2-3 true leaves (not the initial seed leaves), it's time to transplant. Choose 4-inch pots with drainage holes—citrus seedlings need room to develop their root systems. Handle them gently; their stems are delicate and can snap easily. I like to use a small spoon to lift them out of the germination tray to avoid damaging the roots.
Place the pots in bright, indirect light for the first week to help them adjust. After that, gradually introduce them to morning sun, increasing exposure by 1 hour daily. Water when the top inch of soil feels dry—citrus seedlings are prone to root rot if kept too wet. You'll know you're doing it right when the leaves stay bright green and firm to the touch.
⏰ Step 5: Maintain Growth Conditions
Citrus seedlings thrive in 60-75°F temperatures and need 6-8 hours of sunlight daily. If your seedlings start looking leggy (long stems with small leaves), they need more light. Move them closer to a south-facing window or supplement with a grow light. I've had to adjust seedlings twice this way—better to catch it early than let them become permanently weak.
Fertilize lightly with a balanced citrus fertilizer once a month after the third month. The goal is to encourage steady growth without overwhelming the young plants. Watch for new leaf growth as your signal that everything is progressing correctly. With proper care, your seedlings will be ready for larger pots within 6-8 months.
Tips & tricks for perfect orange seed germination
These pro-level insights will help you maximize your citrus seed success and avoid the most common pitfalls.
Seed Selection Matters: Not all oranges are created equal for germination. Choose fresh, firm fruits that haven't been refrigerated for long periods—their seeds contain more viable embryos. I've found that navel oranges and mandarins often yield better results than blood oranges. The seed should feel plump and heavy in your hand, not shriveled or hollow-sounding when tapped.
Stratification Timing Secret: The 7-14 day cold stratification window is crucial, but don't rush it. If your kitchen stays consistently below 65°F, you can extend the refrigeration to 21 days—this mimics longer winter conditions and often improves germination rates. I've noticed that seeds stratified for exactly 14 days at 38-42°F show the most consistent root development when planted.
Transplanting Technique: When moving your seedlings to 4-inch pots, use the "spoon method" I mentioned in Step 4 to preserve root integrity. Gently slide the spoon under the soil to lift the entire root ball rather than pulling by the stem. This minimizes transplant shock and gives your seedlings a stronger start. I've had seedlings recover from rough handling, but they always struggle initially compared to those transplanted carefully.
Light Transition Strategy: The gradual morning sun introduction in Step 4 is non-negotiable—citrus seedlings burn easily. Start with just 1 hour of direct sun on the first day, then add 30 minutes each subsequent day. I've seen seedlings develop sun scorch within hours when exposed to full sun too quickly. A simple shade cloth over half the pot works well for this transition period.
Pro Tips for Orange Seed Germination
- These pro-level insights will help you maximize your citrus seed success and avoid the most common pitfalls.
- Seed Selection Matters: Not all oranges are created equal for germination. Choose fresh, firm fruits that haven't bee...
- Stratification Timing Secret: The 7-14 day cold stratification window is crucial, but don't rush it. If your kitchen ...
Frequently asked questions
Got questions about germinating orange seeds? You’re not alone—this process can feel tricky at first! Below, we’ve answered the most common questions to help you avoid pitfalls and boost your success rate.
How long does it take for an orange seed to germinate?
With the right conditions, orange seeds typically sprout in 2–4 weeks. Some may take longer (up to 6 weeks), especially if the seed is old or stored improperly. Patience is key—keep the soil moist and warm (around 70–75°F) to speed things up.
Why isn’t my orange seed sprouting?
If your seed refuses to germinate, check these common culprits:
- Cold soil: Orange seeds need warmth—try a seedling heat mat if your home is chilly.
- Dry soil: Keep it consistently damp (not soggy) to avoid drying out the seed.
- Old or damaged seeds: Test viability by soaking a few in water—if they float, they’re likely dead.
- Poor drainage: Overwatering can suffocate the seed. Use a pot with drainage holes.
Can I grow an orange tree from any orange seed?
Technically, yes—but the tree may not produce fruit true to the parent orange. Navel or Valencia orange seeds, for example, often grow into sour or hybrid trees. For edible fruit, grafted trees are the way to go. If you’re experimenting, try multiple seeds to increase your odds!
Do I need special soil for germinating orange seeds?
Nope! A simple mix of 50% peat moss or coco coir and 50% perlite or vermiculite works perfectly. Avoid garden soil—it’s too dense and can harbor fungi. Sterilize your mix by baking it at 200°F for 30 minutes to kill pests before planting.
What can I do if my seed sprouts but dies soon after?
This usually happens due to transplant shock or overwatering. Once the seedling has 2–3 true leaves, gradually acclimate it to brighter light (but avoid direct sun). Water only when the top inch of soil feels dry, and use a small pot (6–8 inches) to prevent root stress.
Still stuck? Drop your question in the comments—we’re happy to help!
Wrapping up and next steps
Germinating orange seeds is a rewarding journey that unlocks the magic of growing your own citrus tree! With the right materials, patience, and a few speed-sprouting secrets, you can achieve a 90% success rate—and maybe even a thriving indoor plant.
Whether you're a gardening newbie or a green thumb looking to expand your skills, this process is a fun and educational adventure.
Now that you’re armed with the knowledge, roll up your sleeves and start sowing! 🌱 Start with just one seed, experiment with the techniques shared, and watch your tiny orange seed transform into a vibrant sapling. Happy growing!