
Lawn
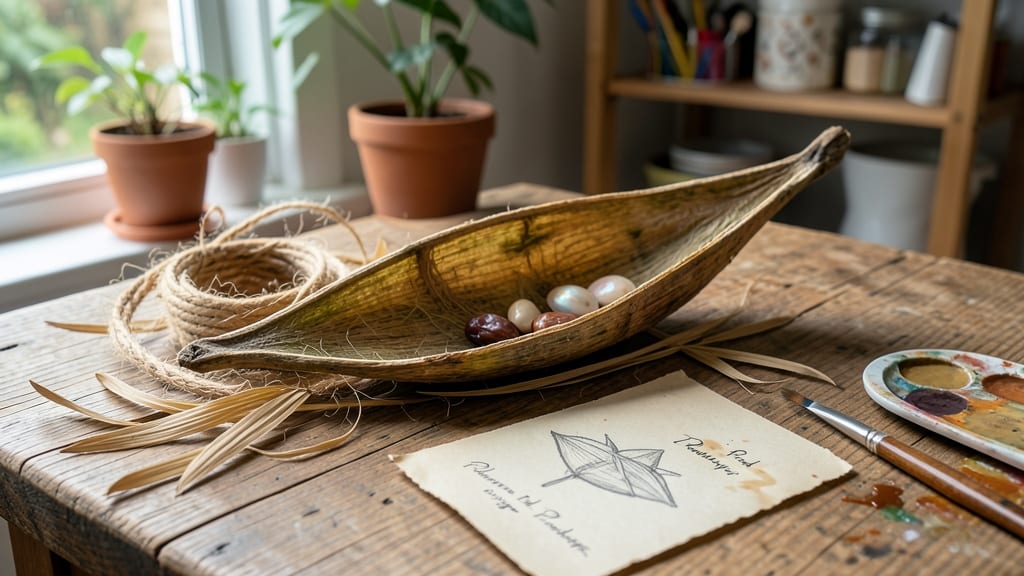
Your garden just got a free, earthy-sculptural upgrade with palm seed pod art. 🌿 These organic shapes—found after a storm or bought from a tropical nursery—transform into wreaths, mobiles, or wall hangings that look like they belong in a jungle but thrive in your backyard.
I’ve turned dozens of these into conversation-starting pieces, and the best part? They’re 100% sustainable and cost next to nothing.
Start with a handful of pods—clean them by soaking in soapy water for 24 hours, then scrubbing off any remaining fibers. Let them dry in the sun for 3-5 days, flipping them daily to prevent mold.
The drying process reveals their natural texture, from glossy browns to sun-bleached tans, perfect for adding organic contrast to any space. No two pieces look alike, which is exactly why they work so well.
Once dry, arrange them into designs: weave them into a rustic wreath for your front door, suspend them from fishing line as a whimsical mobile between patio chairs, or glue them onto driftwood for a coastal-inspired statement piece.
The possibilities are endless, and the results? Stunningly low-maintenance art that evolves with the seasons—think golden tones in autumn or frosted edges after a winter frost.
Pro tip: Pair your creations with native plants or drought-tolerant succulents to keep the natural aesthetic cohesive. If you’re worried about durability, seal the pods with a clear outdoor varnish for extra protection.
This project isn’t just about decor—it’s about turning found treasures into living art that tells a story of your garden’s journey.
📚 In This Guide
- What you need
- Instructions
- Tips and common mistakes
- Wrapping up and next steps
What you need
- ● Palm seed pods: 10–20 fresh or dried pods (depending on project size). Look for Cocos nucifera (coconut) or Borassus flabellifer (palmyra) for durability.
- ● Natural adhesives: White glue (e.g., Elmer’s) – 1 small bottle
- ● OR hide glue (traditional, eco-friendly option) – 1 small packet
- ● Base materials: Bamboo skewers or wooden dowels (¼" diameter, 6–12" long) – 5–10 pieces
- ● Wire (copper or floral wire, 20–22 gauge) – 1 roll
- ● Basic tools: Scissors or craft knife (for trimming)
- ● Pliers (for bending wire)
- ○ Drill with small bit (optional, for pre-drilling holes)
- ○ Finishing touches (optional): Acrylic paint (waterproof, outdoor-safe) – 1–2 colors
- ● Sealer spray (e.g., Mod Podge Outdoor) – 1 can
- ● Natural dyes (turmeric, coffee, or beet juice for staining)
- ● Decorative elements (twine, beads, or dried flowers)
- ● Outdoor workspace (or a well-ventilated area for drying)
- ● Patience! Some designs (like large mobiles) may take hours to assemble.
- ● Weather awareness: Avoid working in direct sunlight or rain.
Step-by-Step instructions for crafting palm seed pod art
Transforming palm seed pods into garden art is simpler than you think—just follow these precise steps.
🌿 Step 1: Harvest and Clean the Seed Pods
Collect fresh palm seed pods from your garden or a nearby landscape (always check local regulations first). Look for pods that are fully mature but still firm—avoid those with soft spots or mold, as they won’t hold their shape. Rinse them gently under lukewarm water to remove dirt and debris, using a soft brush to scrub away stubborn grime from crevices.
Lay the pods on a clean towel to air-dry completely for 24-48 hours. This prevents rot and makes them easier to work with. If you’re in a humid climate, prop them upright in a well-ventilated area to speed up drying. Once fully dry, the pods will feel lightweight and slightly papery—this is your cue they’re ready for crafting.
✂️ Step 2: Design and Cut the Pods
Sketch your design on paper first—whether it’s a whimsical garden ornament, a decorative bowl, or a functional planter. Palm seed pods are naturally fibrous; their strength lies in their layered structure, so preserve as much of that as possible. Use a sharp craft knife or pruning shears to trim excess material, cutting along the natural seams where the pod splits open.
For intricate shapes, score the outer husk lightly with a utility knife before bending—this prevents cracking. If you’re creating a hollow piece like a vase, remove the inner core carefully, leaving the outer shell intact. Test-fit pieces as you go; you’ll notice the pods bend surprisingly well when dampened slightly with water.
🪴 Step 3: Assemble and Secure the Structure
Arrange your cut pieces into your design, using a strong, non-toxic adhesive like E6000 or hot glue to bond them. For added stability, weave natural fibers (like twine or raffia) through the seams of larger pieces. Work in sections, letting each layer dry completely before adding the next—this prevents warping as the adhesive sets.
If your piece includes moving parts (like a hinged door for a planter), reinforce joints with small wooden dowels or bamboo skewers inserted into the pod’s hollow centers. Sand any rough edges with fine-grit sandpaper for a smooth finish. The goal is to highlight the pods’ organic texture while ensuring durability in outdoor conditions.
☀️ Step 4: Seal and Weatherproof
Apply a clear outdoor sealant like polyurethane or a natural beeswax blend to protect your creation from moisture and UV damage. Use a brush to coat all surfaces evenly, including the undersides if your piece will sit on soil. Let it dry for 24 hours in a shaded area—direct sunlight can cause the sealant to cure unevenly.
For extra longevity, consider adding a final layer of matte finish. This not only preserves the pods’ natural color but also prevents them from becoming slippery when wet. Once sealed, place your art in a spot where it can be admired—whether mounted on a fence, nestled in a garden bed, or displayed on a patio table.
💧 Step 5: Maintain and Enjoy
Check your palm seed pod art periodically for signs of wear, especially after heavy rains. If the sealant dulls, reapply a thin topcoat every 6-12 months to keep it vibrant. Avoid placing pieces in areas with prolonged water exposure, like under eaves or in shaded, damp corners of the garden.
Here’s the thing—these pieces evolve over time, developing a beautiful patina as they weather naturally. Embrace the changes; they’re part of the charm. With proper care, your palm seed pod art can last for years, becoming a beloved centerpiece in your outdoor space.
Tips & tricks for perfect palm seed pod art
Here's what nobody tells you—these tricks will transform your palm seed pod creations from simple crafts into heirloom-quality garden art.
Natural Structure is Your Secret Weapon: The layered, fibrous nature of palm seed pods is what gives them strength—don't fight it, work with it. When cutting pieces for your design in Step 2, preserve as much of the natural seams as possible. These seams act like built-in hinges, allowing your pieces to bend naturally when dampened slightly with water. I've found that scoring the outer husk lightly before bending prevents cracking, which is especially important for intricate shapes like animal figures or decorative bowls.
Adhesive Application Strategy: In Step 3, when bonding pieces with E6000 or hot glue, work in small sections and let each layer dry completely before adding the next. This prevents warping that can occur when you try to build up too quickly. For extra stability in larger pieces, I weave raffia through the seams—it adds structural support while maintaining the organic aesthetic. Remember, the goal is durability without sacrificing the natural beauty of the pods.
Sealing Secrets for Longevity: The 24-hour drying time for sealant in Step 4 is non-negotiable for proper curing, but here's the trick: apply your final coat in a shaded area with moderate humidity. Direct sunlight can cause uneven curing, while high humidity may prevent the sealant from fully hardening. For pieces that will sit on soil, always seal the undersides too—this prevents moisture wicking that can cause rot over time. A matte finish not only preserves the natural color but also prevents slipperiness when wet, which is especially important for outdoor planters.
Design Tip for Beginners: Start with simple geometric shapes before attempting complex designs. A basic rectangular planter or circular wall hanging lets you practice cutting techniques and adhesive application without the pressure of intricate details. Once you're comfortable with the material's behavior, you can move on to more ambitious projects like animal sculptures or functional garden furniture. The key is understanding how the pods respond to cutting and bending before committing to elaborate designs.
Pro Tips for Palm Seed Pod Art
- Here's what nobody tells you—these tricks will transform your palm seed pod creations from simple crafts into heirloo...
- Natural Structure is Your Secret Weapon: The layered, fibrous nature of palm seed pods is what gives them strength—do...
- Adhesive Application Strategy: In Step 3, when bonding pieces with E6000 or hot glue, work in small sections and let ...
Frequently asked questions
Got questions about crafting palm seed pod art? We’ve got answers!
Whether you’re a beginner or a seasoned artist, these FAQs will help you bring your garden visions to life with natural flair.
What’s the best time of year to gather palm seed pods for art?
The ideal time is late fall to early winter when pods are fully mature but haven’t yet split open. Avoid rainy seasons—they can cause mold or premature decay. If you’re using store-bought pods, check for firmness and a slight dryness to ensure they’re ready for crafting.
Can I use any palm seed pods, or do I need specific types?
Most palm seed pods work, but coconut, date, or royal palm pods are popular for their size and texture. Smaller pods (like from pygmy date palms) are great for intricate designs, while larger ones suit bold sculptures. Always sanitize pods with a vinegar-water mix to remove pests or bacteria before use.
How do I prevent the pods from cracking or splitting while working?
Work slowly and avoid drilling too close to the edges. Use a sharp, fine-tipped drill bit (1/8” or smaller) and apply gentle pressure. If a pod starts to crack, reinforce it with hot glue or wood glue before proceeding. Let glue dry completely before sanding or painting.
What’s the easiest way to seal and paint palm seed pod art?
Start with a primer designed for natural fibers (like Mod Podge Outdoor) to prevent paint absorption. Use acrylic paint for vibrant colors and seal with a waterproof varnish (e.g., polyurethane) to protect against weather. For a rustic look, skip paint and apply a beeswax or tung oil finish.
How do I protect my palm seed pod art from rain or pests?
Seal all openings with waterproof silicone caulk and apply a pest-repellent spray (like neem oil) before placing outdoors. Elevate sculptures on a pedestal or raised platform to improve drainage. Store pieces indoors during heavy storms or winter to extend their lifespan.
Wrapping up and next steps
Palm seed pod art transforms simple natural materials into stunning, eco-friendly garden masterpieces—perfect for adding organic charm to your outdoor space! 🌿 Whether you're a seasoned crafter or a curious beginner, these handcrafted sculptures prove that creativity thrives with just a little patience and imagination.
Ready to bring your vision to life? Start small with a single pod or dive into a full garden installation—your green thumb (and artistic flair) will thank you! Grab your tools, embrace the process, and let nature inspire your next project.
- 💡 Next step: Sketch your design or gather more pods for a larger piece!
- 📸 Share your creations—tag us and let the world see your palm seed pod art magic!