
Lawn
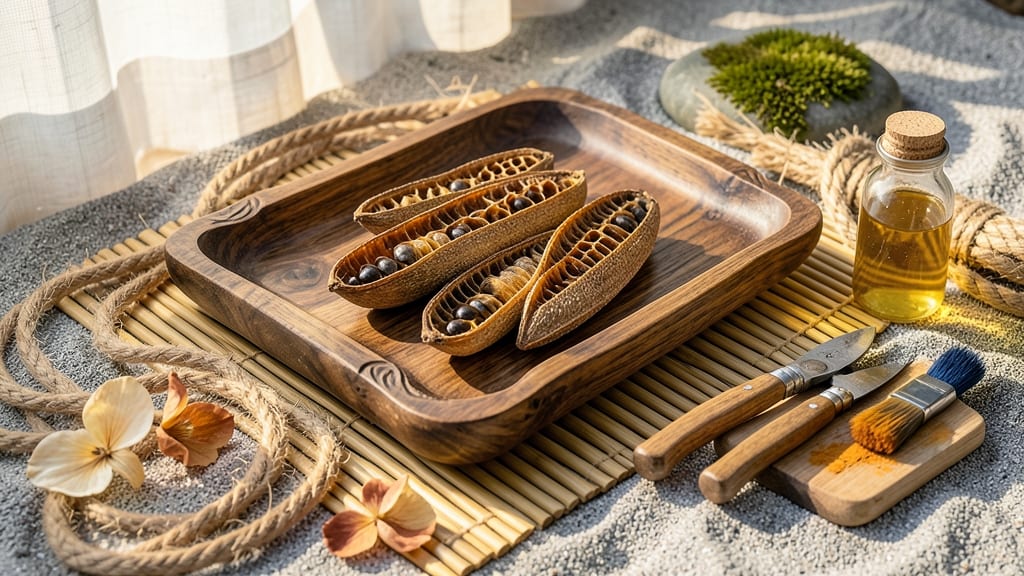
Your outdoor space deserves that tropical statement—without the price tag of store-bought decor. 🌴 Palm tree seed pods are nature’s perfect canvas, waiting to be transformed into one-of-a-kind art that blends seamlessly with your garden.
I’ve turned these organic treasures into everything from rustic lanterns to elegant wall hangings, and the best part? They’re completely sustainable and free if you know where to look. The magic starts with sourcing: collect pods from fallen trees (always check local regulations first!) or buy them from eco-conscious suppliers.
Clean them thoroughly, then let your creativity flow—stain them for a polished look, leave them natural for a raw aesthetic, or even carve simple designs. The possibilities are endless, and the results feel like a vacation in your own backyard.
Imagine lanterns casting a warm glow on your patio or a driftwood-style sculpture framing your front door. These pieces age beautifully, developing character over time as they weather naturally. The best part? You’re upcycling what would otherwise be waste, giving your garden a unique, earthy soul.
Perfect for coastal homes, Mediterranean-style spaces, or anyone craving a touch of the tropics without the travel. Let’s turn those pods into art that tells a story—yours.
📚 In This Guide
- What you need
- Instructions
- Tips and common mistakes
- Wrapping up and next steps
What you need
- ● Palm tree seed pods: 5–10 pods (depending on project size; larger pods = bolder art)
- ● Clean, dry, and free of debris (soak in warm water for 10 mins if needed)
- ● Adhesives & Sealants: Epoxy resin (1–2 small bottles, like ArtResin for durability)
- ○ Waterproof wood glue (optional, for extra reinforcement)
- ● Clear acrylic sealer spray (for weatherproofing)
- ● Base Materials: Wooden plank, driftwood, or metal tray (for mounting; 12"x12" or larger)
- ● Sandpaper (120–220 grit, for smoothing edges)
- ○ Decorative Extras (Optional but Fun!): Natural twine or jute rope (for wrapping)
- ● Acrylic paint & brushes (for custom colors)
- ● Small pebbles or shells (for added texture)
- ● Workspace: Cover a table with newspaper or a silicone mat for easy cleanup.
- ● Safety: Wear gloves and a mask when handling resin or sanding.
- ● Pro Tip: Arrange pods on your base before gluing to visualize the design! 💡
- ● Outdoor Prep: Ensure all materials are fully sealed and cured (24–48 hours) before placing outside.
Step-by-step instructions for crafting palm tree seed pod art
Transform those tropical seed pods into stunning, one-of-a-kind decor that brings the beach to your backyard.
🪴 Step 1: Gather and Clean Your Seed Pod Materials
Collect 4-6 mature palm seed pods—look for ones that are fully dry and have shed their fibrous husks naturally. Rinse them thoroughly under lukewarm water to remove dirt and debris, then let them air-dry completely in direct sunlight for 24-48 hours. This step is critical: any lingering moisture will cause rot or mold during assembly.
Use a soft-bristle brush to gently scrub away stubborn dirt from crevices. If the pods have residual fibers, soak them in warm, soapy water for 10 minutes, then rinse and dry again. The goal is to reveal their natural, weathered beauty—no chemicals or harsh scrubbing needed. Once dry, arrange them on a flat surface to admire their unique shapes before assembly.
✂️ Step 2: Design Your Art Structure and Prep the Base
Sketch a simple tropical-inspired design—think fan shapes, layered tiers, or a freeform cluster. For stability, use a wooden base (like a 6-inch square board) or a wide, shallow ceramic planter as your foundation. If using wood, sand it lightly to prevent splinters, then apply a non-toxic outdoor sealant to protect against moisture.
For a 3D effect, consider attaching pods to bamboo stakes or copper wire before mounting. Bend the wire around each pod’s natural curves, securing with twine or fishing line—this lets you shape them into dynamic poses without damaging the pods. Test-fit your design on the base before final assembly to ensure balance and visual harmony.
💧 Step 3: Secure Pods with Eco-Friendly Adhesives
Use hot glue for quick, sturdy bonds or E6000 craft adhesive for a more permanent hold. Apply small dots of adhesive to the back or underside of each pod, then press firmly onto your base or wire framework. Work in layers, starting with the largest pods as anchors and filling in with smaller ones to create depth.
Let each layer dry for 10-15 minutes before adding more—this prevents shifting as the adhesive sets. If using wire, twist it tightly around the pod’s stem or base, then tuck the ends into the adhesive for extra security. For a natural look, leave some pods slightly loose or angled to mimic organic growth patterns.
☀️ Step 4: Seal and Weatherproof Your Art
Once fully assembled, apply a matte outdoor sealant (like Minwax Polycrylic) to protect against UV rays, rain, and humidity. Use a soft brush to apply a thin, even coat, focusing on the wooden base or wire components. Allow it to dry for 4-6 hours, then add a second coat for added durability.
For a tropical finish, lightly brush on gold or bronze leafing powder (diluted with water) for a sun-kissed glow. Alternatively, leave the pods natural for a rustic, earthy aesthetic. Place your art in a sheltered outdoor spot—near a patio, under a pergola, or beside a pool—to let it shine without direct sun exposure.
🌿 Step 5: Style and Maintain for Long-Lasting Beauty
Arrange your palm pod art near complementary tropical plants like monstera leaves, bamboo, or orchids to enhance the vibe. For extra flair, add fairy lights or solar-powered lanterns to highlight the textures at night. Check the sealant annually and reapply if the pods feel dry or brittle.
If pods lose their luster, gently wipe them with a damp cloth and a mild soap solution, then reseal. With proper care, your art will stay vibrant for years, becoming a conversation piece that celebrates nature’s artistry. Now, step back and admire your tropical masterpiece!
Tips & tricks for perfect palm tree seed pod art
These game-changing tricks will help you create show-stopping tropical decor that wows every time—no crafting experience required!
Selection is Everything: Look for seed pods with interesting textures and natural curves—the more unique their shapes, the more dynamic your final piece will be. I always collect pods that have already shed their fibrous husks naturally; these will hold up better over time without requiring extra cleaning. If you're working with freshly fallen pods, give them that extra 48-hour sun-drying time to prevent mold during assembly.
Design Like a Pro: Before you start gluing, sketch your design on paper first—this saves time and adhesive! I recommend starting with a simple base shape (like a fan or tiered cluster) and building outward. For that 3D effect mentioned in Step 2, copper wire is my secret weapon—it's strong, flexible, and can be shaped to mimic natural growth patterns without damaging delicate pods.
Adhesive Application Strategy: When using hot glue or E6000 adhesive in Step 3, less is more. Tiny dots work better than globs—they create secure bonds without looking bulky. For the 10-15 minute drying time between layers, I set a timer and use the time to clean up any excess adhesive with a damp cloth. This keeps your workspace tidy and prevents sticky fingers!
Sealant Secrets: The 4-6 hour drying time for your outdoor sealant might seem long, but it's worth it for durability. I apply the second coat the next morning to ensure maximum protection against UV rays and humidity. For that tropical finish, I mix gold leafing powder with just enough water to create a washable consistency—this gives a subtle shimmer without overwhelming the natural beauty of the pods.
Pro Tips for Palm Tree Seed Pod Art
- These game-changing tricks will help you create show-stopping tropical decor that wows every time—no crafting experie...
- Selection is Everything: Look for seed pods with interesting textures and natural curves—the more unique their shapes...
- Design Like a Pro: Before you start gluing, sketch your design on paper first—this saves time and adhesive! I recomme...
Frequently asked questions
Got questions about turning palm tree seed pods into stunning art? We’ve got answers! Here are some of the most common queries to help you get started—or troubleshoot along the way.
Can I use any palm tree seed pods for art, or do I need a specific type?
Most palm seed pods—like those from coconut, royal, or Mexican fan palms—work well for art! Look for pods with interesting textures, shapes, or natural cracks. Avoid overly soft or rotting pods, as they won’t hold up. If you’re unsure, test a small piece first to gauge durability.
How long does it take for palm seed pod art to dry or cure?
Drying time depends on the pod’s size and thickness. Smaller pieces may dry in 3–7 days in a well-ventilated, dry space (like a sunny porch or dehydrator set to 115°F). Larger or thicker pods can take 2–4 weeks. Patience is key—rushing can cause cracking or warping.
What’s the best way to preserve palm seed pod art outdoors?
Seal your finished pieces with a waterproof, UV-resistant sealant (like polyurethane or outdoor varnish) to protect against moisture, sun, and pests. For extra durability, add a clear acrylic coating. Store or display pieces in shaded areas to prevent fading over time.
What should I do if my palm seed pod art develops mold or bugs?
If mold appears, scrub the piece with a 10% bleach solution, rinse thoroughly, and let it dry completely in sunlight. For bugs (like beetles), freeze the piece for 48 hours or treat it with food-grade diatomaceous earth before sealing. Always work in a clean, dry space to prevent future issues.
Are there easier alternatives to palm seed pods for similar tropical art?
Try dried citrus slices, bamboo, driftwood, or even repurposed coconuts for a similar vibe. If you want a low-maintenance option, resin-coated shells or painted terracotta pots can mimic the organic look without the drying hassle.
Wrapping up and next steps
Transforming palm tree seed pods into stunning art isn’t just about creativity—it’s about bringing a slice of the tropics into your outdoor space!
Whether you’re crafting a rustic wall hanging, a whimsical mobile, or a functional planter, these natural treasures add organic texture, warmth, and personality to any lawn or patio. The best part? You’re upcycling nature’s discarded beauty into something uniquely yours.
Ready to take the next step? Start small—grab a few seed pods from your yard or a local park and experiment with simple designs. Or, if you’re feeling bold, dive deeper by exploring advanced techniques like resin sealing or mixed-media projects.
Your outdoor oasis (and your creative confidence!) will thank you. 🌴✨