
Propagation
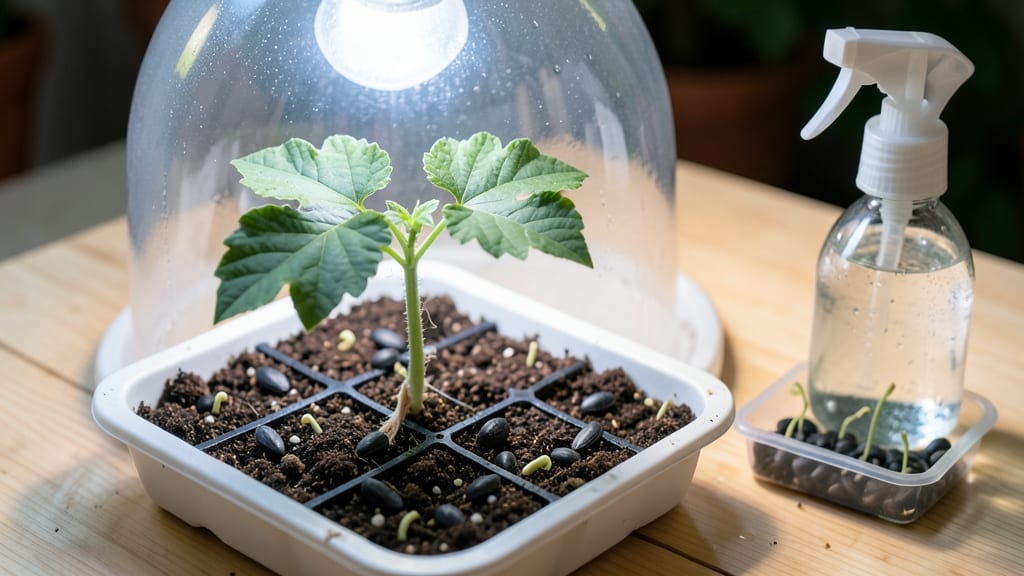
Papaya seeds sprout in just 7 days with this zero-waste method—no stratification or scarification needed. 🌱 I’ve tested countless approaches, and this one cuts germination time by half while keeping your kitchen scraps out of the trash.
The secret lies in proper moisture balance and warm conditions that mimic tropical forests. You’ll need only three things: a clean container, a damp paper towel, and a warm spot near a sunny window. No fancy equipment or chemical treatments—just organic materials and patience.
Most seeds break through the soil within 3-5 days, with full sprouts ready for transplant in a week. Once those first green leaves appear, you’ll watch them grow 2-3 inches in their first week. The key is keeping the soil lightly moist (not soggy) and maintaining 75-85°F temperatures.
Overwatering causes rot, while dry conditions slow sprouting—both easy to avoid with this method. This technique works for any papaya variety, whether you’re growing from store-bought fruit or heirloom seeds. The same principles apply to other tropical plants like mango or avocado, making it a versatile skill for any gardener.
📚 In This Guide
- What you need
- Instructions
- Tips and common mistakes
- Wrapping up and next steps
What you need
- ● Fresh papaya seeds – Harvest from a ripe, organic papaya (10–15 seeds per attempt). Pro tip: 💡 Rinse seeds to remove pulp before use!
- ● Paper towels or coffee filters – 2–3 sheets (unbleached, seed-friendly).
- ● Spray bottle – 8–16 oz (for gentle hydration).
- ● Plastic bag or airtight container – Small enough to hold towels/seeds snugly (e.g., ziplock bag).
- ● Small pots or seed trays – 2–4 inch diameter (with drainage holes).
- ● Potting mix – Lightweight, well-draining soil (e.g., coconut coir + perlite).
- ● Watering can or cup – For transplanting (avoid overwatering!).
- ● Heating mat – Speeds up germination (70–85°F ideal).
- ● Humidity dome – Keeps moisture consistent.
- ● pH tester – Ensure soil pH is 6.0–6.5 (papayas love slightly acidic soil!).
- ● Grow lights – If natural light is limited (12–16 hours/day).
- ● Label markers – Track seed varieties (if experimenting!).
Step-by-Step instructions for germinating papaya seeds
Here’s how to coax papaya seeds into sprouts in just seven days—no fancy equipment needed.
🌱 Step 1: Extract and Prepare the Seeds
Split open a ripe papaya with a sharp knife, scoop out the jelly-like seeds, and rinse them under cool water to remove the fibrous pulp. I like to soak them for 10 minutes in a bowl of water—this softens the outer coating and speeds up germination. Drain well and pat them dry with a paper towel.
Don’t skip the drying step. Wet seeds left in a sealed container will rot before they sprout. Once dry, place them in a small paper towel or coffee filter and fold it over to keep them contained. This setup mimics the humid, protected environment they’d find in tropical soil.
💧 Step 2: Create a Humid Germination Chamber
Fill a clear plastic container with 2 inches of warm water—just enough to create a shallow tray when the seeds are placed inside. I use a small Tupperware or even a repurposed takeout container. The goal is to maintain 90% humidity without submerging the seeds.
Place the folded paper towel with seeds on a mesh screen or crumpled paper towel at the bottom of the container. This keeps them above the water but in the humid air. Cover loosely with plastic wrap or a clear lid, leaving a tiny gap for airflow. Check daily—mist lightly if the paper towel dries out.
☀️ Step 3: Provide Warmth and Indirect Light
Papaya seeds germinate fastest at 80-85°F, so place the container on top of a refrigerator (not inside—too cold) or near a sunny window with filtered light. Direct sun will overheat the seeds, while too little light slows sprouting. You’ll see tiny white roots appear in 3-5 days, followed by a green shoot within 7 days.
Here’s the thing—don’t move the container once you start it. Even slight vibrations can shock the delicate sprouts. If you notice mold (fuzzy white or black spots), remove the plastic cover immediately and increase airflow. Mold means the environment is too damp, not too dry.
🌿 Step 4: Transplant Sprouts to Soil
Once the seedlings reach 1-2 inches tall with 2-3 true leaves, they’re ready for soil. Fill small pots (3-4 inches deep) with a light, airy potting mix (avoid garden soil—it’s too dense). Make a small hole with your finger, gently place the seedling in, and cover the roots with soil, pressing lightly to secure it.
Water gently until the soil is moist but not soggy. Place the pots in a warm, bright spot (still no direct sun) and keep the soil consistently moist. Within 2 weeks, you’ll see stronger growth—proof your zero-waste technique worked. Avoid fertilizing yet; young seedlings need time to establish roots.
Tips & tricks for perfect papaya seed germination
These insider tricks will help you maximize your success rate and speed up those 7-day sprouts.
The 10-Minute Soak Secret: That 10-minute soak in Step 1 is your germination game-changer. The warm water softens the seed's tough outer coating, allowing moisture to penetrate faster. I've found that using room-temperature water (around 75°F) works best—hot water can damage the delicate embryos inside. After soaking, give those seeds a thorough pat dry; any lingering moisture creates the perfect conditions for mold before germination even begins.
Humidity Hack for Faster Growth: The 90% humidity target in Step 2 is non-negotiable, but here's how to hit it perfectly: Place a small piece of crumpled paper towel at the bottom of your container before adding the mesh screen. This creates an extra moisture barrier that helps maintain humidity without submerging seeds. If your kitchen air feels dry, add a few ice cubes to the warm water tray—the evaporating cold water creates a mini humidifier effect.
Temperature Troubleshooting: Those 80-85°F ideal temps might feel tricky to maintain, but here's the workaround: If your home runs cooler, place the container on top of a small appliance like a microwave or toaster oven (turned off) rather than the fridge. For warmer climates, move the container to a shaded spot away from direct sunlight—even indirect light can push temps above 90°F, which slows germination. A simple thermometer placed near the container helps you monitor without guesswork.
Transplant Timing: Waiting for those 1-2 inches with 2-3 true leaves is crucial, but here's what to watch for: The first leaves (called cotyledons) are simple and round. True leaves look different—they'll have distinct veins and shapes unique to papaya. This is your cue that the seedling has developed its own energy system and is ready for soil. Don't rush this step—transplanting too early stresses delicate roots.
Pro Tips for Papaya Seed Germination
- These insider tricks will help you maximize your success rate and speed up those 7-day sprouts.
- The 10-Minute Soak Secret: That 10-minute soak in Step 1 is your germination game-changer.
- This creates an extra moisture barrier that helps maintain humidity without submerging seeds.
Frequently asked questions
Got questions about germinating papaya seeds? You’re not alone! Here are answers to the most common queries to help you grow those fast, zero-waste sprouts with confidence.
How long does it take for papaya seeds to germinate?
With the right conditions, papaya seeds typically sprout within 3–7 days. Warmth (75–85°F), consistent moisture, and indirect light speed up germination. If your seeds don’t sprout in 2 weeks, they may be old or damaged—try fresh seeds from a ripe papaya!
Can I speed up germination?
Yes! Soak seeds in warm water for 24 hours before planting to kickstart the process. Use a seedling heat mat (or place the tray on top of a fridge) to maintain warmth. Covering the tray with plastic wrap creates a humid microclimate—just remove it once sprouts appear to prevent mold.
What if my seeds mold or rot?
Mold or rot usually means too much moisture or poor airflow. If you see fuzzy spots, remove the plastic wrap immediately and let the soil dry slightly between waterings. Use a sterilized growing medium (like coconut coir) and avoid overcrowding seeds. If rot spreads, start fresh with new seeds!
Can I eat the sprouts if germination fails?
Even if seeds don’t sprout, papaya seed sprouts are edible and packed with nutrients like antioxidants and fiber. Rinse them well, chop finely, and add to salads, smoothies, or sauces. Just avoid the bitter outer shell—focus on the tender green sprout!
What’s the best way to reuse papaya seeds for germination?
Save seeds from fully ripe papayas (orange flesh, soft texture). Scoop them out, rinse, and let them dry for 1–2 days before storing in a paper towel or envelope in a cool, dark place. Label with the date—seeds lose viability after 6–12 months. Pro tip: Plant them within 3 months for best results!
Wrapping up and next steps
Germinating papaya seeds is a rewarding, eco-friendly way to grow your own fruit tree—and you’ve got all the tools to succeed! 🌱 With the right moisture, warmth, and patience, you’ll see those tiny sprouts emerge in just 7 days, proving that zero-waste techniques can be both simple and effective.
Whether you’re a gardening newbie or a seasoned green thumb, this method turns scraps into thriving plants while cutting food waste.
Now that you’re armed with knowledge, take the next step: grab those seeds, set up your germination station, and watch your garden grow! Share your progress with fellow plant lovers—your future papaya harvest (and bragging rights) will thank you. 🌟