
Lawn
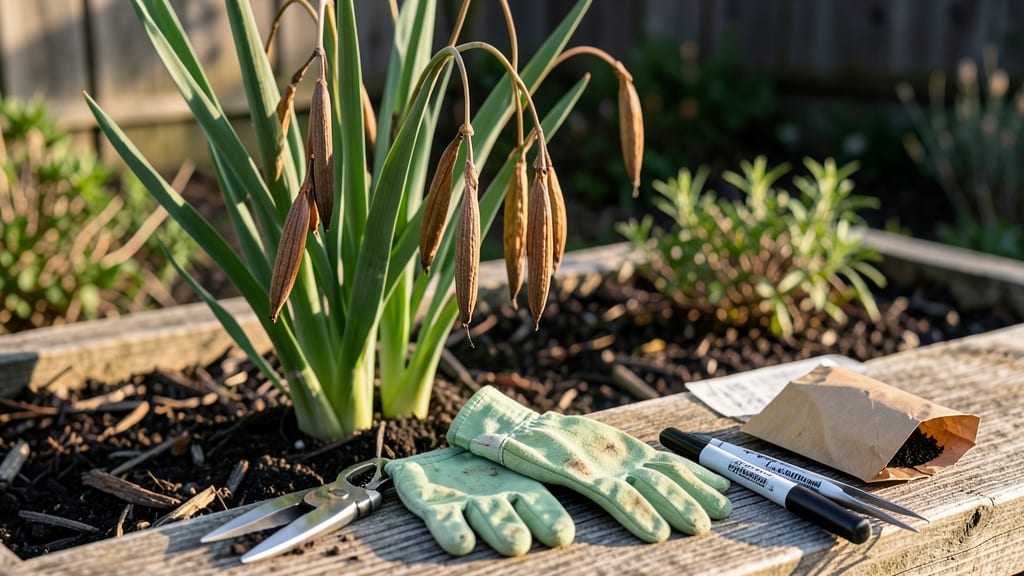
Twisting open iris seed pods reveals tiny treasures that could grow into your next garden showstoppers. 🌿 Most gardeners skip this step—planting iris from seed is slower than division, but there’s something magical about watching those delicate blooms emerge from a seed you nurtured yourself.
The key? Harvesting pods at the right stage and planting them properly for the best germination rates.
First, you’ll need well-draining soil and a sunny spot—iris loves full sun and hates soggy roots. Collect mature pods when they turn brown and papery, then twist them gently to release the flat, seed-like capsules inside.
These aren’t your typical round seeds; they’re more like tiny, papery discs that need just the right conditions to sprout. Plant them shallowly, barely covering them with soil, and keep the area moist but not waterlogged.
Germination can take patience—sometimes up to a year—but once those first green shoots appear, you’ll know it was worth the wait. Young iris plants grow slowly, so give them space and avoid disturbing the soil.
By the second year, you might see tiny blooms, though full-size flowers take a few more seasons. The payoff? A clump of irises that multiplies naturally, all from seeds you harvested yourself.
Most gardeners prefer dividing established rhizomes, but there’s a quiet satisfaction in growing irises from seed. If your pods don’t produce seeds, don’t worry—it’s common. Next time, focus on letting a few plants bloom fully to ensure a better harvest.
With the right care, your twist-resistant pods could become the start of a stunning iris collection.
📚 In This Guide
- What you need
- Instructions
- Tips and common mistakes
- Wrapping up and next steps
What you need
- ● Iris seed pods: 5–10 mature, plump pods (harvest when they turn brown and papery, typically late summer to early fall).
- ● Pruning shears or scissors: Sharp, clean pair for harvesting pods without damaging the plant.
- ● Paper bags or breathable mesh sacks: 2–3 bags (1–2 pods per bag) to store pods while drying.
- ○ Gloves (optional but recommended): Thin gardening gloves to protect hands from sharp pod edges.
- ● Seed-starting mix: 1–2 gallons of well-draining, sterile potting soil (or coco coir blend).
- ● Small pots or trays: 4–6 shallow containers (4–6 inches deep) with drainage holes.
- ● Spray bottle with water: For lightly misting soil or pods during the process.
- ● Labeling tags & marker: To track seed varieties and planting dates.
- ● Humidity dome or plastic wrap: To create a mini greenhouse effect while seeds germinate.
- ○ Heat mat (optional for indoor starts): Helps speed up germination in cooler climates.
- ● Twine or rubber bands: To secure pods to the bag for better airflow.
- ● Journal or notebook: For recording growth stages, pod maturity dates, and germination progress.
- ● Fungicide (mild, like neem oil): Preemptive measure to prevent mold during drying.
Step-by-Step guide to harvesting and planting iris seed pods
Here’s how to collect and plant iris seed pods for healthy, twist-resistant blooms next season.
🌱 Step 1: Identify and Harvest Mature Seed Pods
Wait until the seed pods turn brown and papery—usually late summer to early fall—before harvesting. Iris pods are long and slender, often resembling dried beans. Use clean pruning shears to snip the pods from the stalk, leaving a small stem attached to prevent damage. Handle pods gently to avoid crushing them.
Real talk: If you harvest too early, the seeds won’t be fully developed. If you wait too long, the pods may split open on their own, scattering seeds unpredictably. Aim for fully brown pods with no green remnants.
🪴 Step 2: Dry and Store Seed Pods Properly
Spread the harvested pods in a single layer on a paper towel or mesh screen in a cool, dry, well-ventilated area for 2-3 weeks. This prevents mold and ensures seeds dry evenly. Avoid direct sunlight, which can overheat and damage the pods.
Once fully dry, store the pods in a paper envelope or breathable fabric bag in a cool, dark place (like a pantry or basement). Label the bag with the iris variety and harvest date—this helps track maturity and viability.
⏰ Step 3: Extract Seeds and Prepare for Planting
When ready to plant, gently twist or pinch open the dried pods to release the seeds. Iris seeds are small and flat, often with a slightly wrinkled texture. Remove any debris or empty pods, then soak the seeds in lukewarm water for 12-24 hours to soften the outer coating and encourage faster germination.
After soaking, plant the seeds ½ inch deep in a well-draining seed-starting mix (not garden soil). Use a small container or seed tray with drainage holes to prevent waterlogging, which can rot the seeds.
☀️ Step 4: Provide Ideal Growing Conditions
Place the container in a bright, indirect light spot (like a north-facing window or under grow lights). Iris seeds need consistent moisture but no soggy soil—water gently when the top inch feels dry. Germination can take 4-8 weeks, so be patient.
Once seedlings emerge, provide 6+ hours of sunlight daily and gradually harden them off before transplanting outdoors in spring. Choose a sunny, well-draining location with 6 inches of amended soil to support root growth.
🌿 Step 5: Transplant Seedlings for Long-Term Growth
Transplant seedlings after the last frost when they have 2-3 true leaves. Dig a hole twice as wide as the root ball but only as deep as the container. Space seedlings 12-18 inches apart to allow room for mature rhizomes.
Water deeply after planting to settle the soil, then mulch with 2 inches of organic mulch to retain moisture and suppress weeds. Iris seedlings are slow to mature—blooms may take 2-3 years—so consistent care pays off.
Tips & tricks for perfect iris seed pod planting
Here's what nobody tells you about growing twist-resistant irises from seed pods—these little tricks make all the difference.
Pod Maturity Cues: The key to viable seeds is waiting for pods that are completely brown and papery with no green remnants. I learned this the hard way after planting premature pods that yielded only weak seedlings. Give them that final week of drying on the plant if needed—the extra patience pays off with stronger blooms.
Drying Strategy: That 2-3 week drying period in Step 2 is non-negotiable for preventing mold. I recommend placing your drying setup near a dehumidifier if your home tends to be damp. You can also add a small fan on low circulation to keep air moving gently—this helps prevent any potential mold spores from settling on your precious pods.
Seed Extraction Technique: When opening dried pods in Step 3, use a clean, sharp pair of nail clippers rather than your fingers. This gives you more control and prevents accidental crushing of the delicate seeds. Place a white paper towel underneath to catch any stray seeds—iris seeds are tiny and can easily disappear!
Germination Boost: After your 12-24 hour soak, I've found adding a tiny pinch of seaweed fertilizer to the water gives seedlings a subtle growth advantage. The micronutrients help strengthen cell walls, which translates to more twist-resistant stems later. Just use a scant 1/8 teaspoon per quart of water—iris seeds are sensitive to over-fertilization.
Pro Tips for Planting Iris Seed Pods
- Here's what nobody tells you about growing twist-resistant irises from seed pods—these little tricks make all the difference.
- Pod Maturity Cues: The key to viable seeds is waiting for pods that are completely brown and papery with no green remnants.
- Drying Strategy: That 2-3 week drying period in Step 2 is non-negotiable for preventing mold.
Frequently asked questions
Got questions about planting iris seed pods? You’re not alone! Here are some of the most common concerns—and their answers—to help you grow thriving irises from seed.
When is the best time to harvest iris seed pods?
Harvest iris seed pods after they’ve dried completely on the plant (usually late summer to early fall). If you pick them too soon, the seeds won’t be viable. Wait until the pods turn brown and papery—then twist gently to release the seeds inside. Pro tip: Store harvested seeds in a cool, dry place until planting season!
How long does it take for iris seeds to germinate?
Patience is key! Iris seeds can take 3–12 months to germinate, depending on conditions. Some may even wait until the following spring. Keep the soil moist but not soggy and maintain consistent temperatures (around 60–70°F) for the best results.
Can I plant iris seeds directly in the ground, or should I start them indoors?
Both work, but direct sowing outdoors is easiest for most gardeners. Scatter seeds on well-draining soil in early fall or spring, then lightly cover with ¼ inch of soil. If you prefer starting indoors, use small pots with seed-starting mix and transplant seedlings after they’ve developed roots.
Why aren’t my iris seeds germinating?
Several factors could be at play: overwatering (rots seeds), poor soil drainage (suffocates roots), or improper timing (seeds need cold stratification). Try stratifying seeds (chilling them for 4–6 weeks) or testing your soil’s moisture retention. If all else fails, check seed viability—some may have spoiled during storage.
Will iris seeds grow into true-to-type plants like the parent?
Not always! Iris seeds often produce off-type plants with different colors or forms due to cross-pollination. For consistent blooms, consider dividing mature iris rhizomes instead. If you love the thrill of surprises, though, growing from seed can yield unique and exciting hybrids!
Wrapping up and next steps
Growing irises from seed pods is a rewarding journey that unlocks a world of vibrant blooms and unique varieties! 🌸 By following these steps—from harvesting twist-resistant pods to nurturing young sprouts—you’re not just planting seeds; you’re cultivating future garden stars. Now that you’re armed with the know-how, take the next step: mark your calendar for next spring and prepare your soil for these delicate seedlings.
Ready to dive in? Start small, stay patient, and watch your garden transform! Happy planting! 🌱