
Lawn
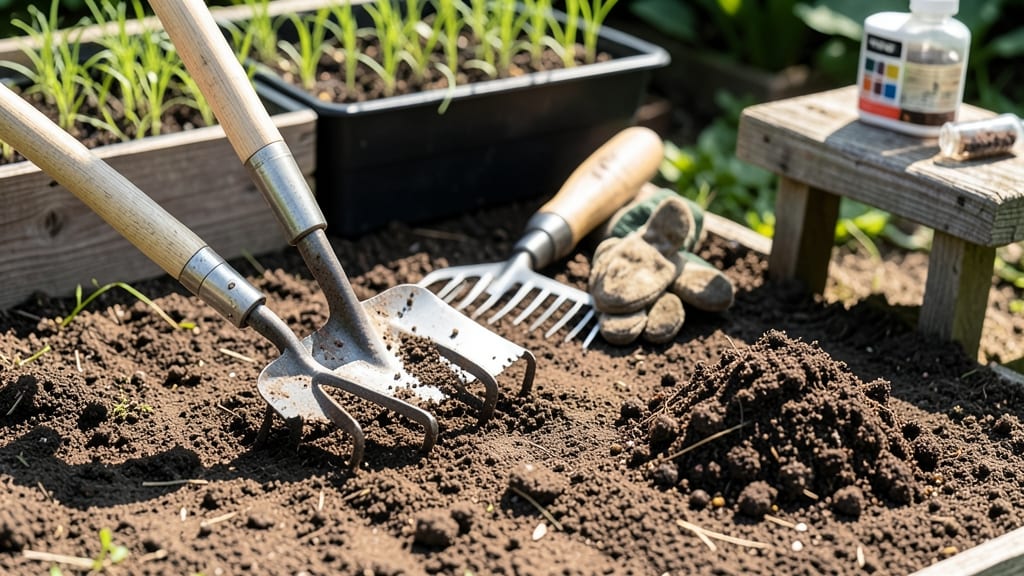
Preparing the perfect seed bed turns fluffy soil into a root rocket. ✨ I’ve learned that the difference between a fast germination and a frustrating wait often comes down to how well you loosen the soil—without turning it into mud.
The right texture lets roots spread easily, while compacted dirt strangles new growth before it starts.
Start with a spot that gets at least 6 hours of sunlight daily and measure your bed dimensions based on what you’re planting—12-inch rows work well for most seeds. Clear weeds first (they’ll steal nutrients), then break up the top 6 inches of soil with a fork or tiller.
For clay-heavy soil, mix in 2-3 inches of compost to improve drainage and aeration.
Once the bed is loose and level, water it gently until the top inch feels damp—not soggy. This mimics spring rains and helps seeds make contact with moist soil for quick germination.
The payoff? Seedlings emerge in half the time and grow stronger from the start, ready to outcompete weeds before they take hold.
Works for both spring and fall planting, though cooler climates may need a light row cover to protect tender sprouts. The key is consistency—overworking the soil or skipping the compost step slows everything down. Let’s get those roots growing!
📚 In This Guide
- What you need
- Instructions
- Tips and common mistakes
- Wrapping up and next steps
What you need
- ● Garden fork or broadfork: 1 (for loosening compacted soil without turning it over).
- ● Garden rake: 1 (preferably a bow rake for leveling and removing debris).
- ● Hoe: 1 (a stirrup hoe or warrior hoe works best for weeding and breaking soil clods).
- ● Shovel: 1 (for digging deeper or amending soil in specific areas).
- ● Garden gloves: 1 pair (to protect your hands from thorns, rocks, or rough soil).
- ● Watering can or hose: 1 (with a gentle spray nozzle for even moisture).
- ○ Soil test kit (optional but recommended): 1 (to check pH and nutrient levels before seeding).
- ● Compost: 2–3 inches (spread evenly to improve soil structure and fertility).
- ○ Peat moss or coco coir (optional): 1–2 inches (for sandy or clay-heavy soils to improve aeration).
- ● Organic matter (leaf mold, well-rotted manure): 1–2 inches (boosts microbial activity).
- ● Lime (if soil is acidic): Follow kit instructions (usually 1–2 lbs per 100 sq ft).
- ○ Slow-release fertilizer (optional): 1–2 lbs per 100 sq ft (check NPK ratio for your plants).
- ● Clear the area of weeds, rocks, and debris (use a weeding tool or hands for small patches).
- ● Choose a sunny spot with at least 6–8 hours of sunlight daily.
- ● Check the weather: Aim for mild, dry conditions (avoid preparing soil before rain).
- ● Know your seed type (e.g., grass, veggies, flowers) to tailor soil prep depth (typically 2–4 inches).
Step-by-Step instructions for creating the perfect seed bed
Here's how I transform dense soil into a fluffy, root-friendly foundation that speeds germination and growth.
🌱 Step 1: Clear and Mark Your Planting Area
Start by removing all existing vegetation, rocks, and debris from your 4-foot square area. I use a stiff garden rake to pull up weeds and their roots—don't leave any behind, or they'll compete with your seedlings. Mark the boundaries with wooden stakes or spray paint if you're working near existing plants.
This is where precision matters. Measure 12 inches beyond your intended planting area on all sides—you'll need that extra space for tilling without disturbing adjacent plants. I like to walk the perimeter with a hose to visualize the exact space before digging begins.
🪴 Step 2: Loosen Soil to 12 Inches Deep
Use a broadfork or digging fork to break up compacted soil layers without turning them over. I work the fork in vertically, 6 inches apart, then wiggle it back and forth to create vertical slices. This aerates without disturbing the soil structure that beneficial microbes rely on.
Stop when you can push the fork in easily with just your boot weight. If it feels like you're fighting resistance at 8-10 inches, you've hit a hardpan layer. In that case, focus on the top 6 inches and we'll address deeper compaction in future seasons through organic matter addition.
💧 Step 3: Add Organic Matter and Mix Thoroughly
Spread 2-3 inches of compost or well-rotted manure evenly across the area. For faster results, I mix in 1 inch of perlite or coarse sand to improve drainage in heavy clay soils. Work these amendments into the top 6 inches using a garden fork or tiller set to shallow depth.
Your goal is to create a uniform texture—like crumbly cake batter. Run your fingers through the soil: it should feel light but still hold its shape when gently squeezed. If it feels gritty or powdery, add more compost. If it sticks together like wet clay, incorporate additional sand.
☀️ Step 4: Level and Prepare for Planting
Rake the surface smooth with a bow rake, creating gentle mounds where water will naturally collect. I like to make subtle 1-inch high ridges along the edges to contain seeds and prevent erosion during watering. Press down lightly with the back of your rake to create firm planting lines.
This final step ensures even seed-to-soil contact. Run your hand across the surface—it should feel uniformly firm with no clumps larger than a quarter. If you see bare spots where soil has washed away, sprinkle additional compost and rake again before planting.
⏰ Step 5: Water and Wait for Ideal Planting Conditions
Give the bed a thorough watering to settle everything in place. I use a gentle rain nozzle setting to avoid creating compaction on the surface. Let the water soak in completely—you should see moisture appear at the 6-inch depth within 20-30 minutes.
Wait 2-3 days before planting to let the soil settle and for any remaining clumps to break down naturally. The perfect seed bed will have a slightly damp, cool feel at planting time—like a well-wrung sponge. This gives seeds the ideal environment to germinate quickly without drying out.
Tips & tricks for perfect seed bed preparation
These practical strategies will help you create an ideal planting environment that speeds germination and prevents common gardening headaches.
Precision in Step 1: When clearing your 4-foot square area, I recommend using a string line and stakes to create perfectly straight edges. This makes subsequent steps easier and ensures your planting area is uniform. For larger gardens, consider using a garden hose to outline the space before marking—it's surprisingly accurate and saves time. The extra 12 inches of buffer zone is crucial for avoiding disturbance to surrounding plants, so don't skip this step, even if you're working in tight spaces.
Equipment Insight for Step 2: If you don't have a broadfork, a digging fork or even a sturdy garden trowel will work in a pinch. The key is to make vertical cuts rather than turning the soil over. I've found that working in a grid pattern—6 inches apart—creates the most consistent aeration. When you hit that hardpan layer at 8-10 inches, don't force it. Focus on breaking up the top 6 inches where most roots will develop initially. This targeted approach prevents unnecessary strain and saves energy.
Texture Test for Step 3: The "crumbly cake batter" texture is your goal, but achieving it takes practice. For heavy clay soils, I recommend adding ½ inch of coarse sand in addition to the 1 inch specified. This creates tiny air pockets that improve drainage while maintaining moisture. When testing the texture, pinch a small handful—it should hold together but easily crumble when squeezed. If it feels like wet sandpaper, you need more organic matter; if it sticks to your fingers like modeling clay, add perlite or vermiculite to lighten it.
Timing Secret for Step 5: The 20-30 minute water absorption check is where many gardeners go wrong. I've learned to test moisture at the 6-inch depth by inserting a metal rod or even a clean screwdriver. If it comes out clean, you're ready. If not, let it soak longer. The 2-3 day waiting period might seem long, but it allows any remaining clumps to break down naturally. This prevents seedling roots from struggling against compacted soil right from the start. Pro tip: Water in the morning to allow excess moisture to evaporate during the day.
Pro Tips for Prepare Seed Bed
- These practical strategies will help you create an ideal planting environment that speeds germination and prevents common gardening headaches.
- Precision in Step 1: When clearing your 4-foot square area, I recommend using a string line and stakes to create perfectly straight edges.
- Equipment Insight for Step 2: If you don't have a broadfork, a digging fork or even a sturdy garden trowel will work in a pinch.
Frequently asked questions
Got questions about preparing the perfect seed bed? You’re not alone—even pros need a refresher now and then! Here are answers to the most common queries to help you get it right the first time.
What’s the best time of year to prepare a seed bed?
The ideal window is early spring or fall when soil is workable but not waterlogged. Spring lets you plant as soon as temps warm up, while fall gives roots time to establish before winter. Avoid preparing in summer heat or freezing conditions—soil compacts easily and can harm seedlings.
Can I use a shovel or rake instead of a tiller?
If your soil is loose or small-scale, a broadfork or sturdy garden fork works great for aerating without tilling. For larger areas, a rake and shovel combo (loosen soil first, then smooth) mimics tilling. Just add compost afterward to boost fertility. Pro tip: Work when soil is damp (like a wrung sponge) to prevent clumping.
What if my soil is rocky or full of roots? Should I still till?
Tilling isn’t always the answer! For rocky soil, hand-pull weeds and rocks, then top-dress with 2–3 inches of compost to improve texture over time. If roots are dense (like from sod), slice through them with a spade or use a rototiller with a blade to chop them up. Warning: Over-tilling can turn clay soil into a brick—test moisture first!
How do I know if my seed bed is ready for planting?
Your seed bed is perfect when it’s:
- Loose and crumbly (like cake batter, not sand or concrete)
- Moist but not soggy (a handful should hold shape but not drip)
- Weed- and clod-free (no rocks or debris larger than a pea)
- Leveled (use a board to smooth bumps)
What’s the fastest way to fix compacted soil after tilling?
Compacted soil? Add organic matter ASAP—try compost, peat moss, or coconut coir mixed into the top 6 inches. Then, cover with straw or mulch to protect it and let worms do the rest. For instant results, rent a core aerator to punch holes and improve drainage.
Wrapping up and next steps
Preparing your seed bed is the foundation of a thriving lawn—loose, nutrient-rich soil gives roots the perfect start to grow strong and fast! 🌱 By following these steps, you’ve set the stage for healthier grass, fewer weeds, and a lush green space you’ll love.
Now, take that first shovel and watch your lawn transform!
Your Next Step:
Ready to dive in? Start small—pick a section of your lawn and give it the care it deserves. Track your progress, adjust as needed, and soon, you’ll be the envy of the neighborhood with that perfectly prepped seed bed!