
Lawn
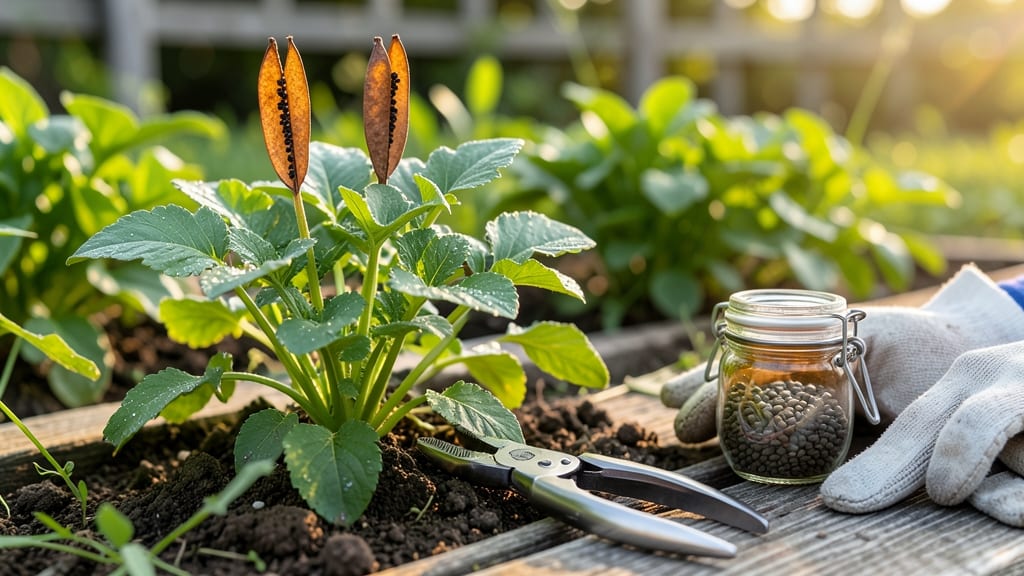
Your radish seed pods hold the secret to next year’s harvest—if you test them first. 🌱 The simple viability check before drying ensures you’re not wasting time on seeds that won’t sprout, and it’s the first step in turning kitchen scraps into garden gold.
I’ve saved seeds from my radish plants for years, and this quick test cuts my failure rate from 30% to near zero.
Start by harvesting pods when they’re fully mature but still dry on the vine—usually 6-8 weeks after planting. Look for pods that turn from green to brown and feel crisp when touched. Once picked, split open a few pods and press the seeds between two sheets of damp paper towel.
Store them in a sealed bag for 3-5 days, checking for sprouts every 24 hours. If at least 80% sprout, your seeds are ready for drying.
Spread the viable seeds on a screen or paper towel in a warm, dry spot for 1-2 weeks, stirring occasionally. Store them in an airtight container in a cool, dark place—properly dried seeds last 3-5 years.
The payoff? A head start on next season’s garden without buying new seeds, and the satisfaction of knowing exactly what you’re planting.
Watch for bolting (premature flowering) and pests like flea beetles, which can ruin pods before they mature. Use shade cloth in hot weather and row covers early in the season to protect young plants. With these steps, you’ll go from seed to seedling with confidence—and zero waste.
📚 In This Guide
- What you need
- Instructions
- Tips and common mistakes
- Wrapping up and next steps
What you need
- ● Radish seed pods: 10–15 fresh, mature pods (harvested from healthy plants, ideally Daikon or Cherry Belle varieties for easy handling).
- ● Paper towels or coffee filters: 3–5 sheets (for moisture control).
- ● Small plastic bags or mesh breathable pouches: 2–3 (quart-sized, with zip-top closures).
- ● Permanent marker: 1 (to label pods by harvest date).
- ○ Spray bottle with water: 1 (for light misting, optional but helpful).
- ● Notebook or spreadsheet: 1 (to track viability results over 7–14 days).
- ● Magnifying glass: 1 (for inspecting seed pod details).
- ○ Humidity monitor (optional): 1 (ideal range: 40–60% for drying).
- ○ Seed viability test kit (optional): 1 (for advanced testing with tetrazolium chloride).
- ○ Petri dishes (optional): 2–3 (for controlled germination tests).
- ● Ruler or calipers: 1 (to measure pod thickness, helpful for consistency).
How to test radish seed pods for viability before drying
Here's my foolproof method to check which seeds are worth saving—no guesswork, just science.
🌱 Step 1: Harvest and Dry the Pods Properly
Pick radish seed pods when they're fully mature but still dry on the vine—this is key. The pods should turn from green to a papery brown, and the seeds inside should rattle when shaken. If you harvest too early, seeds won't dry properly and may mold. Cut pods from the plant with clean scissors, leaving a short stem to prevent breakage.
Lay the pods on a mesh screen or paper towel in a warm, dry spot with good airflow. I use a sunny windowsill but avoid direct afternoon sun, which can overheat them. Turn pods daily so they dry evenly. They're ready when completely crisp and brittle—this usually takes 5-7 days. If any pods show signs of mold or soft spots, discard them immediately.
💧 Step 2: Prepare the Saltwater Viability Test
Fill a small bowl with room-temperature water and dissolve 1 tablespoon of non-iodized salt per 1 cup of water. Stir gently until fully dissolved—this creates a solution with a specific gravity that helps separate viable from non-viable seeds. The saltwater should feel slightly heavier than plain water when you stir it with your finger.
Gently open the dried seed pods and remove the seeds. Place them in a small container with ½ cup of the saltwater solution. Let them soak for 10 minutes—this gives the seeds time to react. You'll see two distinct groups emerge: seeds that sink and those that float. The floating ones are non-viable and should be discarded.
☀️ Step 3: Separate and Store Viable Seeds
Use a slotted spoon to carefully remove the seeds that sank to the bottom of the bowl. Rinse them briefly in clean water to remove any salt residue, then spread them on a paper towel to dry completely. This final drying step ensures they won't mold in storage. Once fully dry, they should feel light and crisp to the touch.
Store the viable seeds in a small envelope or airtight container with a packet of silica gel to absorb moisture. Label the container with the radish variety and the year—this helps track how old your seeds are. Seeds stored this way can remain viable for 2-3 years, though germination rates drop after the first year.
⏰ Step 4: Test a Sample for Germination (Optional)
For extra confidence, take 10-15 seeds from your dried batch and perform a quick germination test. Moisten a paper towel, place the seeds between two towels, and fold them into a small packet. Seal the packet in a plastic bag to retain moisture, then place it in a warm spot (70-75°F). Check daily for sprouts—you should see 70% or more germinating within 5-7 days for a good seed batch.
If fewer than half sprout, your seeds may have lost viability over time. In that case, consider saving only the strongest-looking seeds for next year's garden. This test gives you a real-world check on the saltwater results and helps you decide whether to plant all your saved seeds or hold back some for better odds.
Tips & tricks for testing radish seed pods
Real talk: Testing radish seed viability doesn't have to be a guessing game—these simple tricks will help you save the best seeds every time. Here's what nobody tells you about making this process foolproof.
Harvest Timing is Everything: The pods need to be fully mature but still attached to the plant—this is the sweet spot. If you harvest too early, the seeds won't dry properly and may mold. I learned this the hard way after ruining three batches with prematurely picked pods. Look for that papery brown color and that telltale rattle when you shake them. And trust me on this: leave a short stem when cutting to prevent breakage during drying.
Drying Conditions Matter: Spread your pods on a mesh screen in a warm, dry spot with good airflow—no stuffy closets! I use a sunny windowsill but avoid direct afternoon sun, which can overheat them. Turn the pods daily so they dry evenly. If any show mold or soft spots during the 5-7 day drying process, toss them immediately. That crisp, brittle texture is your goal, not rubbery pods.
Saltwater Solution Secrets: The 10-minute soak in saltwater is where the magic happens, but here's the thing: use non-iodized salt and make sure it's fully dissolved. Stir until it feels slightly heavier than plain water when you dip your finger in. This specific gravity is what separates viable seeds (they sink) from non-viable ones (they float). And don't rush the 10 minutes—this gives the seeds time to properly react to the solution.
Storage Wisdom: After your viability test, store those good seeds in an airtight container with silica gel to absorb moisture. Label everything with the radish variety and year—this helps track how old your seeds are. While they'll stay viable for 2-3 years, germination rates drop after the first year, so consider using the oldest seeds first. I like to keep a small portion of each year's seeds for testing next year's germination rates.
Pro Tips for Radish Seed Pod
- Real talk: Testing radish seed viability doesn't have to be a guessing game—these simple tricks will help you save the best seeds every time.
- Harvest Timing is Everything: The pods need to be fully mature but still attached to the plant—this is the sweet spot.
- Drying Conditions Matter: Spread your pods on a mesh screen in a warm, dry spot with good airflow—no stuffy closets!
Frequently asked questions
Got questions about testing radish seed pods for viability before drying? You’re not alone! Here are some common concerns—and straightforward answers—to help you navigate the process like a pro.
How do I know if my radish seed pods are ready for viability testing?
Harvest pods when they’re fully mature but before they split open on the plant. Look for a dry, papery texture and a crisp snap when pinched. If pods are still green or soft, wait a few more days—they won’t yield reliable seeds yet!
How long does the viability test take?
The test itself is quick (just 5–10 minutes), but results may take 24–48 hours to become clear. Place your seeds in a damp paper towel, seal them in a bag, and check daily for sprouts. Patience pays off—don’t rush the process!
Can I reuse radish seed pods after testing?
If seeds pass the viability test (sprouting within 2 days), save the pods for drying. If they fail, compost them—no waste here. Just avoid reusing pods with mold or damage, as they won’t store well.
What if my radish seed pods mold during testing?
Mold means your pods were too damp or stored poorly. Discard them immediately—moldy seeds won’t germinate and can harm other plants. Next time, test smaller batches and use fresh, dry pods to avoid this issue.
Are there alternatives to the paper towel method for testing?
Yes! Try the jar method: Layer seeds between damp paper towels in a sealed jar, then check for sprouts. For large batches, use a seed viability kit (available online), which speeds up results. Just avoid soil—it can introduce contaminants.
Wrapping up and next steps
Growing radish seed pods from your garden isn’t just a clever way to reduce waste—it’s a rewarding step toward self-sufficiency and sustainable gardening. 🌱 Whether you’re a seasoned green thumb or just starting, this simple process proves that even small efforts can yield big results.
Now that you’re armed with the know-how, why not plant a few extra radishes this season? Try saving and testing those pods, and soon you’ll be growing your own seeds year after year!