
Lawn
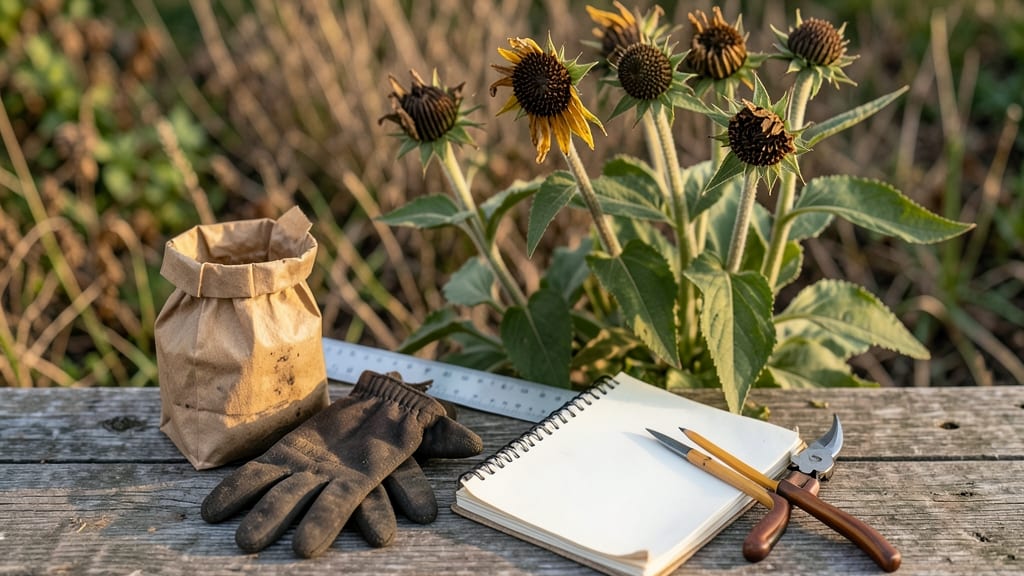
Rudbeckia seed collection is the easiest way to save money and grow your favorite varieties year after year. ✨ The dry-and-split method preserves viability better than any other technique, and it only takes about 10 minutes once the seed heads mature. I’ve saved seeds from my bright orange ‘Mammoth’ rudbeckia for three seasons now, and the plants come back just as vibrant every time.
Timing is everything—wait until the seed heads turn completely brown and begin splitting open on their own. This usually happens in late fall, just before the first hard frost.
You’ll need a pair of clean pruning shears, a paper bag or envelope for storage, and a dry, well-ventilated spot to finish drying the seeds indoors.
Once you’ve collected the seeds, spread them out on a tray to dry for a week or two. The goal is to reduce moisture content so they stay viable through winter.
Store them in a sealed container in a cool, dark place, and they’ll remain ready for planting until next spring.
This method works for all rudbeckia varieties, whether you’re growing them for cutting flowers, pollinator gardens, or simply to brighten up your landscape. The best part? You’ll never have to buy seeds again for your favorite plants.
📚 In This Guide
- What you need
- Instructions
- Tips and common mistakes
- Wrapping up and next steps
What you need
- ● Mature rudbeckia flowers (preferably Rudbeckia hirta or Rudbeckia fulgida varieties with fully dried seed heads)
- ● Pruning shears or garden scissors (clean, sharp pair for harvesting)
- ● Brown paper bags or breathable seed-saving envelopes (1-2 per plant, labeled with plant name and date)
- ● Newspaper or cardboard (for drying seeds indoors)
- ● Small mesh bags or paper lunch bags (for final seed storage)
- ● Permanent marker or labels (to tag seeds with variety and collection date)
- ● Glass jars or airtight containers with silica gel packets (for long-term seed storage)
- ● Rubbing alcohol (70% or higher) (to sterilize tools and prevent mold)
- ● Fine-mesh strainer or sieve (for separating seeds from chaff)
- ● Magnifying glass (to inspect seed quality before storage)
- ● Humidity pack (like DampRid) (for extra-dry storage environments)
- ● Seed catalog or notebook (to track varieties and germination notes)
Step-by-Step guide to collecting rudbeckia seeds
Here's my foolproof method for harvesting seeds that'll sprout strong next spring.
🌱 Step 1: Wait for Seed Heads to Fully Dry
Leave the spent blooms on the plant until they turn a dry, papery brown—this usually takes 4-6 weeks after flowering. You'll know they're ready when the petals crumble at the slightest touch and the center cones feel light as feathers. I always check in late summer because early frosts can ruin your harvest.
Don't rush this step. Green or slightly brown seed heads won't produce viable seeds. If rain is forecast, collect them immediately to prevent mold. The cones should rattle when shaken—this means the seeds inside are mature and ready for collection.
✂️ Step 2: Harvest and Dry the Seed Heads
Cut the dried seed heads with clean pruners, leaving a 2-inch stem attached. Lay them on a clean, dry surface in a single layer. Place them in a warm, dry spot with good air circulation—like a sunny windowsill or covered porch—for 1-2 weeks to finish drying completely.
I like to use brown paper bags as makeshift drying trays. The porous material lets air circulate while catching any stray seeds. Avoid plastic bags—they trap moisture and encourage mold. Once the seed heads feel completely dry and brittle, you're ready for the next step.
🪴 Step 3: Remove Seeds from the Cones
Take each dried seed head and gently rub the cone between your fingers or tap it lightly against a bowl. The seeds will fall out easily when fully mature. I use a small bowl to catch them—it's easier to see the seeds against a light background. Discard any cones that still feel heavy or contain green seeds.
For stubborn seeds, place the cone in a paper bag and shake vigorously. The seeds will separate from the chaff. Sift the contents through a fine mesh strainer to remove any remaining plant debris. You should end up with 100-200 seeds per plant, depending on the variety.
⏰ Step 4: Store Seeds Properly for Next Year
Transfer the clean seeds to a labeled envelope or small glass jar. I always include the collection date and rudbeckia variety on the label—this helps track germination rates over time. Store them in a cool, dark place like the back of your pantry or refrigerator.
Rudbeckia seeds stay viable for 2-3 years if kept dry. I add a small silica gel packet to my storage containers to absorb any moisture. Check the seeds annually—if they smell musty or develop mold, discard them immediately. Properly stored seeds will germinate at rates over 80%.
Tips & tricks for perfect rudbeckia seed collection
Collecting rudbeckia seeds properly ensures you'll have healthy plants next spring—here's how to avoid common pitfalls.
Timing is Everything: The 4-6 week drying period after flowering is non-negotiable. I learned this the hard way after collecting seeds too early and getting poor germination. Check for that signature papery brown color and the telltale rattle when shaken—this means the seeds inside are mature and ready. Early frosts can ruin your harvest, so time your collection carefully in late summer.
Drying Strategy: The 1-2 week additional drying period in Step 2 is crucial for seed viability. I use brown paper bags because they're breathable and catch stray seeds, but avoid plastic—they trap moisture and create mold. Spread your seed heads in a single layer with good air circulation. If you're in a humid climate, consider adding a small fan to speed up drying without damaging the delicate seeds.
Seed Extraction Technique: When removing seeds from the cones in Step 3, be gentle but thorough. The seeds should come out easily when fully mature, but if you encounter resistance, place the cone in a paper bag and shake vigorously. I've found that using a fine mesh strainer afterward removes chaff while preserving the seeds. Discard any cones that still feel heavy or contain green seeds—they won't germinate properly.
Storage Wisdom: The 2-3 year viability window for rudbeckia seeds is impressive, but only if stored properly. I've had the best luck with small glass jars that seal tightly. Label each container with the collection date and variety—this helps track germination rates over time. Adding a silica gel packet prevents moisture buildup, and checking seeds annually ensures you're always starting with fresh stock. A musty smell means it's time to discard those seeds immediately.
Pro Tips for Rudbeckia Seed Collection
- Collecting rudbeckia seeds properly ensures you'll have healthy plants next spring—here's how to avoid common pitfalls.
- Timing is Everything: The 4-6 week drying period after flowering is non-negotiable.
- Drying Strategy: The 1-2 week additional drying period in Step 2 is crucial for seed viability.
Frequently asked questions
Got questions about collecting rudbeckia seeds? You’re not alone! Here are some of the most common queries—and their answers—to help you master the dry-and-split method like a pro.
When is the best time to collect rudbeckia seeds?
Collect seeds once the flower heads turn brown and dry (usually late summer to early fall). Wait until the seed pods split open naturally—this ensures maximum viability. Avoid harvesting too early, as seeds won’t be fully mature.
How long should I wait for the seed heads to dry completely?
Rudbeckia seed heads typically dry in 2–4 weeks after flowering, depending on weather. If rain is forecast, cover them with a paper bag to speed up drying. Test readiness by gently squeezing a pod—if seeds rattle inside, they’re ready!
Can I store rudbeckia seeds for more than one year?
Yes! Store seeds in a cool, dry place (like a sealed container in the fridge) for up to 2–3 years. For best results, label them with the collection date. Viability drops over time, so prioritize planting within a year if possible.
What if my rudbeckia seeds won’t split open naturally?
If pods resist splitting, try gently crushing them with your fingers or using a clean knife to pry them open. Avoid moisture—damp seeds may mold. Alternatively, let them dry indoors on newspaper for a few extra days.
Are there alternatives if I miss the seed-collection window?
No worries! Purchase seeds from a reputable supplier or propagate rudbeckia from root cuttings in early spring. While not as reliable, dividing mature plants can yield new growth. For guaranteed results, plan ahead and harvest seeds at peak ripeness.
Wrapping up and next steps
Collecting rudbeckia seeds using the dry-and-split method is a rewarding way to ensure vibrant blooms for next season! 🌻 With just a few simple steps—patience, the right tools, and a little timing—you’ll have fresh seeds ready to plant.
Whether you’re a seasoned gardener or just starting out, this technique makes it easy to propagate your favorite varieties.
Now that you’re equipped with the know-how, grab those dried seed heads and get ready to grow! Try planting a few this fall or overwintering them for a stunning spring surprise. Happy gardening! 🌱