
Lawn
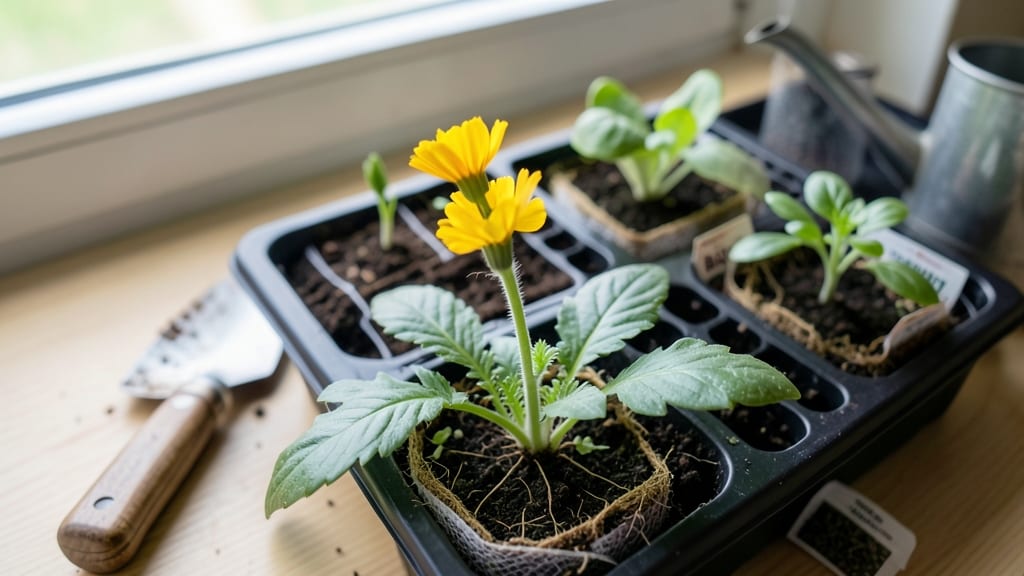
Seed starter cubes cut my seedling time in half last spring—no messy soil, no transplant shock, just faster growth from day one. 🌱 The moment I saw those tiny roots poking through the mesh, I knew I’d never go back to flats again.
These little cubes hold moisture perfectly while giving roots room to spread before you even plant them.
You’ll need just three things: the cubes themselves (peat or coir-based work best), a seed-starting tray, and whatever seeds you’re eager to grow. Most vegetables, herbs, and annual flowers thrive with this method—tomatoes, peppers, and basil especially love the extra space.
The cubes even prevent damping-off, that dreaded seedling killer that’s ruined more trays than I care to admit.
By week three, you’ll have sturdy seedlings ready to transplant with minimal stress. The roots stay intact, and the cubes dissolve right into the soil. No more wrestling with fragile seedlings or watching them wilt after their first move to the garden.
It’s the kind of foolproof system that makes gardening feel effortless.
Works for both beginners and veterans—just adjust watering based on your climate. Too dry? The cubes dry out fast. Too wet? They’ll mold before seeds even sprout. Find that sweet spot, and you’ll be harvesting sooner than you thought possible.
📚 In This Guide
- What you need
- Instructions
- Tips and common mistakes
- Wrapping up and next steps
What you need
- ● Seed starter cubes – 50-100 cubes (depending on your planting scale; peat-based or coir cubes work best for beginners).
- ● Seeds – Choose fast-growing varieties like lettuce, herbs (basil, parsley), or flowers (marigolds, sunflowers). Aim for 1-2 seeds per cube.
- ● Water – Room-temperature water (avoid tap water if it’s heavily chlorinated—let it sit out for 24 hours first!).
- ● Spray bottle – A 16-ounce bottle with a fine mist nozzle for gentle hydration.
- ○ Clear plastic dome or zip-top bag – To create a mini greenhouse effect (optional but helpful for humidity).
- ● Tray or shallow container – A seedling tray with drainage holes or even a repurposed egg carton!
- ● Grow lights or sunny windowsill – 10-12 hours of light daily (south-facing windows or LED grow lights work great).
- ● Fertilizer – A diluted liquid seedling fertilizer (like fish emulsion) for a nutrient boost after germination.
- ● Toothpick or pencil – For gently pressing seeds into the cubes if they’re too light.
- ● Label markers – To track seed varieties (especially useful if planting multiple types).
Step-by-Step instructions for using seed starter cubes
Here’s how to get your seedlings off to a flying start—no soil mess, no fuss.
🌱 Step 1: Soak the Cubes and Prepare Your Seeds
Fill a shallow tray with room-temperature water and place your seed starter cubes inside. Let them soak for 10-15 minutes until fully saturated—you’ll know they’re ready when they hold their shape and feel heavy but not dripping. Drain any excess water afterward; soggy cubes will suffocate seeds.
While the cubes soak, I like to pre-treat my seeds for faster germination. For most varieties, a 12-hour soak in lukewarm water softens the seed coat and speeds up sprouting. Just don’t overdo it—24 hours max, or you risk rotting the seeds. Place them in a small container, cover with water, and let them sit while the cubes drain.
💧 Step 2: Plant Your Seeds and Cover for Germination
Gently squeeze each cube to create a small indentation—just deep enough to cradle a seed. Place 1-2 seeds per cube, pressing lightly so they make contact with the moist material. I tap the seed packet gently to release one seed at a time; planting too many in one cube leads to weak, crowded seedlings later.
Once planted, cover the entire tray with a clear plastic dome or plastic wrap to trap warmth and humidity. This creates the perfect greenhouse effect for germination. Place the tray in a warm spot—70-75°F is ideal—like on top of your fridge or near a sunny window. You’ll see sprouts in 3-7 days, depending on the plant type.
☀️ Step 3: Provide Light and Monitor Moisture
The moment you see those first tiny green shoots, remove the dome immediately. Seedlings need airflow to prevent damping-off, a fungal disease that collapses stems overnight. Place the tray under grow lights or in a south-facing window where they’ll get 12-16 hours of light daily. Without enough light, seedlings stretch leggy and weak—you’ll know they’re happy when they stand tall with dark green leaves.
Water from the bottom by placing the tray in ½ inch of water for 10-15 minutes. The cubes will absorb moisture as needed, preventing overwatering. Check daily: the cubes should feel damp but not soggy. If they dry out completely, germination slows or stops entirely.
✂️ Step 4: Transplant When Ready
Seedlings are ready to transplant when they develop their first true leaves (the second set after the initial seed leaves). At this stage, they’ll have strong enough roots to handle being moved to soil. Gently squeeze the cube to loosen it from the tray—most cubes dissolve easily in water, but if not, use your fingers to break them apart.
Plant each seedling 1 inch deeper than it was in the cube to encourage root stability. Water thoroughly after transplanting to help the roots establish. I’ve found that transplanting on an overcast day reduces shock, giving seedlings a smoother transition to their permanent home.
Tips & tricks for perfect seed starter cubes
Common pitfalls—and how to sidestep every one—when growing seedlings with starter cubes.
The Soaking Secret: For Step 1, I've found that using a colander with small holes works best for soaking the cubes—it drains excess water faster than a tray. After the 10-15 minute soak, gently squeeze each cube between your fingers to check saturation. They should feel heavy but not dripping like a wet sponge. This prevents waterlogged cubes that can suffocate seeds during germination.
Seed Placement Precision: In Step 2, when creating indentations for seeds, I press just enough to make a well but not so much that the cube crumbles. For tiny seeds like lettuce or herbs, I use the tip of a toothpick to create the perfect planting spot. This ensures proper seed-to-cube contact without damaging the delicate cubes.
Germination Environment: The 70-75°F temperature range in Step 2 is crucial—most household thermostats maintain this range. If your home runs cooler, place the tray on top of your refrigerator or near a sunny window. For faster germination, I've had success using a small heating pad set to low under the tray, but never exceed 80°F to avoid overheating the seeds.
Lighting Strategy: For Step 3's 12-16 hours of light, I recommend using a simple LED grow light if natural sunlight isn't sufficient. Position it just 6 inches above the seedlings and adjust as they grow. The key is maintaining consistent light—seedlings will grow toward the light source, so rotate the tray daily for even growth. Without enough light, you'll notice seedlings stretching upward with weak stems.
Pro Tips for Seed Starter Cubes
- Common pitfalls—and how to sidestep every one—when growing seedlings with starter cubes.
- The Soaking Secret: For Step 1, I've found that using a colander with small holes works best for soaking the cubes—it drains excess water faster than a tray.
- Seed Placement Precision: In Step 2, when creating indentations for seeds, I press just enough to make a well but not so much that the cube crumbles.
Frequently asked questions
Got questions about seed starter cubes?
You’re not alone! Here are answers to the most common queries to help you get started with confidence.
What are seed starter cubes made of?
Seed starter cubes are typically made from coir (coconut fiber), peat moss, or compostable materials like recycled paper. These biodegradable cubes hold moisture and nutrients while breaking down naturally when transplanted, so you won’t disturb delicate roots!
How long do seed starter cubes take to work?
Most seeds sprout within 5–14 days in starter cubes, depending on the plant type. Fast growers like lettuce or radishes may appear in a week, while slower ones (like tomatoes) could take up to two weeks. Keep them moist and in a warm spot for best results!
Do I need to add fertilizer to seed starter cubes?
Many starter cubes come pre-mixed with nutrients, but adding a light dose of water-soluble fertilizer (half-strength) after germination can boost growth. Avoid over-fertilizing—too much salt can harm tender seedlings. Organic options like fish emulsion work great!
Can I reuse seed starter cubes?
Unfortunately, no! Starter cubes are designed for single use because they break down as seedlings grow. However, you can reuse the trays for future batches—just rinse them well and let them dry. Pro tip: Store empty trays in a dry place to extend their life.
Why are my seedlings dying in the cubes?
Common issues include overwatering (root rot), underwatering (dry, crispy leaves), or poor drainage. Ensure cubes stay damp (not soggy) and place trays in a sunny spot. If mold appears, reduce moisture and improve airflow. Most problems fix quickly with adjustments!
Are seed starter cubes eco-friendly?
Yes! Biodegradable cubes eliminate plastic trays and peat waste. They’re compostable (check the label) and reduce landfill clutter. Plus, they’re lightweight and easy to ship—perfect for sustainable gardening. Win-win for your plants and the planet!
Wrapping up and next steps
Seed starter cubes are a game-changer for gardeners who want faster, healthier seedlings without the mess of soil! 🌱 Whether you're a beginner or a seasoned pro, these cubes simplify the process, save space, and reduce transplant shock.
Now that you’re equipped with the how-to’s and answers to common questions, it’s time to roll up your sleeves and start growing!
🚀 Your Next Step:
- Pick your favorite seeds and give seed starter cubes a try—your future plants will thank you!
- Experiment with different herbs, veggies, or flowers to see what thrives best.
- Share your success (or bloopers!) with fellow gardeners for extra motivation.
Happy sprouting—your garden awaits! 🌿