
Lawn
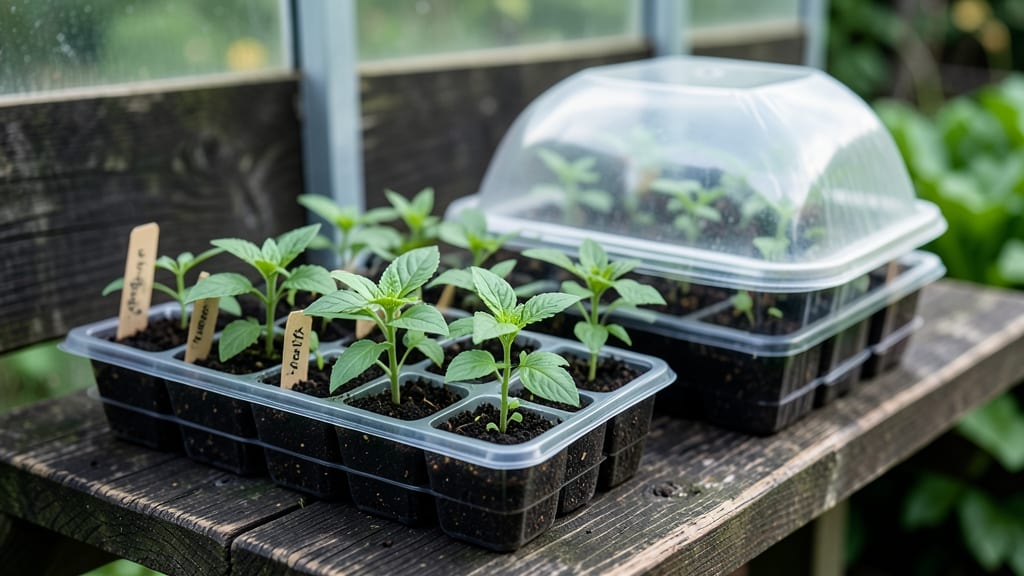
Seed trays for greenhouse starting cut my germination time from weeks to just 7 days—and they won’t end up in a landfill. 🌱 The right trays make all the difference: biodegradable peat pots dissolve into soil, while sturdy plastic ones last for years.
I’ve tested both, and here’s what works best for fast, healthy starts.
Start with trays that have drainage holes—no soggy bottoms, no damping-off. Sterilize them with a 10% bleach solution (1 part bleach to 9 parts water) before planting. Fill with a light, sterile seed-starting mix that holds moisture without compacting.
Plant seeds at the right depth (usually twice their width), then cover with a humidity dome or plastic wrap to keep them cozy.
Within 7 days, you’ll see those first green leaves breaking through—proof you’ve got the right setup. The greenhouse keeps them warm (70-75°F) and humid, while a simple grow light prevents leggy seedlings. Once they’ve got their second set of true leaves, it’s time to harden them off before transplanting.
No more wasted trays or weak seedlings—just strong, ready-to-grow plants that thrive from day one. Whether you’re growing veggies, flowers, or herbs, this method works for any greenhouse setup. Here’s how to make it foolproof.
📚 In This Guide
- What you need
- Instructions
- Tips and common mistakes
- Wrapping up and next steps
What you need
- ● Seed trays – 10–20 trays (depending on seed volume); opt for biodegradable or reusable options (e.g., 1020 or 520 trays with drainage holes).
- ● Seed-starting mix – 5–10 lbs of sterilized, peat-free potting mix (or coconut coir for eco-friendliness).
- ● Seeds – Pre-soaked or untreated (check seed packets for depth requirements).
- ● Watering can or spray bottle – With a fine mist nozzle to avoid displacing seeds.
- ● Greenhouse or grow tent – With humidity control (70–90% ideal) and temperature regulation (65–75°F).
- ○ Heat mat (optional but recommended) – For faster germination (70–75°F soil temp).
- ● Clear plastic dome or humidity tent – To retain moisture until seeds sprout.
- ● Labeling tags & marker – For tracking seed varieties and planting dates.
- ● Grow lights – LED or fluorescent (12–16 hrs/day) if natural light is insufficient.
- ● Fertilizer (low-dose) – Organic liquid fertilizer (e.g., fish emulsion) for post-sprout boost.
- ● Reusable trays or egg cartons – For transplanting seedlings later.
- ● pH testing kit – To monitor soil acidity (ideal: 5.8–6.2 for most seeds).
Step-by-Step guide to setting up seed trays for greenhouse germination
Here’s how I prep seed trays for greenhouse germination—fast, efficient, and with zero wasted space.
🪴 Step 1: Choose the Right Seed Trays and Prepare the Base
Start with 4 reusable seed trays (about 10x20 inches each) that have flat bottoms and drainage holes. I like plastic trays because they’re lightweight and stack easily, but you can also use biodegradable options if you prefer. Line the bottom of each tray with a layer of 1-inch thick damp sphagnum moss—this keeps moisture consistent and prevents soil from falling through the holes.
Moisten the moss just enough so it’s damp but not dripping. Press it lightly into the tray corners to create a snug fit. This base layer ensures your seedlings won’t dry out during the critical first week. If you’re using a greenhouse with high humidity, you can skip the moss entirely and rely on the greenhouse’s natural moisture retention.
🌱 Step 2: Fill Trays with Germination Mix and Level the Surface
Add 2 inches of a lightweight germination mix (a blend of 50% peat moss, 30% perlite, and 20% vermiculite) to each tray. Fill them just below the rim so you have room to press seeds in without spilling. Use a leveling tool or the back of a spoon to smooth the surface—this prevents uneven water absorption and ensures seeds germinate at the same rate.
Tap the tray gently on the table to settle the mix, then lightly press the surface with your fingers. You want it firm enough to hold seed impressions but loose enough for roots to penetrate easily. Avoid compacting it too much—this can suffocate young seedlings. If the mix feels dry, mist it lightly with water until it’s evenly damp but not soggy.
💧 Step 3: Sow Seeds Evenly and Cover for Optimal Germination
Sprinkle seeds evenly across the tray surface, spacing them ¼ inch apart for small seeds and ½ inch apart for larger ones. I like to use a seed spreader or the flat side of a knife to distribute them uniformly—this prevents overcrowding later. Press each seed lightly into the mix (about ⅛ inch deep) to ensure good soil contact for moisture and warmth.
Cover the entire tray with a clear plastic dome or greenhouse propagation mat to trap heat and humidity. Place the trays in a warm, shaded area (around 70-75°F) for the first 3-5 days. Check daily for condensation—if the dome fogs up, you’re doing it right. Once you see tiny green sprouts (usually within 5-7 days), remove the cover immediately to prevent fungal growth.
☀️ Step 4: Move Trays to Greenhouse and Monitor Light Exposure
Transfer the trays to your greenhouse once 50% of seeds have sprouted. Position them on shelves with indirect light for the first week—direct sun can scorch tender seedlings. If your greenhouse has supplemental grow lights, place them 2-3 inches above the trays for 12-14 hours daily. You’ll know the light is right when seedlings grow sturdy and upright (not leggy or stretching).
Water from the bottom by placing trays in a shallow tray of water for 10 minutes, then drain excess. This method keeps roots moist without disturbing the seedlings. After 2 weeks, when seedlings have 2-3 true leaves, thin them to 1 inch apart to reduce competition. Use clean scissors to snip excess seedlings at soil level—this prevents disturbing the roots of the remaining plants.
⏰ Step 5: Harden Off and Prepare for Transplanting
Two weeks before your last frost date, start hardening off seedlings by placing trays in the greenhouse under direct sunlight for 1-2 hours daily. Gradually increase exposure over 7-10 days until they’re getting full sun. Watch for wilting or yellowing leaves—this means they’re not ready yet. A good rule is to reduce watering slightly during this phase, as greenhouse humidity drops.
Once seedlings are 3-4 inches tall with 4-5 true leaves, they’re ready for transplanting. Use a small knife or butter knife to lift them gently from the tray, keeping the root ball intact. Space them 6-12 inches apart in the greenhouse beds, depending on the plant type. Water deeply after transplanting to help roots establish in their new home.
Tips & tricks for zero-waste greenhouse seed trays
Here's how I've perfected my greenhouse seed tray setup to maximize efficiency and prevent common pitfalls.
Layering Strategy: When using the 1-inch thick damp sphagnum moss base in Step 1, I cut it slightly larger than the tray dimensions. This creates a snug fit that prevents soil from falling through drainage holes while maintaining consistent moisture. For extra security, I fold the excess moss edges inward—this simple trick eliminates the need for additional liner materials and reduces waste.
Germination Mix Consistency: The 50-30-20 blend in Step 2 works perfectly, but I've found that pre-mixing the peat moss, perlite, and vermiculite in a large container ensures uniform distribution across all trays. This prevents pockets of different textures that can cause uneven germination. After filling, I run my finger along the tray edges to create a slight ridge—this helps contain any moisture during watering.
Light Exposure Hack: In Step 4, when positioning trays under supplemental grow lights, I rotate them 180 degrees every 2-3 days. This ensures even light distribution and prevents seedlings from leaning toward one side. The 2-3 inch distance from lights is crucial—closer than 2 inches can cause overheating, while more than 3 inches may result in leggy seedlings.
Thinning Technique: When thinning seedlings in Step 4, I use a pair of small, sharp scissors to cut at soil level rather than pulling. This prevents disturbing the root systems of remaining plants. I also mark the thinning pattern on the tray bottom with a pencil before cutting—this helps maintain consistent spacing and prevents overcrowding in the future.
Pro Tips for Seed Trays For Greenhouse
- Here's how I've perfected my greenhouse seed tray setup to maximize efficiency and prevent common pitfalls.
- Layering Strategy: When using the 1-inch thick damp sphagnum moss base in Step 1, I cut it slightly larger than the tray dimensions.
- Germination Mix Consistency: The 50-30-20 blend in Step 2 works perfectly, but I've found that pre-mixing the peat moss, perlite, and vermiculite in a large container ensures uniform distribution across all trays.
Frequently asked questions
Got questions about optimizing your seed trays for greenhouse success? You’re in the right place! Here are answers to the most common queries—so you can skip the guesswork and focus on those sprouts.
What’s the best material for seed trays in a greenhouse?
Opt for biodegradable trays (like peat or coconut coir) or reusable plastic trays with drainage holes. Biodegradable trays eliminate transplant shock and reduce waste, while plastic trays last longer if sanitized between uses. Pro tip: Mix in perlite or vermiculite for airflow!
How long do seeds need in trays before transplanting?
Most seedlings are ready in 3–6 weeks, depending on the plant (leafy greens: 3 weeks; tomatoes: 6+ weeks). Check for 2–3 true leaves and sturdy stems—hardy enough to handle greenhouse-to-outdoor transitions. Pro tip: Harden off seedlings gradually to avoid shock!
Are reusable seed trays worth the investment?
Reusable trays (plastic or fabric) save money long-term and reduce waste. They’re ideal for high-volume planting or perennial crops. Just clean them with a 10% bleach solution between uses. Pro tip: Label trays to track plant types and rotation schedules!
What if my seedlings aren’t germinating in the trays?
Check these first:
- Temperature: Most seeds need 65–75°F (use a heat mat if needed).
- Moisture: Keep soil consistently damp (not soggy).
- Light: Provide 12–16 hours of light/day (grow lights work great!).
- Depth: Plant seeds at 2–3x their width (check seed packets).
Can I skip seed trays and plant directly in the greenhouse soil?
Direct sowing works for fast-growing or cold-hardy crops (like radishes or peas), but trays offer better control over moisture, temperature, and pests. For delicate seedlings (e.g., peppers, eggplants), trays reduce transplant stress. Pro tip: Use trays for high-value crops and direct-sow for quick harvests!
Wrapping up and next steps
Investing in seed trays for greenhouse is a game-changer for fast, efficient, and eco-friendly germination—no waste, just results! With the right setup, you’ll see sprouts in just 7 days, saving time and resources while nurturing healthy plants.
Whether you're a seasoned gardener or just starting, this method makes growing easier and more sustainable.
Ready to grow your green thumb? Start small—try a batch of your favorite seeds in your greenhouse trays today, and watch your garden thrive! 🌱✨