
Planting
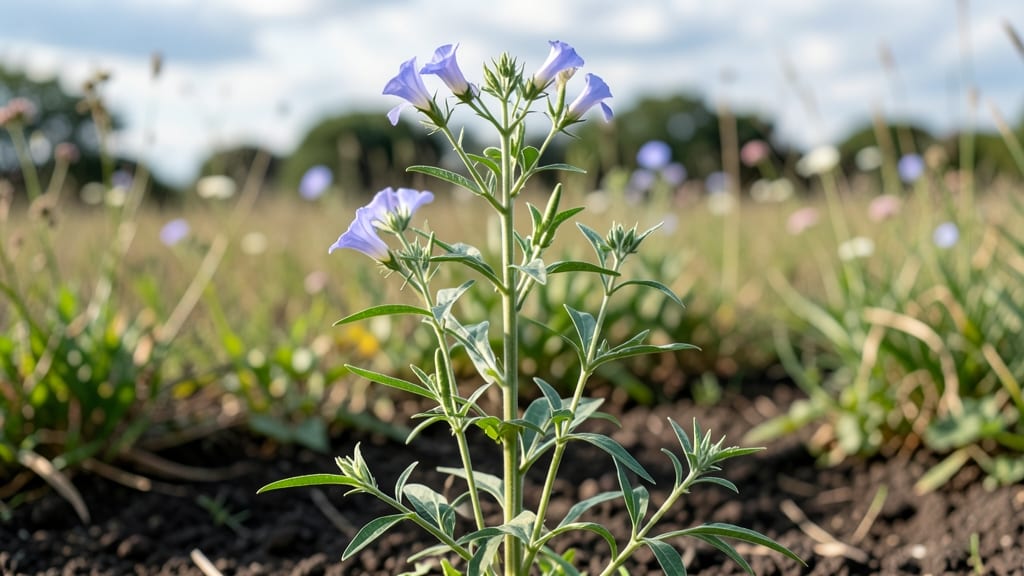
Growing sesame plants from seed gives you golden harvests in just 3 months—no greenhouse needed. 🌱 I planted mine last spring in a sunny kitchen window, and by summer, we had enough sesame seeds to sprinkle on everything from salads to baked goods.
The key is patience and warmth, since sesame thrives in hot weather. You’ll need well-draining soil, a sunny spot (or grow light), and consistent moisture—though too much water causes root rot. Sesame seeds germinate best in 70-80°F soil, so wait until after your last frost or start indoors.
The plants grow tall (up to 3 feet) with delicate white flowers that turn into seed pods. By late summer, you’ll harvest crispy seed pods that split open to reveal tiny black or white sesame seeds.
The flavor is nutty and toasty, perfect for homemade tahini or sprinkling on dishes. Even if you’ve never grown sesame before, the process is straightforward once you know the timing. Works in containers, garden beds, or even a sunny patio—just keep them warm and well-spaced.
Here’s how to get started without the guesswork!
📚 In This Guide
- What you need
- Instructions
- Tips and common mistakes
- Wrapping up and next steps
What you need
- ● Sesame seeds – Buy organic, non-GMO seeds (e.g., blank">Black, White, or Tan varieties). Quantity: 2–3 tbsp (or ~30–45 seeds) for a small harvest.
- ● Seed-starting soil mix – Lightweight, well-draining potting soil (e.g., blank">Miracle-Gro Seed Starting Potting Mix). Quantity: 1 small pot (4–6 inches deep) or a seed tray.
- ● Containers – Use biodegradable pots, peat pellets, or repurposed containers (e.g., yogurt cups with drainage holes). Size: 4–6 inches deep.
- ● Drainage tray or saucer – To catch excess water and prevent root rot.
- ● Spray bottle – For gentle watering (avoid over-saturating seeds).
- ● Grow lights or sunny windowsill – Sesame thrives in 8+ hours of sunlight. A LED grow light works if natural light is limited.
- ● Humidity dome or plastic wrap – Keeps seeds moist during germination.
- ● Fertilizer (balanced, 10-10-10) – Lightly diluted to avoid burning young plants.
- ● Pruning shears – For trimming leggy stems if needed.
- ● Thermometer/hygrometer – To monitor ideal temps (70–80°F / 21–27°C).
Step-by-step instructions for growing sesame plants indoors
Grab your supplies and let's turn that sunny windowsill into a sesame harvest in just 3 months.
🌱 Step 1: Prepare Your Containers and Soil Mix
Sesame plants need room to grow, so use 6-inch diameter pots for each plant—you'll end up with four healthy specimens. Fill each pot with a mix of 50% potting soil and 50% perlite to ensure excellent drainage. Sesame hates soggy roots, so this light, airy mix prevents rot while keeping moisture just right.
Tap the pot gently on the table to settle the soil without compacting it. You want the mix to feel like a damp sponge—not bone dry, but not dripping wet either. Press down lightly with your fingers until the surface is firm enough to hold a seed without sinking.
🌱 Step 2: Plant Sesame Seeds at the Right Depth
Sesame seeds are tiny but mighty—plant them ½ inch deep in the soil. Use your finger to make a small hole, drop in 2-3 seeds per pot (you'll thin later), and cover lightly with soil. Don't bury them too deep or they'll struggle to reach the surface.
Water gently with a spray bottle until the soil looks evenly moist. Here's the thing—sesame seeds need warmth to germinate, so place the pots in a spot where the soil stays between 70-80°F. A sunny windowsill works, but if your home runs cooler, consider a seedling heat mat for faster sprouts.
☀️ Step 3: Provide Consistent Light and Warmth
Sesame plants thrive in full sun—6+ hours daily. If your window doesn't get enough light, supplement with a grow light kept 4-6 inches above the plants. You'll know your sesame plants are happy when they grow upright with dark green leaves—no stretching or yellowing.
Keep the soil lightly moist but never soggy. Water when the top inch feels dry to the touch, and always water at the base to avoid wetting the leaves. Sesame plants are drought-tolerant once established, but seedlings need steady moisture to prevent wilting.
✂️ Step 4: Thin and Support as Plants Mature
Once your sesame plants reach 2-3 inches tall, thin to the strongest seedling per pot. Use small scissors to snip the weaker stems at soil level—don't pull, or you'll disturb the roots of the remaining plant. This gives your sesame room to grow bushy and strong.
When plants reach 12 inches tall, they'll need support. Insert a small bamboo stake near each plant and tie the stems loosely with twine as they grow. Sesame plants can get top-heavy, and staking prevents them from flopping over before harvest.
🌿 Step 5: Harvest and Dry Your Sesame Seeds
Sesame plants are ready to harvest when the seed pods turn yellow and begin to split open—this usually happens around 90-120 days after planting. Use clean scissors to cut the entire plant at the base, then hang it upside down in a dry, well-ventilated area.
Let the pods dry completely before removing the seeds. Once fully dry, rub the pods between your hands to release the seeds, then store them in an airtight container. Properly dried sesame seeds will keep for months, ready for cooking or snacking!
Tips & tricks for perfect sesame seed planting
Real talk: Growing sesame indoors is easier than you think—once you know these game-changing tricks.
Soil Prep Secret: After mixing your 50% potting soil and 50% perlite, sprinkle a thin layer of coarse sand on top before planting. This creates a natural barrier that prevents soil from clumping around the tiny sesame seeds during germination. I learned this the hard way after struggling with uneven sprouts—now my seeds pop up consistently!
Warmth Hack: If your home stays below 70°F, don't just rely on a sunny windowsill. Place your pots on top of a seedling heat mat (set to 75°F) for the first 7-10 days. This mimics tropical conditions where sesame naturally grows and speeds up germination from 10-14 days to just 5-7 days. The extra warmth makes all the difference for these heat-loving seeds.
Lighting Strategy: For those 6+ hours of daily sunlight, position your plants on the southernmost windowsill in your home. If you notice leggy growth (long stems with small leaves), it's a sign they're stretching for light. Immediately move them closer to the window or add a grow light—just keep it 4-6 inches away to avoid burning tender leaves.
Harvesting Tip: When your pods turn yellow and start splitting (around 90-120 days), don't rush to harvest! Wait until the pods have completely dried on the plant—this ensures maximum seed yield. I've found that hanging plants in a dark, well-ventilated closet for 2-3 days after cutting speeds up the drying process without losing quality.
Pro Tips for Sesame Seed Plant
- Real talk: Growing sesame indoors is easier than you think—once you know these game-changing tricks.
- Soil Prep Secret: After mixing your 50% potting soil and 50% perlite, sprinkle a thin layer of coarse sand on top bef...
- Warmth Hack: If your home stays below 70°F, don't just rely on a sunny windowsill. Place your pots on top of a seedli...
Frequently asked questions
Got questions about growing your own sesame seeds?
You’re not alone! Here are some of the most common queries—plus quick, practical answers to help you crush your homegrown harvest.
How long does it take for sesame seeds to grow from seed to harvest?
Sesame plants are fast—typically ready for harvest in just 90–120 days (3–4 months) after planting! With the right warmth (70–85°F) and sunlight (6+ hours daily), you’ll see tiny white flowers bloom in about 6–8 weeks, followed by seed pods in another 4–6 weeks. Pro tip: Plant in spring or early summer for the best timing!
Can I grow sesame seeds indoors, or do they need a garden?
Sesame seeds thrive outdoors but can be grown in large containers (12"+ depth) if you live in a short-season zone. Use a sunny windowsill or grow light for 6+ hours/day, but expect smaller yields. For best results, opt for a south-facing garden bed or balcony with warm soil. Warning: Sesame plants are sensitive to cold—wait until nighttime temps stay above 50°F!
How often should I water sesame plants, and do they need special care?
Water sesame plants sparingly—overwatering causes root rot! Aim for 1 inch of water per week, letting soil dry slightly between waterings. Once flowers appear, reduce water to encourage seed development. Extra care: Mulch to retain moisture and watch for pests like aphids (spray with neem oil if needed).
What can I do if my sesame plants aren’t flowering or producing seeds?
No flowers? Check these fixes:
- Not enough light: Move plants to a sunnier spot or add grow lights.
- Cool temps: Sesame needs warmth—use a heat mat or wait for spring.
- Overcrowding: Thin seedlings to 12–18" apart for better airflow.
- Poor soil: Amend with compost or a balanced fertilizer (10-10-10) at planting.
Are there any alternatives to traditional sesame seeds if I want a similar plant?
If sesame proves tricky, try these fast-growing, seed-rich alternatives:
- Sunflower (60–120 days): Edible seeds, drought-tolerant, and great for beginners!
- Flax (90–100 days): Tiny blue flowers, rich in omega-3s, and loves cool weather.
- Buckwheat (60–90 days): Not a true seed but produces edible groats and thrives in short seasons.
Wrapping up and next steps
Growing a sesame seed plant in just 3 months is not only rewarding but also a fun and educational journey! Whether you're a beginner or a seasoned gardener, this fast-growing plant offers nutritious seeds and a sense of accomplishment. 🌱
Now that you’re armed with the right knowledge, why not take the next step? Start small—plant a few seeds in your sunny windowsill or balcony—and watch your little garden thrive. Share your progress with fellow plant lovers, and soon, you’ll be enjoying homegrown sesame seeds in your favorite dishes! 🌟