
Propagation
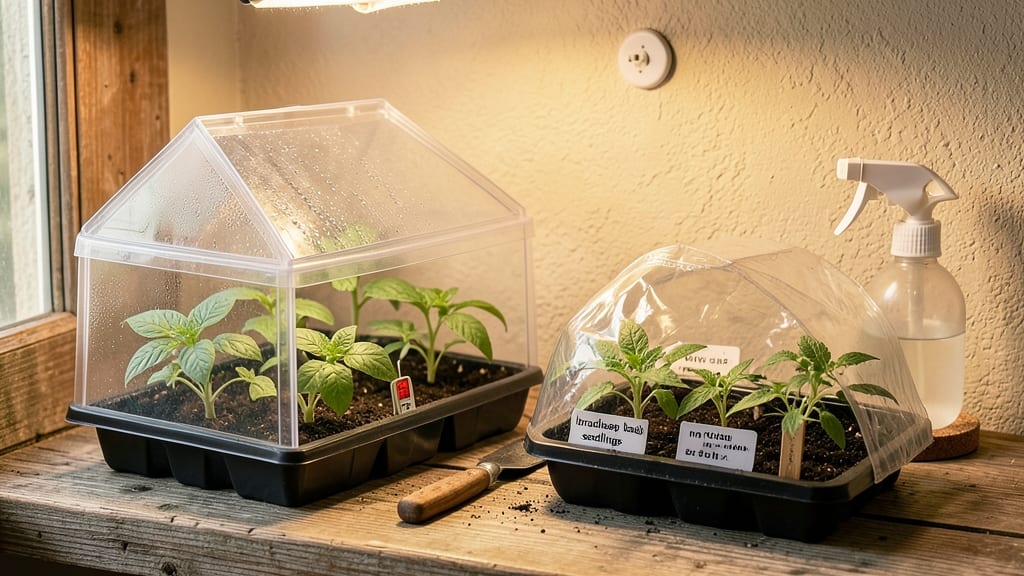
A small seed starting greenhouse turns your kitchen counter into a year-round nursery where even the pickiest seeds germinate like clockwork. 🌱 I learned the hard way that my basement's chilly air and uneven light were sabotaging my early starts—until I built this compact greenhouse that keeps conditions perfect for sprouts.
You'll need just three key things: a clear plastic dome or frame, a heat mat for warmth, and a grow light within 6 inches of the seedlings. The magic happens when you balance 70°F soil temps and 70-80% humidity—no fancy equipment required.
Even my black thumb can't kill these setups. By week 3, you'll see sturdy seedlings with true leaves instead of the weak, leggy disasters that used to greet me. The right setup means faster growth, stronger plants, and a head start on the growing season that store-bought transplants can't match.
Works for herbs, veggies, and flowers alike—just adjust light duration as days lengthen. Here's how to set yours up without the common pitfalls that derail beginners.
📚 In This Guide
- What you need
- Instructions
- Tips and common mistakes
- Wrapping up and next steps
What you need
- ● Greenhouse Structure: Clear plastic sheeting (6 mil thickness, 4’ x 6’ or larger) or
- ● Polycarbonate panels (4mm–6mm thick, UV-resistant)
- ● Frame: PVC pipes (½” or ¾” diameter, 10–15 ft total) or
- ● Wooden 1x2 or 2x4 lumber (pressure-treated or cedar)
- ● Base: Plywood or cinder blocks (for stability)
- ○ Landscape fabric (optional, to block weeds)
- ● Ventilation: Small vent fans (12V or solar-powered, 1–2)
- ● Adjustable louvered vents (2–4, depending on size)
- ● Growing Supplies: Seed starting trays (72–200 cell count)
- ● Growing medium (seed starter mix or coco coir)
- ● Spray bottle (for misting seedlings)
- ● LED grow lights (full-spectrum, 10W–20W)
- ● Hygrometer/thermometer (digital, for climate monitoring)
- ● Drip irrigation kit (for automated watering)
- ● Reflective insulation (for cold climates)
- ● Portable humidity dome (for high-humidity crops)
Step-by-step instructions for building your small seed starting greenhouse
Here's how to create a climate-controlled space that keeps seedlings strong year-round.
🪴 Step 1: Select and Assemble the Greenhouse Structure
Choose a 4-foot by 2-foot greenhouse kit designed for seed starting—look for one with clear polycarbonate panels for even light diffusion. I recommend a domed or sloped design to prevent condensation buildup on seedlings. Assemble the frame according to manufacturer instructions, using the included hardware to ensure sturdy connections. Place it on a level surface—uneven bases cause poor airflow and uneven heat distribution.
Position the greenhouse in a location that receives at least 6 hours of indirect light daily. A north-facing window or under grow lights works best for winter use. Avoid direct midday sun in summer, which overheats the space. Once assembled, wipe down the interior with a mild vinegar solution to remove any manufacturing residues that could harm delicate seedlings.
💧 Step 2: Set Up Climate Control Systems
Install a small electric fan near the greenhouse to create gentle airflow—this prevents fungal diseases like damping-off. Set it to run on low speed for 12 hours daily to mimic natural breezes. For temperature control, add a seedling heat mat set to 70-75°F for germination. Place it beneath the trays to maintain consistent warmth without overheating the air.
Add a digital thermometer/hygrometer to monitor conditions—ideal ranges are 65-75°F during the day and 55-60°F at night. If your space lacks natural light, install full-spectrum LED grow lights on a 14-hour timer. Position them 4-6 inches above seedlings and adjust as they grow. I always test the lights first by running them for 24 hours to ensure no flickering that stresses young plants.
☀️ Step 3: Prepare Trays and Growing Medium
Use sterile seed-starting mix in 2-3 inch deep trays—never garden soil, which compacts and blocks roots. Fill each tray to 1 inch below the rim, then gently press down to eliminate air pockets. Moisten the mix until it holds together when squeezed but doesn't drip. I like to use biodegradable seedling trays so I can transplant without disturbing roots later.
Sow seeds according to packet depth—typically ¼ inch deep for most vegetables. Space them ½ inch apart to allow airflow. After sowing, mist the surface with a spray bottle until evenly damp. Place a clear humidity dome over each tray to retain moisture, but remove it immediately once 50% of seeds sprout to prevent mold. Label each tray with the variety and date—seedlings grow fast, and you'll forget which is which!
⏰ Step 4: Monitor and Maintain Ideal Conditions
Check seedlings daily for even moisture—water when the top inch of soil feels dry. Use a watering can with a fine rose to avoid disturbing seeds. Fertilize with diluted fish emulsion at half-strength when first true leaves appear, typically 7-10 days after germination. Over-fertilizing now burns tender roots, so less is always better.
Rotate trays quarter-turn daily to ensure even light exposure. Watch for leggy growth—a sign of insufficient light—by adjusting grow lights or moving the greenhouse closer to a bright window. If condensation forms on the interior, ventilate for 10 minutes daily to prevent humidity buildup. I keep a small notebook nearby to track temperatures, watering dates, and growth milestones—it helps spot patterns before problems arise.
Tips & tricks for perfect small seed starting greenhouse
Between us, these small details make all the difference when creating your ideal seed-starting environment.
Location Strategy: That 6-hour indirect light requirement is non-negotiable for healthy seedlings. I place my greenhouse near a north-facing window during winter months, but in summer, I move it to a shaded patio to prevent overheating. Watch for leaves touching the plastic—this creates hot spots that can scorch tender seedlings. A simple solution is to prop up the sides slightly to improve airflow around the perimeter.
Temperature Fine-Tuning: The 70-75°F range for germination is your sweet spot, but don't panic if you see slight variations. I've found that placing the greenhouse on a tile floor (which stays cooler) helps maintain those 65-75°F daytime temps more consistently. For nighttime dips, a simple ceramic heat emitter placed near the base can help maintain that 55-60°F range without overheating during the day.
Lighting Optimization: When using grow lights, that 4-6 inch distance is crucial. I start with 6 inches for seedlings, then lower to 4 inches as they grow. Pro tip: Test your lights for 24 hours first—flickering can stress seedlings more than insufficient light. For budget-friendly options, I recommend the Philips LED grow lights—they're energy-efficient and provide full-spectrum coverage without the heat output of older models.
Condensation Control: That 10-minute daily ventilation is your best defense against mold. I set a timer for 10:30 AM daily to open the greenhouse for fresh air. For extra protection, I've found that placing a small dehumidifier near the greenhouse (but not inside) helps maintain ideal humidity levels without creating drafts that stress seedlings.
Pro Tips for Small Seed Starting Greenhouse
- Between us, these small details make all the difference when creating your ideal seed-starting environment.
- Location Strategy: That 6-hour indirect light requirement is non-negotiable for healthy seedlings. I place my greenho...
- Temperature Fine-Tuning: The 70-75°F range for germination is your sweet spot, but don't panic if you see slight vari...
Frequently asked questions
What’s the best time to start seeds in a small greenhouse?
For most veggies, start 6-8 weeks before your last frost date—but a greenhouse lets you begin earlier! Leafy greens (like lettuce) can go in as soon as soil is workable, while tomatoes or peppers need warmth (70°F+). Monitor temps: if nights dip below 50°F, use a heat mat or row cover.
How do I prevent frost damage in winter?
Layer up! Use clear plastic domes or bubble wrap on walls for insulation. Add a thermostat-controlled heat source (like a small fan heater) if temps drop below 40°F. Ventilate daily to avoid humidity buildup—condensation = mold risk. A thermometer/hygrometer is your best friend!
Are DIY greenhouses cheaper than buying one?
A repurposed plastic bin + LED grow lights can cost <$50, while store-bought kits start at <$100+. DIY wins for customization—just ensure it’s ventilated, drainable, and UV-resistant. Pro tip: Add a 5-gallon bucket watering system to save time!
How do I keep pests out without chemicals?
Start with clean seeds/trays and sterilized soil. Use fine mesh screens on vents and yellow sticky traps for fungus gnats. Introduce beneficial nematodes or ladybugs for organic control. Isolate new plants for 2 weeks to spot hitchhikers early!
What’s the ideal temperature range for seed starting?
| Seed Type | Daylight Temp (°F) | Night Temp (°F) |
|---|---|---|
| Leafy Greens | 60–70°F | 50–55°F |
| Tomatoes/Peppers | 75–85°F | 60–65°F |
| Cool-Season Crops (carrots, radishes) | 65–75°F | 45–50°F |
Use a seedling heat mat for slow germinators (like parsley) if temps drop below 60°F.
Wrapping up and next steps
A small seed starting greenhouse is your ticket to year-round gardening success—no matter the weather! 🌱 With climate control at your fingertips, you’ll enjoy faster germination, healthier seedlings, and a head start on the growing season.
Whether you’re a beginner or a seasoned green thumb, this setup makes propagation easier and more rewarding.
Ready to take the next step? Start small—pick your favorite seeds, assemble your greenhouse, and watch your plants thrive! Happy growing! 🌿