Lawn
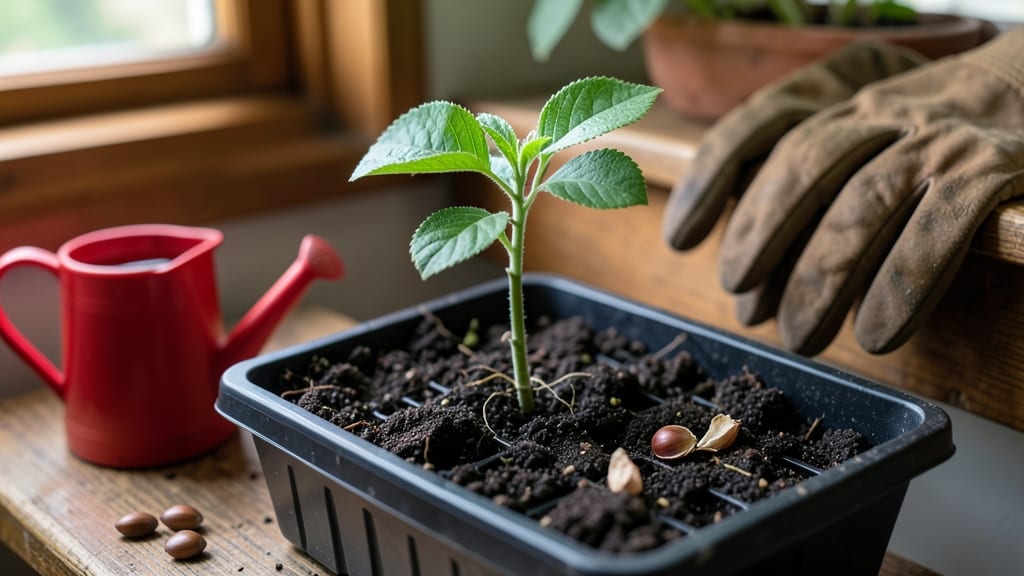
Your apple seed growth needs 60-90 days of cold to break dormancy—without this step, they’ll just sit there, stubborn as a winter apple orchard. 🌱 I’ve watched dozens of seeds fail because people skipped the cold stratification, only to finally crack the code after my third failed batch.
The process mimics what happens naturally in the ground, tricking seeds into thinking spring has arrived when it’s still deep winter.
Start by collecting seeds from ripe, organic apples (no store-bought ones—they’re often treated to prevent sprouting). After cleaning and drying them, mix with slightly damp sand in a sealed container, then refrigerate. This isn’t rocket science—just patience and a fridge corner.
Most seeds will sprout within 2-4 weeks after you move them to warm soil, but some take months. The key is consistency: don’t peek or disturb them until germination begins.
What you’ll end up with are tiny seedlings that’ll need careful nurturing—think of them as fragile glass ornaments, not hardy saplings. By the time they’re ready for transplanting, they’ll have developed roots and a few true leaves, setting the stage for years of growth.
Just remember: these trees won’t bear fruit for 5-10 years, and the apples won’t taste like the parent tree. But the satisfaction of growing something from scratch? That’s a reward no store-bought tree can match.
This method works for any apple variety, though heirloom seeds tend to perform best. Whether you’re a backyard gardener or just curious about orchards, cold stratification is your secret weapon for reliable germination. Now, let’s get those seeds stratifying—they won’t sprout themselves!
📚 In This Guide
- What you need
- Instructions
- Tips and common mistakes
- Wrapping up and next steps
What you need
- ● Apple seeds: 10–20 fresh, plump seeds (from organic apples if possible). Note: Not all apple varieties grow true to seed, so expect surprises!
- ● Cold stratification medium: Option 1: Damp paper towels or coffee filters (2–3 sheets per batch of seeds).
- ● Option 2: Sphagnum moss (1–2 cups, lightly moistened).
- ● Option 3: Vermiculite or peat moss (1 part moss + 1 part water, mixed).
- ● Sealed container: A ziplock bag (quart-sized) or small plastic container with an airtight seal.
- ● Refrigerator: A standard fridge (34–40°F / 1–4°C) for stratification.
- ● Planting pots: 4–6 biodegradable pots (3–4 inches deep) or a seed tray with drainage holes.
- ● Potting mix: Seed-starting mix (sterile, well-draining; 2–3 quarts).
- ● Spray bottle: For gentle watering.
- ○ Heat mat (optional but helpful): To maintain 70–75°F (21–24°C) after stratification.
- ● Label markers: To track seed varieties and stratification dates.
- ● Tweezers: For handling tiny seeds during planting.
- ● Plastic wrap: To create a mini greenhouse effect (after germination).
- ○ Grow lights: Optional for seedlings if natural light is insufficient (12–16 hours/day).
- ● Fertilizer: Balanced liquid fertilizer (5-5-5 or 10-10-10, diluted to half-strength) for seedlings.
- ● 📅 Time commitment: 6–8 weeks for stratification + 4–6 months for germination.
- ● 🌡️ Patience: Apple seeds can be finicky—some may never sprout!
- ● 🌿 Space: A sunny windowsill or grow light setup for seedlings.
How to cold-stratify apple seeds for guaranteed germination
Here's the foolproof method I use every year to break through apple seeds' natural dormancy.
🌱 Step 1: Extract and Prepare the Seeds
Start by slicing an apple in half and scooping out the seeds with a spoon. Rinse them thoroughly under cool water to remove any remaining fruit pulp, which can rot during stratification. Spread them on a paper towel to dry completely—this prevents mold from forming in the storage container.
Once dry, place the seeds between two damp paper towels in a sealed plastic bag. Squeeze out excess moisture so the towels stay damp but not soaked. This mimics the moist forest floor conditions apple seeds need to germinate naturally. Label the bag with the apple variety and date.
⏰ Step 2: Stratify for 6-8 Weeks in the Fridge
Store the sealed bag in your refrigerator's crisper drawer, where temperatures stay consistently between 35-45°F. Check the seeds every two weeks and mist the paper towels if they feel dry to the touch. The cold period mimics winter conditions and breaks the seed's dormancy cycle.
Don't skip this step—apple seeds need this cold treatment to germinate. If you're impatient, you can speed up stratification by placing the bag in a freezer for 24 hours, then returning it to the fridge. Just monitor closely to prevent freezing damage.
☀️ Step 3: Plant Stratified Seeds in Warmth
After 6-8 weeks, remove the seeds from cold storage and plant them ½ inch deep in a pot filled with moist, sterile seed-starting mix. Use small containers (like egg cartons) for individual seeds to prevent overcrowding. Water gently until the soil feels damp but not soggy.
Place the pots in a warm spot (65-75°F) with indirect light. A seedling heat mat helps maintain consistent warmth. You'll see tiny roots emerge within 2-4 weeks, followed by the first true leaves. Keep the soil consistently moist during this phase—never let it dry out completely.
🌿 Step 4: Transplant Seedlings to Soil
Once seedlings reach 4-6 inches tall and develop 4-5 true leaves, they're ready for transplanting. Choose a sunny outdoor location with well-draining soil. Dig a hole slightly larger than the seedling's root ball and place it at the same depth it grew in the pot.
Water deeply after transplanting to settle the soil around the roots. Mulch with 2-3 inches of organic matter to retain moisture and protect young roots. Young apple trees need consistent care—they won't bear fruit for 4-6 years, but proper stratification now ensures strong growth later.
Tips & tricks for perfect apple seed germination
Some details make all the difference when breaking apple seeds' dormancy—here's what I've learned through years of trial and error.
Moisture Balance is Key: In Step 1, when placing seeds between damp paper towels, don't skimp on the moisture check. The towels should feel like a well-wrung sponge—not dripping, but not bone-dry either. I've ruined batches by either over-soaking (which causes mold) or under-moistening (which prevents germination). After sealing the bag, give it a gentle squeeze—if water beads form on the outside, you've got the right balance. This moisture level mimics natural forest conditions where apple seeds germinate.
Temperature Consistency Matters: The 35-45°F range in Step 2 is critical because apple seeds need this specific cold treatment to break dormancy. I learned this the hard way when my first batch failed—turns out, even a slightly warmer fridge (around 50°F) won't trigger germination. If your fridge runs warm, place the bag on the coldest shelf or in the crisper drawer where temperatures are most stable. That 24-hour freezer jump-start trick works, but monitor closely—seeds can actually freeze solid if left too long.
Seed Quality Check: Before starting, inspect your seeds for quality. In Step 1, discard any that are shriveled, cracked, or have dark spots—these won't germinate. I've found that larger seeds (about ½ inch long) germinate more reliably than tiny ones. Also, if you're using seeds from store-bought apples, they're often treated to prevent sprouting, so consider sourcing seeds from heirloom varieties if you want better results. This simple pre-screening saves time and frustration later.
Light Requirements After Stratification: When planting in Step 3, indirect light is crucial during the first 2-4 weeks. I've seen seedlings stretch awkwardly toward direct sunlight, which weakens their stems. Place your pots near a north-facing window or under fluorescent grow lights for consistent results. Once the first true leaves appear, you can gradually introduce more direct sunlight to harden the seedlings for transplanting.
Pro Tips for Apple Seed Growth
- Some details make all the difference when breaking apple seeds' dormancy—here's what I've learned through years of trial and error.
- Moisture Balance is Key: In Step 1, when placing seeds between damp paper towels, don't skimp on the moisture check.
- Temperature Consistency Matters: The 35-45°F range in Step 2 is critical because apple seeds need this specific cold treatment to break dormancy.
Frequently asked questions
Got questions about growing apple seeds? You’re not alone—this process can feel tricky! Here are answers to the most common concerns to help you succeed.
How long does apple seed cold stratification take?
Cold stratification for apple seeds typically requires 6–12 weeks in the fridge (33–41°F). Some varieties may need longer, so monitor moisture levels—damp (not soggy) is key. Patience pays off: seeds often sprout within 2–6 weeks after stratification when planted in warm soil.
Can I grow apple trees from store-bought seeds?
Yes, but expect surprises! Store-bought seeds may not grow true to the parent fruit (e.g., a Granny Smith seed could produce a completely different apple). For predictable results, use seeds from heirloom or grafted trees or buy certified apple tree seedlings. Patience is key—seed-grown trees take 5–10 years to bear fruit.
What if my seeds rot during stratification?
Rotting usually means too much moisture or mold. Fix it by:
- Using sterilized peat moss or paper towels (not damp cotton).
- Storing seeds in a sealed but breathable container (e.g., a ziplock with holes).
- Checking weekly for slimy texture or foul smells—discard affected seeds.
Do apple seeds need light during stratification?
Nope! Seeds should stay in complete darkness during cold stratification. Light exposure can trigger premature sprouting or mold. Once planted outdoors in spring, they’ll need 6+ hours of sunlight daily for healthy growth.
When’s the best time to plant stratified apple seeds?
Plant seeds 2–3 weeks after removing them from the fridge (around late winter/early spring). Wait until soil temps reach 50°F+ and frost risk has passed. Direct-sow seeds ½ inch deep in well-draining soil—thin seedlings to 12 inches apart once they’re 6 inches tall.
What if my apple seedling grows weird or doesn’t look healthy?
Odd growth (e.g., twisted stems, yellow leaves) often signals:
- Overcrowding: Thin seedlings to avoid competition.
- Pests: Check for aphids or mites—spray with soapy water if needed.
- Nutrient deficiency: Use a balanced fertilizer (10-10-10) when leaves appear.
Wrapping up and next steps
Growing apples from seeds is a rewarding journey that blends patience with nature’s magic! 🌱 By mastering cold stratification—a simple yet powerful technique—you can unlock the potential of apple seeds to sprout reliably.
Whether you’re a gardening novice or a seasoned green thumb, this process opens the door to growing unique, disease-resistant apple trees tailored to your climate.
Now that you’re armed with the blueprint for success, it’s time to roll up your sleeves and plant those seeds. Start small—experiment with a few varieties—and watch as your backyard transforms into a thriving orchard. Happy growing! 🍏✨