
Propagation
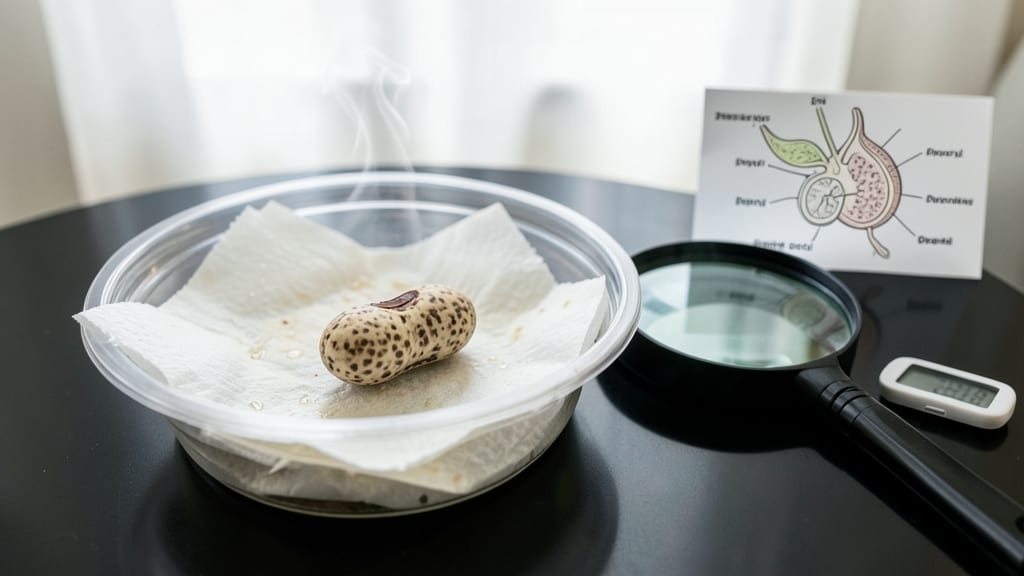
Define seed germination as the magical moment when a tiny seed transforms into a hungry new plant—all it needs is water, warmth, and patience. 🌱 The science behind it starts with the seed absorbing moisture (that’s imbibition), swelling up as the radicle (the first root) pushes through the shell, then the shoot breaks free toward the light. Understanding this process is how you go from a packet of seeds to a thriving garden. The right conditions make all the difference: most seeds need soil that stays consistently moist but not soggy, temperatures between 60-80°F, and either darkness or gentle light, depending on the seed type. Too cold, and they’ll sit dormant; too hot, and they might rot before sprouting. I’ve learned that even the best seeds fail if the environment isn’t just right—like my first batch of basil that refused to wake up until I moved them to a warmer spot. Once you get the basics down, you’ll see those first green hooks appear in as little as 3-14 days, depending on the plant. The key is keeping conditions stable—no drying out, no flooding—and giving them space to stretch without competition. Think of it like creating a cozy nursery for your future plants. This isn’t just theory; it’s how you turn a $2 seed packet into a garden full of homegrown tomatoes, herbs, or flowers. Whether you’re a beginner or a seasoned grower, mastering germination means more reliable starts and fewer disappointments. Let’s break it down step by step.
📚 In This Guide
- What you need
- Instructions
- Tips and common mistakes
- Wrapping up and next steps
What you need
- ● Seeds: Choose 10–20 healthy, fresh seeds (e.g., beans, peas, or radishes) with high germination rates.
- ● Containers: 2–3 shallow, clean containers (e.g., plastic trays, paper towels, or small pots) with drainage holes if repurposing.
- ● Growing Medium: Option 1: 2–3 paper towels or coffee filters (for the "paper towel method").
- ● Option 2: 1–2 cups of potting soil or coconut coir (for soil-based germination).
- ● Water: Room-temperature, filtered water (enough to lightly moisten the medium).
- ○ Spray Bottle (Optional but Helpful): For gentle watering to avoid disturbing seeds.
- ● Plastic Wrap or Lid: To create a humid environment (e.g., a clear plastic bag or container lid).
- ○ Ruler or Measuring Tape: For tracking seed growth (optional but useful for experiments).
- ● Light Source: A sunny windowsill or grow light (for soil-based germination after sprouting).
- ○ Thermometer (Optional): To monitor temperature (ideal range: 65–85°F for most seeds).
- ● Notebook & Pen: For recording observations like sprouting dates and growth milestones.
- ● Patience & Consistency: Germination timelines vary (e.g., radishes sprout in 3–5 days; beans take 7–14 days).
- ● Label Your Seeds: Use toothpicks or markers to track varieties if testing multiple types! 📝
- ● Avoid Overwatering: Keep the medium damp, not soggy—excess water can cause mold. 💧
- ● Warmth Helps: Place containers near a heat source (like a fridge’s warm side) to speed up germination. 🔥
Understanding seed germination: the science behind getting sprouts started
Let's break down what really happens when a seed turns into a plant—and how to set it up for success.
🌱 Step 1: Recognize the Four Key Requirements for Germination
Every seed needs four things to wake up: water, oxygen, proper temperature, and light—though light only matters after the sprout emerges. Water activates enzymes that break down stored food inside the seed, while oxygen fuels that process. Think of it like turning on a car: you need fuel (water), air (oxygen), and the right conditions (temperature) before the engine (growth) can start.
Most seeds germinate best at 65-75°F, though some tropical varieties prefer 80-85°F and cold-hardy ones like lettuce do fine at 50-60°F. You'll know temperature is right when sprouts appear consistently within the expected timeframe—usually 3-14 days depending on the seed type. If they take much longer, your soil might be too cold or too hot.
💧 Step 2: Prepare the Seed Environment Like a Tiny Greenhouse
Moisten your growing medium until it's damp but not soggy—you should be able to squeeze a handful and see moisture beads form, but no water should drip out. Too much water cuts off oxygen, while too little prevents the seed from activating. I like to use a spray bottle for precision, misting until the surface looks evenly damp but not wet.
Cover the container with plastic wrap or a humidity dome to trap heat and moisture, creating the ideal greenhouse effect. This isn't just about keeping things wet—it's about maintaining 90% humidity until germination begins. Check daily for condensation on the plastic; if it's dry, mist again. The moment you see the first tiny root poking through, remove the cover immediately to prevent fungal diseases that thrive in damp conditions.
☀️ Step 3: Monitor for the Three Stages of Germination
Stage one begins when the radicle (the first root) emerges from the seed. This usually happens within 24-72 hours under ideal conditions, but some seeds like okra can take 5-10 days. You'll spot it as a tiny white thread pushing through the seed coat—this is your signal that the seed has "decided" to grow.
Stage two occurs when the hypocotyl (the stem) straightens and pushes upward, often bending toward light if any is present. This is when seedlings become visible above soil level. Watch for cotyledons (the first true leaves) to unfurl next—these look different from later leaves and signal the plant is transitioning from seedling to established growth. At this point, move your container to bright, indirect light (no direct sun yet, which can scorch tender sprouts).
⏰ Step 4: Troubleshoot Common Germination Problems
If seeds fail to sprout after 2-3 weeks, they're likely dormant or non-viable. Some seeds need scarification (scratching the seed coat) or stratification (a cold period) to break dormancy. For example, apple seeds need 60-90 days of cold moisture before they'll germinate. Check your seed packet—it usually lists special requirements.
Mold or fuzzy growth on soil means overwatering or poor drainage. Remove affected seedlings immediately and let the soil dry slightly before trying again. Leggy, pale sprouts? Your light is too weak or too far away. Move the container within 2-3 inches of a grow light or to a sunnier windowsill. You'll see stronger, stockier growth within 2-3 days of adjusting light.
🌿 Step 5: Transition to Light and Air for Healthy Seedlings
Once 50% of seeds have sprouted, uncover the container and place it under grow lights or bright indirect sunlight. Seedlings need 12-16 hours of light daily to prevent stretching. If leaves look pale or stems bend toward the light source, they're reaching for more intensity. Adjust the light source to stay 3-4 inches above the tallest sprout—too close causes burning, too far causes legginess.
Thin seedlings to one per cell (if using trays) or 2-3 inches apart (if planted directly) once they have 2-3 true leaves. This prevents competition for nutrients and reduces the risk of disease spreading between crowded plants. You'll notice stronger growth in the remaining seedlings within 5-7 days—they'll develop deeper green leaves and thicker stems as they access more resources.
Tips & tricks for perfect seed germination
Here's what nobody tells you about making sure your seeds actually grow—these are the details that make all the difference.
Temperature Matters: The 65-75°F range is ideal for most seeds, but don't guess—use a thermometer. I place my seed trays on top of my fridge (not inside) for consistent warmth. For cold-hardy seeds like lettuce, a sunny windowsill during winter often provides the perfect 50-60°F environment naturally. If your home runs cooler, try placing the tray on a heat mat set to low—just be careful not to exceed 85°F for tropical varieties.
Humidity Hack: That 90% humidity requirement is tricky to maintain without special equipment. I use a clear plastic storage container with a tight lid, place a damp paper towel on the bottom, and add a few drops of water to the lid before sealing. Check daily—condensation on the lid means you're golden; dry sides mean it's time to mist again. This simple setup mimics a greenhouse and prevents the dreaded "damp but not sprouting" situation.
Light Transition Strategy: The moment you see those first cotyledons (the baby leaves), it's time to move your seedlings to light—but not just any light. I use a simple LED grow light on a timer for 12-16 hours daily. Position it 3-4 inches above the tallest sprout and raise it as they grow. If using natural light, rotate the tray daily so all seedlings get equal exposure. The key is gradual adaptation—sudden bright light can shock tender sprouts.
Troubleshooting Early: If you're not seeing any radicles (those first roots) after 72 hours, don't panic—but do check your setup. I've found that sometimes the seeds need a little encouragement. Try gently pressing them into the damp medium with your finger (just enough to make contact with the soil). For stubborn seeds, a quick 10-minute soak in warm water before planting can help kickstart the process. Just remember to drain them well afterward to prevent rot.
Pro Tips for Define Seed Germination
- Here's what nobody tells you about making sure your seeds actually grow—these are the details that make all the difference.
- Temperature Matters: The 65-75°F range is ideal for most seeds, but don't guess—use a thermometer.
- Humidity Hack: That 90% humidity requirement is tricky to maintain without special equipment.
Frequently asked questions
Got questions about seed germination? You’re not alone!
Here are answers to the most common queries—from impatient gardeners to science-curious beginners.
How long does seed germination take?
Germination time varies by seed type. Fast growers like radishes or lettuce sprout in 3–7 days, while slowpokes (e.g., beans or peas) may take 7–14 days. Check the seed packet for specifics—patience is key!
What if my seeds won’t germinate?
Try these fixes:
- Check moisture: Soil should stay damp (not soggy). Use a spray bottle for precision.
- Test temperature: Most seeds need 65–75°F. A heating mat helps in cool climates.
- Inspect seeds: Old or damaged seeds may fail. Soak in water for 24 hours to test viability.
- Light exposure: Some seeds (like tomatoes) need light; others (like peas) prefer darkness.
Can seeds germinate in cold weather?
Some seeds (e.g., spinach, kale) thrive in cool temps (40–50°F), but most need warmth. Use a seedling heat mat or start indoors near a sunny window. Harden off seedlings gradually before transplanting!
Do I need special equipment for germination?
Not necessarily! Basic tools include:
- A tray or container with drainage
- Seed-starting mix (or a mix of peat/potting soil)
- Water spray bottle
- Optional: Grow lights or a sunny windowsill
For large batches, a seedling heat mat or propagation station speeds up results. DIY setups work too!
What’s the difference between germination and sprouting?
Germination is the scientific process where a seed activates, breaks dormancy, and grows a root (radicle) and shoot. Sprouting is the visible result—when you see tiny leaves or roots emerge! Think of germination as the "behind-the-scenes" magic; sprouting is the payoff.
Wrapping up and next steps
Understanding seed germination unlocks the magic of growing plants from scratch—whether you're a gardening newbie or a seasoned green thumb! 🌱 From moisture and temperature to light and patience, each step plays a crucial role in coaxing life from a tiny seed.
Now that you know the science-backed secrets, it’s time to put theory into action.
Ready to see your first sprouts? Start small—try germinating a few easy seeds like beans or marigolds, and track your progress. Every successful sprout is a victory, and soon, you’ll be expanding your garden confidence like a pro!