
Lawn
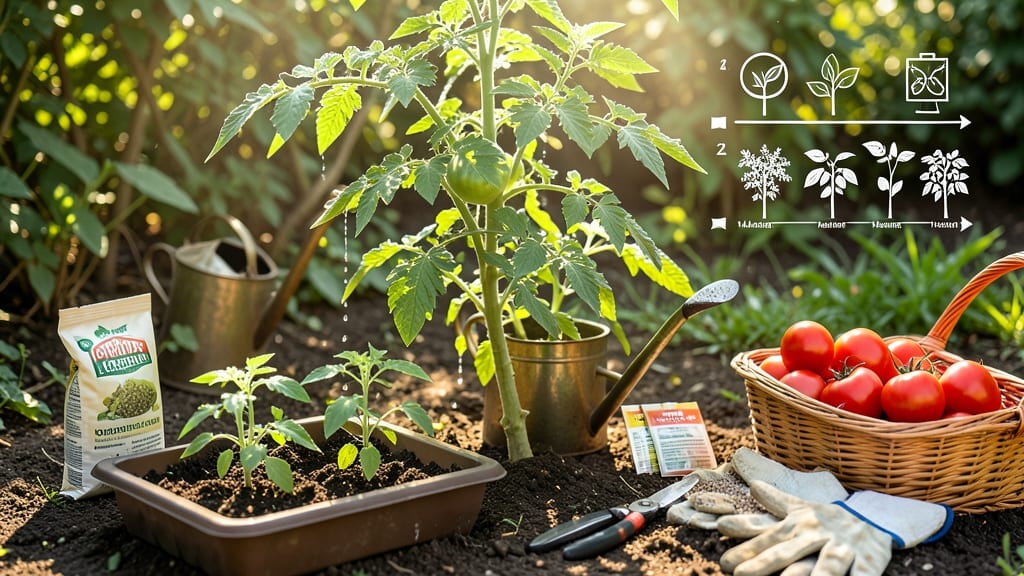
Follow directions to seed to table, and your dinner plate gets a story—and your garden gets a foolproof system for year-round harvests. 🌱 I learned the hard way that skipping soil prep or ignoring light needs turns seedlings into sad little sticks, but once you master the rhythm, every bite tastes like victory.
The magic starts with the right seeds, soil, and a little patience (and maybe a grow light for winter starts).
You’ll need basic supplies: seed-starting mix, containers with drainage, a sunny spot (or grow light), and a watering can with a gentle spray. Three simple steps—planting, nurturing, and harvesting—turn scraps of soil into meals.
Even herbs like basil thrive on a windowsill if you give them consistent light and water. The key is matching each plant’s needs to your space, whether that’s a windowsill, greenhouse, or backyard plot.
By summer, you’ll be harvesting crisp lettuce, sweet tomatoes, and fragrant herbs straight from your garden to your kitchen. The best part? No more guessing—consistent results come from tracking growth stages and adjusting care.
A single basil plant can produce enough for pesto all season, and a well-timed tomato transplant means juicy fruit by July. This isn’t just gardening; it’s a reliable way to eat fresher, cheaper, and more delicious food.
Works for beginners or seasoned growers—just scale the space. Start small with herbs or greens, then expand to tomatoes and peppers. The only mistake? Not starting sooner. Let’s get those seeds sprouting!
📚 In This Guide
- What you need
- Instructions
- Tips and common mistakes
- Wrapping up and next steps
What you need
- ● Seeds: Choose heirloom, non-GMO, or organic seeds suited to your climate. Start with easy-to-grow varieties like lettuce, radishes, green beans, or herbs (e.g., basil, cilantro, or parsley). Aim for 1-2 seed packets per plant type to begin.
- ● Growing Containers: For indoor sprouting: Small mesh sprouting jars (2-4) or a sprouting tray.
- ● For seedlings: Biodegradable seedling pots (50-100) or 4-inch plastic pots.
- ● For outdoor gardening: Raised garden beds, large pots (10+ gallons), or in-ground plots with well-draining soil.
- ● Growing Medium: Potting soil (sterilized, seed-starting mix for seedlings).
- ● Coco coir or peat moss (for moisture retention).
- ● Vermiculite or perlite (for aeration).
- ● Watering Supplies: Spray bottle (for delicate seedlings).
- ● Watering can with a fine rose nozzle.
- ○ pH testing kit (optional but helpful for soil/water).
- ● Lighting: Grow lights (LED or fluorescent, full-spectrum) for indoor setups.
- ● South-facing window or greenhouse for natural light.
- ● Basic Tools: Hand trowel or small garden fork.
- ● Pruning shears (for harvesting and trimming).
- ● Gloves (gardening or nitrile for handling soil).
- ● Compost bin or worm composting kit (to recycle kitchen scraps into nutrient-rich soil).
- ● Soil moisture meter (to avoid over/under-watering).
- ● Trellis or stakes (for vining plants like cucumbers or beans).
- ● Organic fertilizers (fish emulsion, compost tea, or worm castings).
- ● Seedling heat mat (for cold climates or early starts).
- ● Harvesting baskets or mesh bags (to keep produce fresh post-harvest).
- ● Food dehydrator or canning supplies (for preserving your harvest).
- ● Access to sunlight: At least 6-8 hours of sunlight daily for outdoor plants (or equivalent grow light time indoors).
- ● Space: Even a small balcony, windowsill, or backyard plot can work with the right planning!
- ● Time: Dedicate 10-30 minutes daily for watering, monitoring, and care.
- ● Patience: Some plants (like tomatoes) take 2-3 months to harvest, while sprouts are ready in 3-7 days!
- ● Local knowledge: Check your USDA Plant Hardiness Zone and last frost dates for timing.
Step-by-step guide to year-round seed-to-table harvesting
Here's how to turn seeds into pantry staples with a system that works in any season.
🌱 Step 1: Plan Your Seasonal Succession Planting Schedule
Start by mapping your growing seasons using a 12-month calendar. Divide your year into four 3-month blocks (spring, summer, fall, winter) and assign each block to different crops based on their days to maturity. Fast growers like bush beans (50-60 days) or lettuce (30-40 days) belong in summer, while slower varieties like carrots (70-80 days) or kale (60-70 days) fit winter.
I like to stagger plantings every 2-3 weeks—this ensures continuous harvests. For example, plant radishes (25-30 days) in early spring, then again in late summer for a fall crop. Use seed packets as your guide for spacing and timing; they'll tell you exactly when to start indoors or direct-sow outdoors based on your last frost date. Mark these dates on your calendar with highlighters so you don’t miss a planting window.
☀️ Step 2: Optimize Growing Conditions for Each Season
Spring and fall offer moderate temperatures (50-70°F) and gentle sunlight, perfect for leafy greens and root vegetables. Use row covers or cold frames to extend the season by 2-4 weeks on either end. In summer, prioritize heat-tolerant varieties like okra, sweet potatoes, or malabar spinach, and provide afternoon shade to prevent bolting in lettuce or wilting in herbs.
Winter growing requires supplemental light (12-14 hours daily) if indoors, or greenhouse setups with heat mats (70-75°F soil temp) for germination. I’ve found that microgreens and sprouts thrive in cool (60-65°F) conditions with grow lights just 6 inches above the trays. Monitor humidity levels—winter air is dry, and most seedlings need 60-70% humidity to prevent stunted growth.
💧 Step 3: Harvest at Peak Ripeness for Storage Success
Harvest leafy greens like kale or spinach when leaves reach 6-8 inches for maximum flavor and nutrient density. For root vegetables, pull them when tops are 2-3 inches tall—larger roots often become woody. Tomatoes and peppers should be harvested when they’re firm but yielding slightly to touch, and herbs like basil or cilantro are best picked just before flowering for the strongest aroma.
After harvesting, process immediately or store properly. Blanching (dipping in boiling water for 2 minutes) preserves color and texture in greens, while drying or freezing works for herbs and tomatoes. I like to slice tomatoes into ¼-inch rounds, spread them on dehydrator trays, and dry at 135°F for 6-8 hours—this concentrates flavor and extends shelf life to 6 months. Label everything with the harvest date so you know what to use first.
🪴 Step 4: Preserve for Pantry Staples
For fermenting, use quart jars filled with chopped vegetables (cabbage, carrots, beets) and a 5% brine solution (2 tbsp salt per quart of water). Let ferment at 65-75°F for 5-7 days, then refrigerate. Canning requires a pressure canner for low-acid foods like green beans or carrots—follow USDA guidelines for processing times (usually 45-75 minutes at 10-15 psi).
For freezing, blanch vegetables first, then shock in ice water to stop cooking. Spread on trays to freeze solid before transferring to airtight bags or containers. Label with contents and date—most frozen produce stays fresh for 8-12 months. I also make herb oils by infusing olive oil with fresh herbs (rosemary, thyme, basil) in a jar for 2 weeks, then storing in the fridge for 2 months. This keeps flavors vibrant and ready for cooking.
⏰ Step 5: Rotate Crops and Maintain Soil Health Year-Round
After each harvest, remove spent plants and amend the soil with compost (1-2 inches) and balanced fertilizer (10-10-10). Rotate crops annually to prevent disease buildup—for example, if you grew tomatoes in a bed this summer, plant beans or peas there next year. Cover crops like clover or winter rye protect soil when beds are empty and add nitrogen when tilled in.
Test soil pH (6.0-7.0 for most vegetables) every 3-4 months and adjust with lime (to raise pH) or sulfur (to lower pH) as needed. I keep a soil journal to track amendments and results—this helps me fine-tune the system each season. Mulch heavily in winter with straw or leaves (4-6 inches) to insulate roots and retain moisture for spring planting.
Tips & tricks for year-round home harvesting
Here's what I've learned from years of growing my own food—these tricks turn seasonal gardening into a year-long success.
Seasonal Planning Precision: When mapping your 12-month calendar, I recommend color-coding each season differently. This visual system helps me instantly see gaps or overlaps in planting schedules. For example, my spring block always includes radishes (25-30 days) and lettuce (30-40 days) because they mature quickly, while winter gets dedicated to kale (60-70 days) and carrots (70-80 days). The key is matching crop maturity times to seasonal windows—don't let fast growers like bush beans (50-60 days) get crowded out by slower varieties.
Temperature Control for Winter Success: That 60-65°F range for microgreens and sprouts is non-negotiable—any colder and germination slows dramatically. I use a small greenhouse with a heat mat set to 70-75°F soil temperature for starting winter seeds indoors. For humidity, a simple pebble tray under grow lights works wonders—just keep the water level below the pebbles to prevent mold. The 6 inches above trays measurement is critical too; too close and seedlings scorch, too far and they stretch weakly.
Harvesting Timing Matters: Those 6-8 inches for leafy greens might seem arbitrary, but it's the sweet spot where flavor and texture peak. I've found that harvesting at this stage also prevents bitterness that develops as plants mature. For tomatoes, the "firm but yielding" test is foolproof—press gently with your thumb. If it gives slightly, it's perfect; if it's rock hard, it needs more time. The 2-minute blanching window for greens is tight too—any longer and you lose nutrients, any shorter and texture suffers.
Preservation Shortcuts: For the 6-8 hour dehydrating process at 135°F, I've discovered that pre-slicing tomatoes into ¼-inch rounds creates even drying. Arrange them skin-side up on dehydrator trays with space between slices—they'll shrink dramatically. For herb oils, I've started using small glass jars with tight lids to prevent oxidation. The 2-week infusion time gives enough flavor without turning bitter, and storing in the fridge extends that vibrant taste for months.
Pro Tips for Directions To Seed To Table
- Here's what I've learned from years of growing my own food—these tricks turn seasonal gardening into a year-long success.
- Seasonal Planning Precision: When mapping your 12-month calendar, I recommend color-coding each season differently.
- Temperature Control for Winter Success: That 60-65°F range for microgreens and sprouts is non-negotiable—any colder and germination slows dramatically.
Frequently asked questions
Got questions about growing your own food from seed to table? Here are some of the most common ones—and their answers—to help you get started on your year-round harvesting journey!
How long does it take to grow food from seed?
The time varies by crop! Fast growers like microgreens or radishes can be ready in 1-3 weeks, while tomatoes or peppers may take 2-4 months. Check seed packets for days to maturity—it’s your best guide!
Can I grow food indoors year-round?
Use grow lights, hydroponics, or sunny windowsills for herbs, leafy greens, and even dwarf tomatoes. Just ensure proper light (12-16 hrs/day), temperature (60-75°F), and humidity for success.
Is seed-to-table more expensive than buying groceries?
Not always! While seeds and supplies have upfront costs, long-term savings add up. A single tomato plant can yield 20+ pounds—enough for dozens of meals. Start small with fast, cheap crops (like beans or lettuce) to test the waters.
What do I do if pests or diseases attack my plants?
Stay proactive! Prevent pests with row covers, companion planting (e.g., basil + tomatoes), and regular inspections. For issues, try neem oil, soapy water sprays, or remove affected leaves. Avoid chemicals—they can harm your soil and food!
How do I preserve homegrown harvests for later?
Preservation is easy! Try canning (tomatoes, beans), freezing (berries, veggies), dehydrating (herbs, peppers), or fermenting (sauerkraut, pickles). Always research proper techniques to ensure safety and quality.
Wrapping up and next steps
Embracing the seed-to-table journey is more than just growing food—it’s a celebration of sustainability, freshness, and self-sufficiency! 🌱 Whether you’re a seasoned gardener or just starting, every sprout, harvest, and stored pantry item connects you deeper to the cycle of life.
The key takeaway? With the right tools, patience, and passion, you can enjoy homegrown goodness year-round—no matter your space or climate.
Ready to take the next step? Start small—plant a few seeds, experiment with storage, or share your harvest with neighbors. Every action plants the seed for a greener, tastier future! 🌍✨