
Propagation
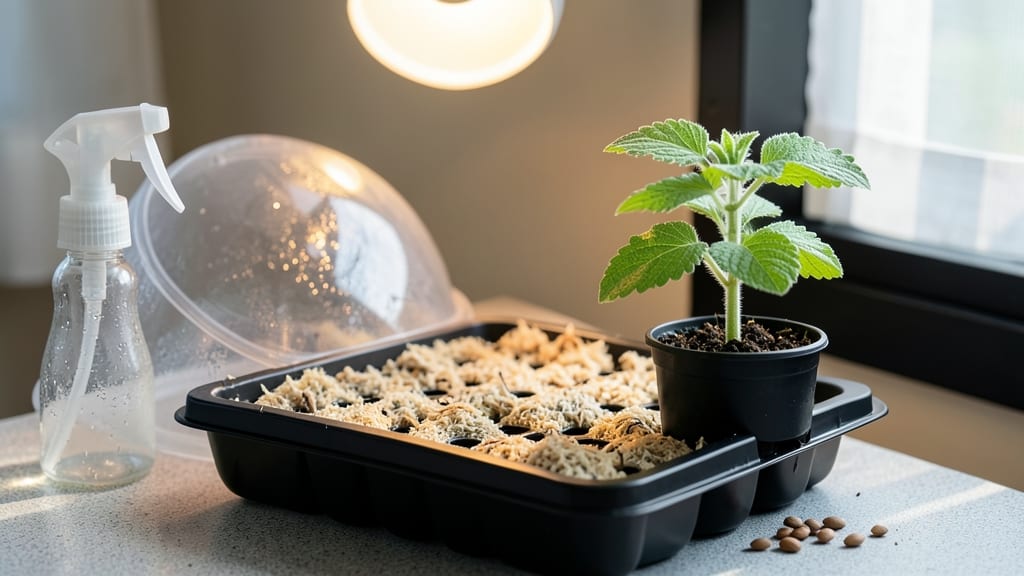
Growing catnip from seed indoors means fluffy, fragrant stems for your feline friend in just six weeks—no sunny windowsill required. 🌱 I’ve grown catnip indoors three times now, and the secret lies in mimicking its natural light and moisture needs without overcomplicating things.
Most people assume it needs bright light, but catnip thrives under grow lights too, making it perfect for apartments or low-light spaces.
The magic starts with the right setup: a shallow tray, well-draining soil, and a grow light (or a south-facing window if you have one). Seeds germinate in 7–14 days if kept warm and moist, and seedlings will be ready to transplant in 3–4 weeks.
The best part? Catnip repels pests like fleas and mosquitoes, so you’re growing a functional plant, not just a pretty one.
By week six, you’ll have lush, aromatic foliage that cats can’t resist—and you’ll avoid the leggy, weak stems that happen when light is too dim. The plants stay compact, making them ideal for small spaces or even hanging baskets.
Plus, it’s completely safe for cats to nibble on, so you’re giving your pet a natural, stimulating treat.
This method works year-round, whether you’re in a Zone 3 winter or a Zone 10 summer. The key is consistency: keep the soil damp but not soggy, and give those seedlings 12–16 hours of light daily.
Troubleshoot leggy growth by adjusting the light height, and watch your catnip grow into a thriving, cat-approved indoor garden.
📚 In This Guide
- What you need
- Instructions
- Tips and common mistakes
- Wrapping up and next steps
What you need
- ● Catnip seeds: 1 packet (50-100 seeds, non-GMO preferred for organic growth).
- ● Seed-starting trays or small pots: 4-6 (3-4 inches deep, with drainage holes).
- ● Seed-starting mix: 1 bag (lightweight, sterile potting soil blend for seedlings).
- ● Grow lights: 1 full-spectrum LED bulb (12-16 watts, adjustable height). OR a sunny windowsill (south-facing preferred).
- ● Spray bottle: 1 (for gentle watering).
- ○ Misting nozzle (optional but helpful): Ensures even moisture without over-saturating.
- ● Humidity dome or plastic wrap: 1 (to retain moisture during germination).
- ● Fertilizer: 1 bottle (balanced liquid fertilizer, 10-10-10 or fish emulsion for organic options).
- ● Scissors or pruning shears: 1 pair (for transplanting or harvesting).
- ● Heating mat: 1 (to speed up germination, set to 70-75°F).
- ● pH meter or test kit: Ensures soil pH stays between 6.0-7.0 (catnip thrives in slightly acidic to neutral soil).
- ● Label markers: 1 set (to track planting dates and varieties).
- ● Tweezers: 1 pair (for delicate seed handling).
- ● Glove: 1 (to protect hands from soil and potential allergens).
Step-by-step instructions for growing catnip from seed indoors
Here’s how I’ve grown lush catnip indoors—no sunny windowsill required.
🌱 Step 1: Prepare Containers and Seed Starting Mix
Use 4-inch diameter pots (one per seedling) filled with sterile seed-starting mix—never garden soil, which can harbor fungi that rot delicate catnip roots. I like to add a handful of perlite to the mix for extra drainage, since catnip hates soggy feet. Fill each pot to 1 inch below the rim and press down lightly to remove air pockets, but don’t compact it.
Moisten the mix with lukewarm water until it’s damp but not dripping. You’ll know it’s right when a handful squeezes together but doesn’t form a solid clump. Place the pots in a shallow tray to catch any excess water during germination.
🌱 Step 2: Sow Seeds and Create Ideal Germination Conditions
Scatter 2-3 seeds per pot on the soil surface—catnip seeds are tiny, so I use a toothpick to place them precisely. Cover them with just ⅛ inch of soil (or none at all, since light aids germination). Gently mist the surface with water until the soil looks uniformly damp.
Cover the pots with clear plastic wrap to trap humidity and warmth. Place them in a spot where the temperature stays 70-75°F—a seedling heat mat helps if your home runs cooler. Seeds should sprout in 7-14 days, but don’t peek under the plastic until you see green shoots.
☀️ Step 3: Provide Grow Lights and Monitor Growth
Once seedlings emerge, remove the plastic wrap immediately to prevent damping-off. Move them under a full-spectrum LED grow light positioned 2-3 inches above the pots. Catnip needs 14-16 hours of light daily, so set a timer if your lights aren’t on a smart system.
Watch for first true leaves (the second set after the initial cotyledons)—this signals it’s time to thin. Use scissors to snip the weakest seedling at soil level, leaving the strongest one per pot. You’ll see fluffy stems forming in 4-6 weeks if light and water are consistent.
💧 Step 4: Water and Fertilize for Healthy Growth
Water when the top inch of soil feels dry, using room-temperature water to avoid shocking the roots. I water from the bottom by placing pots in a tray of water for 10 minutes, then letting them drain completely. This method prevents fungal issues that plague overhead watering.
After 3 weeks, switch to a balanced liquid fertilizer (half-strength) every 2 weeks. Catnip responds well to feeding but won’t tolerate salt buildup, so always flush the soil with plain water after fertilizing. You’ll notice new growth within 5-7 days of feeding.
✂️ Step 5: Prune and Harvest for Bushier Plants
When stems reach 3-4 inches tall, pinch off the top set of leaves to encourage branching. This creates a fuller, more cat-friendly plant. Regular pruning also prevents legginess, which happens when light is insufficient. Always use clean scissors to avoid spreading disease.
Harvest leaves when they’re fully developed but still tender—the best time is in the morning after dew has dried. Snip stems just above a leaf node to promote new growth. With proper care, your catnip will produce harvests every 3-4 weeks indefinitely.
Tips & tricks for growing catnip indoors
Here's what nobody tells you about growing catnip indoors—these tricks make all the difference between a struggling plant and a thriving, fluffy harvest.
Germination Environment: The 70-75°F temperature range is critical for germination, but humidity matters just as much. After covering your pots with plastic wrap, place them in a sealed plastic bag with a few drops of water to create a mini greenhouse effect. This keeps moisture levels high without overwatering, which can drown those tiny seeds. I've seen germination rates double with this simple trick—just make sure to remove the bag once you see sprouts to prevent damping-off.
Lighting Strategy: Those 14-16 hours of daily light are non-negotiable, but the quality matters too. If you're using LED grow lights, position them just 2-3 inches above the seedlings and adjust as they grow. I recommend using a timer to automate this—catnip won't tolerate inconsistent light cycles. For extra vigor, rotate your pots quarter-turn daily so all sides get even exposure, preventing lopsided growth that makes harvesting messy.
Pruning Technique: When you pinch those stems at 3-4 inches tall, aim for the top set of leaves just above a leaf node. This encourages branching that creates that signature fluffy appearance cats love. I've found that using clean, sharp scissors dipped in rubbing alcohol between cuts prevents disease transmission. The first pruning sets the stage for your plant's entire structure—don't skip it, even if your cat is already drooling at the sight of those tiny seedlings.
Fertilizer Timing: That 3-week mark before starting fertilizer is crucial because young plants can't handle salts in their first few weeks. When you do start, I've had the best results with a fish emulsion fertilizer—it's gentle but packed with nutrients. The key is that half-strength application every 2 weeks. After fertilizing, always flush the soil with plain water to prevent salt buildup, which can burn delicate roots. You'll notice new growth within 5-7 days if you've got the timing right.
Pro Tips for Grow Catnip From Seed Indoors
- Here's what nobody tells you about growing catnip indoors—these tricks make all the difference between a struggling plant and a thriving, fluffy harvest.
- Germination Environment: The 70-75°F temperature range is critical for germination, but humidity matters just as much.
- Lighting Strategy: Those 14-16 hours of daily light are non-negotiable, but the quality matters too.
Frequently asked questions
about growing catnip indoors—because even the best gardeners need a little extra help!How long does it take for catnip seeds to germinate indoors?
Catnip seeds typically sprout within 7–14 days when kept warm (around 70°F) and moist. Use a seedling heat mat if your home runs cooler—patience is key! If nothing sprouts after 3 weeks, try gently pressing the seeds into the soil or soaking them overnight to soften the tough outer shell.
Can I grow catnip indoors without grow lights?
Yes, but expect slower growth and weaker stems. Place your seedlings near a south-facing window for 6+ hours of sunlight daily. If natural light is limited, supplement with a basic LED bulb (12–16 hours/day) to mimic sunlight. Just avoid harsh fluorescent lights—they can stress delicate seedlings.
Will my cat destroy my catnip plants before they mature?
Start with a small, enclosed grow tray (like a seedling kit) to protect sprouts. Once seedlings are 2–3 inches tall, transfer them to a hanging planter or high shelf out of paw’s reach. If your cat is persistent, try growing catnip in a windowsill planter with a mesh cover until harvest.
What’s the best soil mix for indoor catnip?
Use a light, well-draining potting mix blended with perlite or vermiculite (50/50 ratio) to prevent root rot. Avoid heavy garden soil—it compacts and suffocates roots. For extra fluffiness, add a handful of coco coir to retain moisture without sogginess. Sterilize the mix by baking it at 200°F for 30 minutes to kill fungi.
Can I regrow catnip from cuttings or harvest multiple times?
Catnip is a perennial herb, so you can harvest leaves 3–4 times per year by pruning stems just above a leaf node. For cuttings, snip 3–4 inch sections, strip lower leaves, and root them in water or moist perlite. However, indoor plants may weaken after 2–3 harvests—replace them with fresh seeds for stronger growth.
Why are my catnip leaves turning yellow or wilted?
Yellowing leaves often signal overwatering or poor drainage. Let the top inch of soil dry out between waterings, and ensure pots have drainage holes. Wilting can also mean underwatering or root rot—check for mushy stems. Adjust humidity with a pebble tray or mist lightly (but avoid soggy soil).
Wrapping up and next steps
Growing catnip from seed indoors is easier than you think—no sunlight required! With the right setup, you’ll enjoy fluffy, fragrant stems in just six weeks, perfect for your feline friends.
Whether you’re a beginner or a seasoned plant parent, this method proves that even small spaces can yield big rewards.
Ready to take the next step? Once your catnip thrives, harvest and share the joy with your cats—or even expand your indoor garden! 🐾 Start small, stay patient, and watch your little green project grow into a purr-fect success.