
Lawn
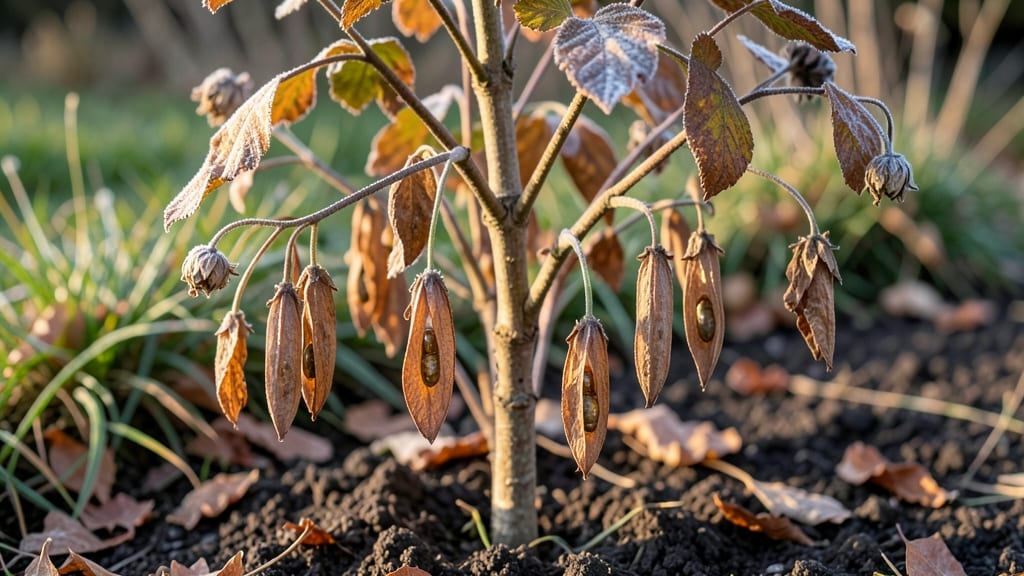
Those round, papery hydrangea seed pods are nature’s way of growing new plants—if you collect and store them right. 🌿 I’ve turned my garden’s "waste" into thriving seedlings by drying and saving these pods, and the process is simpler than you’d think.
The key is timing: harvest them when they turn brown and crispy in late fall, before they burst open. You’ll need just a few supplies: a paper bag for drying, a sealed container for storage, and patience.
Once dried, crack open the pods to release the tiny seeds, then store them in a cool, dry place. Germination takes time—sometimes up to a year—but the payoff is worth it when those first green shoots appear.
By spring, you’ll have lush hydrangea seedlings ready to transplant, with the potential to grow into the same stunning blooms you love. The best part? You’re saving money and preserving your favorite varieties for years to come.
This method works for all hydrangea types, from bigleaf to panicle, and even thrives in containers. Just be patient—hydrangeas grow slowly, but the results are stunning.
📚 In This Guide
- What you need
- Instructions
- Tips and common mistakes
- Wrapping up and next steps
What you need
- ● Mature hydrangea seed pods: Collect 5–10 healthy, fully dried pods from your garden or a trusted source.
- ● Brown paper bags: 2–3 large, breathable bags (10x12 inches) for drying pods indoors.
- ● Newspaper or paper towels: A sheet or two for lining storage containers.
- ● Small plastic bags or envelopes: 5–10 resealable bags (quart-sized) for long-term seed storage.
- ○ Desiccant packets (optional but recommended): 1–2 packets to absorb moisture in storage bags.
- ● Permanent marker: For labeling seed bags with the date and hydrangea variety.
- ○ Spray bottle with water (optional): For lightly misting pods if they’re too dry.
- ● Pruning shears or scissors: For gently harvesting pods without damaging them.
- ○ Small paintbrush (optional): A soft-bristle brush to dislodge seeds from pods if needed.
- ● Damp cloth or paper towels: For cleaning pods if dirt or debris is present.
- ● Cooling environment: A dark, dry space (like a basement or closet) with temperatures between 35–45°F (2–7°C) for storage.
- ● Patience! Hydrangea seeds benefit from a stratification period (cold treatment), so plan ahead.
How to harvest, dry, and store hydrangea seed pods
Here’s the simple method I use to save hydrangea seeds year after year—no fancy tools needed.
🌿 Step 1: Collect Mature Seed Pods
Wait until seed pods turn brown and papery—this usually happens in late fall after the flowers fade. Gently twist or cut open the pods with pruning shears to reveal the small, fluffy seeds inside. I like to work on a clean sheet of paper to catch the seeds and avoid losing them.
Don’t rush this step—green pods won’t dry properly, and seeds inside may not germinate. If pods drop naturally, collect them from the ground immediately to prevent mold or pests from damaging the seeds.
💧 Step 2: Dry the Seeds Thoroughly
Spread the seeds in a single layer on a mesh screen or paper towel in a warm, dry, well-ventilated spot (like a sunny windowsill or a drying rack). Avoid direct sunlight—it can overheat and damage the seeds. Stir them gently every 24 hours to ensure even drying.
Seeds are ready when they feel light and crisp—this usually takes 7-10 days. If humidity is high, drying may take longer. Store them in a paper envelope (not plastic) to allow airflow until fully dry.
🪴 Step 3: Store Seeds for Germination
Once completely dry, transfer seeds to a sealed, airtight container (like a glass jar or plastic bag with a silica packet). Label it with the variety and date—hydrangea seeds stay viable for 1-2 years if stored properly in a cool, dark place (like a fridge).
Check the container every few months for moisture or mold. If you notice condensation, open it to air out the seeds before resealing. Proper storage ensures a high germination rate when you’re ready to plant.
⏰ Step 4: Stratify Seeds for Best Results
Hydrangea seeds need stratification to break dormancy. Mix seeds with moist sand or peat moss in a sealed container, then refrigerate for 30-60 days. This mimics winter conditions and triggers germination. Keep the mix damp but not soggy—check weekly and mist if needed.
After stratification, sow seeds ¼ inch deep in well-draining soil. Place the container in a warm spot (65-75°F) until sprouts appear, which can take 2-4 weeks. Patience is key—hydrangeas grow slowly from seed!
Tips & tricks for perfect hydrangea seed pod preservation
Between us, these little tricks will help you avoid the most common pitfalls when saving hydrangea seeds.
Timing Secret: The 24-hour stirring interval in Step 2 is your best friend for even drying. I learned this the hard way after ruining seeds by leaving them undisturbed—moisture pockets form and create mold. Set a phone alarm so you don't forget, especially if you're drying multiple batches.
Visual Cue for Doneness: When checking if seeds are ready after 7-10 days, hold them between your fingers—they should feel as light as dandelion fluff. If they still have any weight or stickiness, give them another day. Overdrying won't hurt, but underdrying means poor germination later.
Storage Wisdom: That paper envelope in Step 3 isn't just for airflow—it's also your moisture detector. If you notice any condensation inside after a few months, your seeds are too damp. Open it immediately, spread the seeds on a paper towel, and let them air out completely before resealing. This single step can double your germination rate.
Stratification Hack: For the 30-60 day cold treatment in Step 4, I like using small plastic baggies with a tiny hole punched in the top. Place them directly on the fridge shelf (not the crisper drawer) where temps stay steady around 35-40°F. The hole prevents condensation buildup while keeping the mix moist.
Pro Tips for Hydrangea Seed Pods
- Between us, these little tricks will help you avoid the most common pitfalls when saving hydrangea seeds.
- Timing Secret: The 24-hour stirring interval in Step 2 is your best friend for even drying.
- Visual Cue for Doneness: When checking if seeds are ready after 7-10 days, hold them between your fingers—they should feel as light as dandelion fluff.
Frequently asked questions
Got questions about hydrangea seed pods? You’re not alone! Here are some of the most common queries—plus quick, actionable answers to help you master seed-saving like a pro.
Why do hydrangea seed pods dry out before they open?
Hydrangea seed pods dry out as a natural part of their maturation process. This drying signals the seeds are ready for harvest—often turning brown or papery. If pods stay green or moldy, they’re not fully ripe. Pro tip: Wait until pods are crispy to the touch before collecting!
How long does it take for hydrangea seeds to germinate?
Germination can take anywhere from 2–6 weeks, depending on moisture, temperature, and seed freshness. Start seeds indoors in late winter for a head start, using a warm (70–75°F) seed-starting mix. Patience is key—some stubborn seeds may take longer!
Can I use store-bought hydrangea seeds instead of saving my own?
While saving seeds from your plants ensures variety consistency, store-bought seeds are a great alternative—especially for rare cultivars. Just check the packet for cold stratification requirements, as many hydrangea seeds need a chilling period to sprout.
What should I do if my hydrangea seed pods develop mold?
Moldy pods mean the seeds are too damp or stored improperly. Discard affected pods immediately to prevent spoilage. For future harvests, store pods in a cool, dry place (like a paper bag with holes) or use silica gel packets to absorb excess moisture.
Do hydrangea seed pods produce the same flowers as the parent plant?
Not always! Hydrangeas can be hybrids, meaning saved seeds may not match the parent’s blooms. For true-to-type flowers, propagate via cuttings or buy seeds labeled for specific varieties. Think of seed pods as a fun experiment—nature’s way of surprising you!
Still stumped? Drop your question in the comments—we’re happy to help!
Wrapping up and next steps
Hydrangea seed pods are a gardener’s secret weapon for expanding your floral collection without breaking the bank! By drying and storing them properly, you unlock the potential for year-round germination—giving you fresh starts whenever inspiration (or spring!) strikes.
Whether you’re a seasoned green thumb or just beginning, this simple process turns fallen pods into future blooms with minimal effort.
Ready to grow your garden’s possibilities? 🌱 Start by gathering pods from your yard or a local nursery, then follow the steps to dry and store them.
Next, experiment with germination techniques—like the paper towel method—to see what works best for your climate. Happy gardening, and may your hydrangeas thrive!