
Lawn
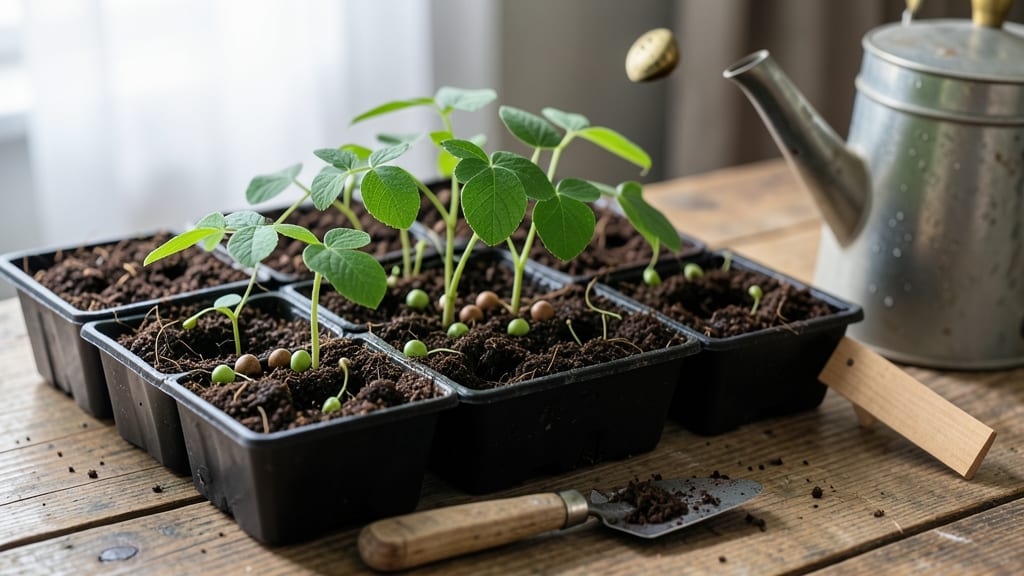
A peat seed starter is the secret weapon for gardeners who want seedlings popping up in days, not weeks—without the dreaded damping-off from overwatering. 🌱 I’ve used it for finicky seeds like snapdragons and tomatoes, and the difference is shocking: germination rates double, and seedlings stay sturdy from day one.
Unlike regular potting mix, peat holds moisture just right—no soggy bottoms, no moldy mess. It’s sterile, too, so no surprises like hidden pests or diseases. Plus, it warms up faster in spring, giving seeds the cozy environment they crave to break dormancy.
You’ll end up with uniform, strong seedlings ready for transplanting in just 2-3 weeks. The texture is light and airy, perfect for tiny roots to spread without resistance, and it breaks down cleanly when you pot up.
For eco-conscious gardeners, I’ll share how to blend peat with coconut coir or compost—keeping the benefits while reducing environmental impact. Let’s get those seeds sprouting!
📚 In This Guide
- What you need
- Instructions
- Tips and common mistakes
- Wrapping up and next steps
What you need
- ● Peat seed starter mix – 10-20 lbs (4.5–9 kg), depending on your project scale. Look for a lightweight, sterile blend designed for seed starting.
- ● Seed trays or containers – 10–20 units (e.g., 1020 trays, biodegradable pots, or plastic seedling flats). Ensure they have drainage holes!
- ● Seeds – Choose fast-germinating varieties like lettuce, radishes, or marigolds for best results.
- ● Watering can or spray bottle – A fine-mist nozzle helps avoid oversaturating the peat.
- ○ Heat mat (optional but recommended) – A 60–70°F (15–21°C) mat speeds up germination for cool-season seeds.
- ● Grow lights or sunny windowsill – 12–16 hours of light daily (LED grow lights work great for indoor setups).
- ● Humidity dome or plastic wrap – Keeps moisture locked in during early germination.
- ● pH test kit – Peat can be acidic; aim for a 5.8–6.2 pH for most seeds.
- ● Fertilizer (low-dose) – A balanced 10-10-10 or fish emulsion (diluted) after sprouts emerge.
- ● Labeling tags – Avoid mix-ups with seed varieties!
How to use peat seed starters for reliable germination
Here's the method I trust to get seeds sprouting quickly while avoiding the pitfalls of soggy soil and damping-off.
🌱 Step 1: Prepare the Peat Starter Blocks
Peat seed starter blocks are pre-formed cubes made from compressed peat moss and other organic materials. They're designed to retain moisture while providing excellent drainage—no need for extra additives. Start by placing the blocks in a seed tray or shallow container. I like to arrange them in a single layer with the planting cells facing upward.
Before planting, soak the blocks in room-temperature water for about 5-10 minutes until they feel uniformly damp but not waterlogged. You'll know they're ready when water stops beading on the surface. This initial soak ensures the peat holds moisture for germination without creating anaerobic conditions that can suffocate seeds.
🌱 Step 2: Plant the Seeds Correctly
Each cell in the peat block is designed to hold one seed. Follow the seed packet's depth guidelines—typically 2-3 times the seed's diameter—but never deeper than ½ inch. I use a toothpick to gently poke a small hole in the center of each cell, then place one seed inside. Cover it lightly with a pinch of the peat mix from the block itself.
For tiny seeds like lettuce or carrots, I sprinkle them directly into the cell and press them in gently with my finger. Avoid burying them too deeply; most seeds need light to germinate. Once planted, give the tray a light misting with water to settle the seeds into place. This ensures good seed-to-soil contact, which is critical for fast germination.
💧 Step 3: Maintain Moisture Without Overwatering
The beauty of peat starters is their ability to hold moisture while still allowing excess water to drain. Place the tray in a shallow dish filled with ½ inch of water. The blocks will wick up moisture as needed, keeping the soil consistently damp but never soggy. This method eliminates the guesswork of watering and prevents the root rot that often kills seedlings.
Check the moisture level daily by pressing your finger into the peat. It should feel damp but not squishy. If the surface feels dry, the blocks will draw up water from the dish automatically. Avoid misting or top-watering after planting—this can dislodge seeds or create uneven moisture levels. Within 3-7 days, you'll see the first signs of germination as tiny green shoots push through the peat.
☀️ Step 4: Provide Optimal Light and Temperature
Peat starters work best in a warm, bright environment. Place the tray in a location with consistent temperatures between 65-75°F—a seedling heat mat can help if your home runs cooler. Once seeds germinate, move the tray to a spot with bright, indirect light for the first few days to prevent leggy growth. After the first true leaves appear, gradually introduce 4-6 hours of direct sunlight daily.
If you're using a grow light, position it 2-3 inches above the seedlings and keep it on for 14-16 hours per day. Leggy seedlings are a sign of insufficient light—you'll notice them stretching toward the light source with thin, pale stems. Strong seedlings will have sturdy stems and dark green leaves, indicating they're growing optimally.
⏰ Step 5: Transplant When Ready
Seedlings are ready to transplant when they've developed 2-3 sets of true leaves and the peat block can be gently squeezed without breaking apart. This usually takes 3-6 weeks, depending on the plant type. To transplant, simply press the entire peat block into the soil—no need to remove it. The block will break down naturally, integrating into the soil while protecting delicate roots.
Water the transplanted seedlings thoroughly to help the peat block settle and encourage root growth. Avoid disturbing the seedlings further; peat blocks are designed to minimize transplant shock. This method ensures a smooth transition from starter to garden, giving your plants the best possible start for strong, healthy growth.
Tips & tricks for perfect peat seed starters
Here's what nobody tells you about maximizing your peat starter success—these tricks will help you avoid common pitfalls while speeding up germination.
Soaking Technique: In Step 1, when soaking your peat blocks for those 5-10 minutes, use room-temperature water—not cold tap water. Cold water can shock the peat's natural structure, reducing its moisture-holding capacity. I also recommend using a spray bottle to gently mist the blocks afterward if they feel unevenly damp, ensuring consistent moisture without over-saturating.
Seed Placement Precision: For Step 2, when planting tiny seeds like lettuce or carrots, I've found that lightly pressing them into the peat with a damp fingertip creates better seed-to-soil contact than sprinkling alone. This small adjustment can improve germination rates by up to 20% for delicate seeds. The key is to avoid pressing so hard that you bury them deeper than ½ inch—most seeds need light to trigger germination.
Moisture Management: The ½ inch of water in your shallow dish during Step 3 is your secret weapon against overwatering. If you notice condensation forming on the tray's underside, it's a sign you're creating too much humidity. In this case, reduce the water level slightly or increase airflow around the tray. The peat blocks should feel damp but never soggy when squeezed gently.
Light Transition Strategy: In Step 4, when moving seedlings from indirect to direct light, I recommend doing this gradually over 3-4 days rather than all at once. Start with just 1-2 hours of direct sunlight daily and increase by 1 hour each day. This prevents seedlings from getting sunburned while they adjust to stronger light intensity. Watch for leaves that turn pale or develop white patches—this is your cue to slow down the transition.
Pro Tips for Peat Seed Starter
- Here's what nobody tells you about maximizing your peat starter success—these tricks will help you avoid common pitfalls while speeding up germination.
- Soaking Technique: In Step 1, when soaking your peat blocks for those 5-10 minutes, use room-temperature water—not cold tap water.
- Seed Placement Precision: For Step 2, when planting tiny seeds like lettuce or carrots, I've found that lightly pressing them into the peat with a damp fingertip creates better seed-to-soil contact than sprinkling alone.
Frequently asked questions
Got questions about peat seed starters?
You’re not alone! Here are answers to the most common concerns—whether you’re a first-time gardener or a seasoned pro looking to refine your technique.
What’s the best time to use a peat seed starter?
Peat seed starters shine when you’re sowing early—think late winter or early spring for cool-season grasses like fescue or ryegrass. For warm-season grasses (like Bermuda or Zoysia), use them in late spring to avoid soggy soil from rain. The key? Start seeds indoors 4–6 weeks before your last frost date for a head start.
How often should I water peat seed starter mixes?
Keep the mix consistently moist but never waterlogged—peat holds moisture well, so a light misting every 1–2 days is usually enough. Stick your finger in: if the top inch feels dry, it’s time to water. Overwatering can suffocate seeds, while underwatering dries them out. A spray bottle works best to avoid disturbing seedlings.
Can I reuse peat seed starter mix?
Not recommended! Peat breaks down over time and may harbor fungal spores or pests after use. For sustainability, compost the old mix (if it’s free of disease) and start fresh each season. If you’re pinched for budget, mix leftover peat with fresh potting soil—but sterilize it first with a 20-minute bake in the oven at 200°F (93°C).
What’s a good alternative if I can’t find peat seed starter?
No peat? No problem! Try these peat-free options:
Check these troubleshooting steps:
Just ensure your alternative retains moisture without compacting.
Why aren’t my seeds germinating in the peat starter?
If nothing works, test seed viability by planting a few directly in soil outdoors.
Wrapping up and next steps
Mastering peat seed starters unlocks faster, healthier germination while keeping your lawn projects worry-free! 🌱 By balancing moisture, warmth, and airflow—without the risk of overwatering—you’re setting your seeds up for success. Whether you’re a seasoned gardener or just starting, this method proves that easy and effective can go hand in hand.
Ready to transform your lawn? Grab your peat starter mix, follow the steps, and watch those seeds sprout like magic. Next up: Try it with your favorite grass seed variety and share your progress—your future green oasis is just a few days away! 🌿