
Lawn
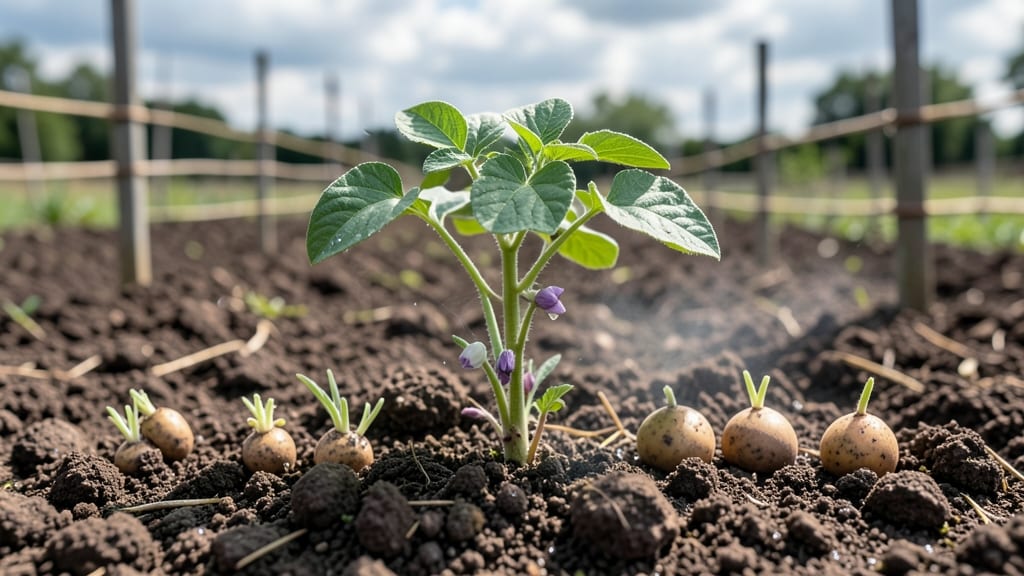
Growing potatoes from sprouted seed potatoes cuts your harvest time by weeks—no more waiting for store-bought starts to catch up. 🌱 I’ve grown thousands of pounds this way, and the secret isn’t just planting them early; it’s knowing which ones are truly viable before they rot in the soil.
That twist test I’ll show you saves more potatoes than any other trick I’ve tried.
First, grab organic seed potatoes (certified disease-free) with sprouts 1-2 inches long—those are your goldmines. Cut them into chunks with at least one sprout and one "eye" (the little dimples), let the cut sides dry for 24 hours, and store in a cool, dark place until planting.
The right soil—loose, well-draining, and rich in compost—makes all the difference between a scraggly harvest and a bushel basket of perfect spuds.
Plant them 4-6 inches deep, 12 inches apart, with rows 30 inches apart to give vines room to sprawl. Mound soil around stems as they grow (called "hilling"), and keep the soil consistently moist but never soggy.
Frost? No problem—plant 2-3 weeks before last frost in spring, and you’ll have new potatoes ready in 6-8 weeks or full-sized harvests by summer’s end.
Here’s the game-changer: skip the viability test at your peril. A sprout doesn’t always mean a healthy tuber—some potatoes are just putting on a show. The twist test (I’ll cover it in the guide) catches the fakes before they waste your garden space. Ready to dig in?
📚 In This Guide
- What you need
- Instructions
- Tips and common mistakes
- Wrapping up and next steps
What you need
- ● Seed potatoes: 5–10 certified disease-free potatoes per variety (choose organic or heirloom for best results). Look for small to medium-sized tubers with multiple eyes (sprouts).
- ● Growing containers or garden bed: Containers: 5–10 gallon pots (1–2 per potato) with drainage holes, or a 5-gallon bucket with a drill bit for holes.
- ● Garden bed: Well-draining soil, enriched with compost (at least 2–3 inches mixed in).
- ● Potting mix or soil: Lightweight, sterile mix (e.g., 50% peat moss, 50% perlite or vermiculite) for containers. For in-ground planting, use loamy soil with a pH of 5.0–6.5.
- ● Watering can or hose: With a gentle spray nozzle to avoid damaging sprouts.
- ● Pruning shears or knife: For cutting seed potatoes (if pre-sprouting indoors).
- ● Grow lights or sunny windowsill: If starting indoors (12–16 hours of light daily).
- ● Fertilizer: Balanced 10-10-10 or organic options like fish emulsion (apply sparingly after sprouts reach 4–6 inches).
- ● Mulch: Straw or grass clippings (2–3 inches) to retain moisture and regulate soil temp.
- ○ Twist test tool (optional): A potato viability tester or even a paperclip to check for hollow hearts (if testing maturity later).
Step-by-step guide to growing sprouted seed potatoes
Here's how to turn those sprouted spuds in your pantry into a thriving garden—no twist tests required.
🌱 Step 1: Select and Prep Your Sprouted Potatoes
Start with firm, disease-free potatoes that have 1-2 inch sprouts (called "eyes"). Avoid any with soft spots or mold—those won’t make it. I like to cut larger potatoes into 2-3 inch chunks, ensuring each piece has at least one sprout. Let the cut pieces dry for 24 hours to prevent rot; this forms a protective callus.
Here's the thing—don’t rush this step. If you plant potatoes with sprouts longer than 2 inches, they’ll grow weak stems and produce fewer tubers. Instead, wait until sprouts reach 1-2 inches, then plant. This ensures strong root development underground.
🪴 Step 2: Choose Containers or Garden Beds
For containers, use 5-gallon buckets or 12-inch deep pots with drainage holes—potatoes need 12+ inches of soil depth to grow properly. Fill the bottom 6 inches with well-draining soil mixed with compost (I use a 50/50 blend). If planting in the ground, choose a sunny spot with loose, fertile soil and full sun (6+ hours daily).
Real talk: If your soil drains poorly, add a 3-inch layer of gravel at the bottom of containers or amend garden beds with sand or perlite. Waterlogged roots lead to rot, and nobody wants to lose their crop to soggy soil.
☀️ Step 3: Plant and Maintain Moisture
Place your prepped potato pieces 2 inches deep, sprouts facing up. Space them 12 inches apart in containers or 18 inches apart in garden beds. Cover lightly with soil, then water gently but thoroughly until the soil feels evenly moist (not soggy). Keep soil consistently damp—never dry or waterlogged—until sprouts emerge above soil (about 2-3 weeks).
Once sprouts appear, add 2-3 inches of soil around the stems to encourage underground tuber formation. Repeat this "hilling" every 2 weeks until plants flower. This protects new tubers from sunlight, which turns them green and bitter.
🌿 Step 4: Fertilize and Monitor Growth
After 4-6 weeks, when plants reach 6-8 inches tall, feed with a balanced fertilizer (10-10-10) or compost tea to boost growth. I use 1 tablespoon per plant every 4 weeks during the growing season. Avoid high-nitrogen fertilizers—they produce leafy growth at the expense of tubers.
Watch for yellowing leaves or stunted growth, which signal overwatering or nutrient deficiency. If leaves wilt in hot afternoons, mulch with straw or grass clippings to retain moisture. Harvest when flowers fade and leaves start yellowing—this usually takes 3-4 months from planting.
⏰ Step 5: Harvest and Store for Year-Round Use
Gently dig around the base of plants with a fork, lifting potatoes carefully to avoid bruising. Cure them in a dark, dry place at 50-60°F for 1-2 weeks to thicken skins. Store in a cool, dark spot (40-50°F) with high humidity—I use a paper bag with a few holes in a basement corner.
Here’s the trick for long-term storage: Check potatoes monthly and remove any that sprout early. If stored properly, they’ll keep for 4-6 months, giving you a steady supply even in winter.
Tips & tricks for perfect sprouted seed potato growth
Common pitfalls—and how to sidestep every one—when growing potatoes from sprouts.
Sprout Size Matters: The instructions emphasize 1-2 inch sprouts for a reason—longer sprouts (over 2 inches) signal the potato has already started expending energy growing above ground. This weakens the root system before planting. I’ve seen gardeners rush this step and end up with spindly plants that produce tiny tubers. If your sprouts exceed 2 inches, trim them back to that length before planting to encourage stronger underground growth.
Soil Depth is Non-Negotiable: The 12+ inches of soil depth mentioned in Step 2 isn’t just a suggestion—it’s critical for tuber formation. Potatoes need this space to develop properly. If you’re using containers, fill them completely with the soil-compost mix before planting. For garden beds, dig trenches 12 inches deep and plant horizontally if needed, placing potatoes on their sides with sprouts facing up. This maximizes root spread and tuber production.
Hilling Technique Timing: The instructions specify hilling every 2 weeks until flowering, but here’s what nobody tells you—start hilling when you see the first signs of new growth after planting. This early mound encourages more tuber formation from the beginning. Use loose soil (not packed) when hilling to prevent compacting the roots. A good rule of thumb: mound soil to just below the plant’s current height, leaving the top leaves exposed to sunlight.
Storage Humidity Hack: The 4-6 months storage time mentioned assumes proper humidity. To create the ideal environment without fancy equipment, place a damp towel in the paper bag with your potatoes. Check it monthly—if it’s dry, spritz it lightly with water. This maintains high humidity naturally. Also, avoid storing near onions or apples, which release gases that accelerate sprouting and spoilage.
Pro Tips for Sprouted Seed Potatoes
- Common pitfalls—and how to sidestep every one—when growing potatoes from sprouts.
- Sprout Size Matters: The instructions emphasize 1-2 inch sprouts for a reason—longer sprouts (over 2 inches) signal the potato has already started expending energy growing above ground.
- Soil Depth is Non-Negotiable: The 12+ inches of soil depth mentioned in Step 2 isn’t just a suggestion—it’s critical for tuber formation.
Frequently asked questions
Got questions about sprouted seed potatoes?
You’re not alone! Here are some of the most common queries—plus quick, actionable answers to keep your garden thriving.
Can I plant sprouted potatoes from the grocery store?
Yes, but with caution! Store-bought potatoes are often treated with sprout inhibitors or pesticides. Cut them into chunks with at least one sprout (and an "eye") per piece, let them dry for 1–2 days, and plant them in well-draining soil. For organic or untreated potatoes, this is a great way to reduce waste!
How long do sprouted potatoes take to grow?
From planting to harvest, sprouted seed potatoes typically take 90–120 days for early varieties and up to 150 days for late-season types. Factors like soil temperature, sunlight, and watering speed this up—aim for 60–70°F soil temps for optimal growth. Check for harvest readiness when foliage yellows and dies back.
What if my sprouted potatoes rot before planting?
Rot is often caused by moisture or poor storage. Store sprouted potatoes in a cool (40–50°F), dark, and humid (85–90%) place (like a paper bag in the fridge). If they soften or mold appears, discard them—don’t risk planting! For extra protection, dust cut pieces with cinnamon or wood ash before planting.
Are there alternatives to sprouted seed potatoes?
Try these options:
- Certified seed potatoes: Disease-free and untreated, available at garden centers.
- Organic seed potatoes: Look for labels like "USDA Organic" for chemical-free starts.
- Grow from grocery-store potatoes: Just ensure they’re organic or untreated.
- Regrow from store-bought sprouts: Place a potato in water until roots form, then plant!
Can I reuse sprouted potatoes for multiple growing seasons?
Not recommended! Potatoes degenerate over time, leading to weaker plants and lower yields. Save seeds from your healthiest harvest each year for the best results. If you’re short on space, try container gardening—just use a deep pot (12+ inches) with drainage.
Wrapping up and next steps
Growing sprouted seed potatoes is a rewarding way to ensure healthy, twist-free harvests year-round! 🌱 Whether you're a seasoned gardener or just starting, this method saves money, reduces waste, and guarantees fresh, homegrown potatoes. The key is patience, proper storage, and a little know-how—but the results are worth it.
Ready to dig in? Start small this season—plant a few sprouted potatoes in a container or patch of soil, and soon you’ll be enjoying your own homegrown harvest. Happy growing! 🌟