
Propagation
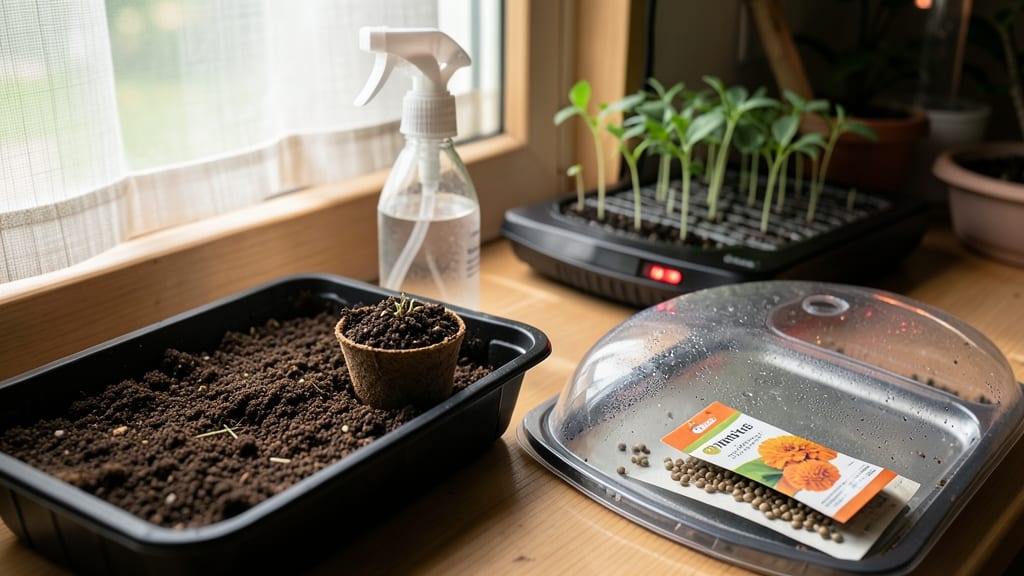
The right soil to use for seed starting isn’t just dirt—it’s the foundation for fast germination and strong roots. 🌱 I learned this the hard way when my first batch of seedlings flopped because the garden soil was too dense and compacted.
The secret lies in a lightweight mix that holds moisture without drowning roots or locking them out of air. Most commercial seed-starting mixes use peat moss or coconut coir as their base, which creates that perfect fluffy texture.
These blends are sterile, so you won’t introduce diseases to your tender sprouts, and they drain well enough to prevent rot.
If you're feeling adventurous, you can even make your own mix with 50% peat or coir, 30% perlite or vermiculite, and 20% compost—just be sure to sterilize it first.
What you’ll end up with is a soil that lets seeds breathe while keeping them cozy enough to sprout. Roots grow freely, stems stay sturdy, and you’ll see those first little leaves break through the soil in half the time compared to heavy garden dirt. The payoff?
Seedlings that thrive from day one. This approach works for everything from tiny lettuce seeds to burly tomato starts. Just adjust the moisture level based on what you’re growing—succulents need drier mixes, while herbs and veggies prefer slightly moister blends. Here’s how to get it right every time.
📚 In This Guide
- What you need
- Instructions
- Tips and common mistakes
- Wrapping up and next steps
What you need
- ● Seed-starting mix: 1–2 bags (1–2 cubic feet) of a lightweight, sterile mix designed for seedlings (e.g., Pro-Mix, FoxFarm Seedling Mix, or Black Gold Seedling Mix). Avoid garden soil—it’s too dense and may harbor pests or diseases.
- ● Containers: Seed trays (with or without drainage holes) or
- ● Small pots (2–4 inches deep) or
- ● Recycled containers (yogurt cups, egg cartons) with drainage holes punched in.
- ○ Drainage layer (optional but recommended): Perlite, vermiculite, or coarse sand (1 part per 4–5 parts soil mix) to improve aeration and prevent compaction.
- ● Spray bottle or watering can: With a fine mist nozzle to water gently without disturbing seeds.
- ● Grow lights or sunny windowsill: A LED grow light (12–16 hours/day) or a south-facing window (60°F+ consistency).
- ● Humidity dome or plastic wrap: To retain moisture while seeds germinate (remove once sprouts appear).
- ○ Thermometer (optional but helpful): To monitor soil temperature (ideal range: 65–75°F for most seeds).
- ● Clean workspace: Disinfect surfaces with a 10% bleach solution (1 part bleach to 9 parts water) to prevent contamination.
- ● Seeds: High-quality, fresh seeds (check expiration dates—older seeds germinate poorly!).
- ● Patience: Germination times vary (some seeds sprout in 3–7 days; others take weeks!).
Step-by-step guide to selecting the perfect soil for seed starting
You’ll want a mix that speeds up germination and keeps roots happy—here’s how to choose it right.
🌱 Step 1: Understand the Key Qualities of Seed Starting Soil
Seed starting soil needs to be lightweight and airy, not compact like garden soil. Think of it like a fluffy nest for tiny roots—it should crumble easily between your fingers when dry and still drain well when wet. The best mixes are sterile to prevent diseases that can kill seedlings before they even sprout.
Look for labels that say "seed starting mix" or "germination blend." These are specially formulated to hold just enough moisture without becoming soggy. Avoid garden soil, compost, or potting mixes meant for mature plants—they’re too dense and can smother delicate seedlings.
🌿 Step 2: Compare Common Soil Options for Seed Starting
Peat-based mixes are the gold standard for fast germination—they’re light, retain moisture well, and warm up quickly under grow lights. Brands like FoxFarm Seedling Mix or Black Gold Seedling Mix are reliable choices. If you’re eco-conscious, coco coir blends (made from coconut husks) are a great alternative—they hold moisture longer and don’t compress like peat.
Vermiculite or perlite blends (often added to pre-mixed soils) improve drainage and aeration. You’ll see these listed as ingredients—aim for a mix with 30-50% perlite or vermiculite by volume. A good rule of thumb: if the bag says "seed starting" or "germination," it’s likely a safe bet. Just skip anything with fertilizer—you’ll add that later, after germination.
💧 Step 3: Test Your Chosen Soil Before Planting
Fill a small container with your selected mix and give it a squeeze. If it holds its shape like wet sand but still feels light, you’re good to go. Now, add warm water until it’s damp like a wrung-out sponge—no puddles, just even moisture. Drop a handful into your palm; if it stays loose when you open your hand, it’s ready for seeds.
Pro tip: If you’re using a pre-mixed bag, check the expiration date. Old seed starting mix loses its fluffiness and can harbor mold. For homemade mixes, combine 60% peat or coco coir, 30% perlite, and 10% worm castings (for gentle nutrients). This DIY blend gives you control over drainage and fertility while keeping costs low.
✂️ Step 4: Adjust the Mix for Your Specific Seeds
Some seeds, like tiny carrot or parsley, need extra fine, sifted soil to avoid getting buried too deep. For these, strain your mix through a fine-mesh sieve before use. Larger seeds (tomatoes, beans) can handle a slightly coarser texture—just press them into the soil lightly so they stay in place without sinking.
If you’re starting succulents or cacti, blend in extra perlite or coarse sand (up to 50%) to prevent rot. These plants hate soggy roots, so a gritty mix mimics their natural desert conditions. For everything else, stick with the standard seed-starting formula—it’s designed to balance moisture and airflow perfectly.
☀️ Step 5: Maintain the Soil After Planting
Once seeds are in, keep the soil consistently moist but never soggy. The surface should feel damp to the touch, like a wrung-out sponge—if it’s dry, seeds won’t sprout. Use a spray bottle for the first week to avoid disturbing seeds, then switch to gentle watering from the bottom (place trays on a saucer of water for 10 minutes).
Watch for crusting on the soil surface—this cuts off air to seeds. If it happens, loosen the top layer with a fork or your finger. And here’s the thing: if your seedlings start looking leggy (thin stems, pale leaves), your soil might be too dense or not warm enough. Move them under grow lights within 2 inches of the plants to encourage strong, stocky growth.
Tips & tricks for perfect seed starting soil
Here's what nobody tells you about getting your seed starting mix just right—these are the details that make all the difference.
Texture is everything: The ideal seed starting mix should feel like a cloud when dry and hold moisture like a wrung-out sponge when wet. If your mix feels dense or clumps together, it's too heavy—add more perlite or vermiculite until it passes the squeeze test. I've ruined three batches of seedlings because the soil was too compact, so trust me on this.
Sterility matters more than you think: Even if your mix looks perfect, old or improperly stored seed starting soil can harbor mold spores that will kill your seedlings before they sprout. Always check the expiration date on pre-mixed bags, and if making your own, sterilize all components by baking them at 200°F for 30 minutes before mixing. This simple step prevents weeks of heartbreak.
Warm water is your secret weapon: Using warm water (around 70°F) when moistening your mix helps it heat up faster under grow lights, which speeds up germination. Cold water can shock seeds and slow down the process. I keep a small thermometer in my watering can just for this purpose—it's a small investment for big results.
Adjust for your specific seeds: Not all seeds need the same soil texture. For tiny seeds like parsley or carrots, sift your mix through a fine-mesh sieve to create a powdery layer on top. For larger seeds like beans or tomatoes, you can use a slightly coarser texture. This prevents seeds from getting buried too deep, which can prevent germination.
Pro Tips for What Soil To Use For Seed Starting
- Here's what nobody tells you about getting your seed starting mix just right—these are the details that make all the difference.
- Texture is everything: The ideal seed starting mix should feel like a cloud when dry and hold moisture like a wrung-out sponge when wet.
- Sterility matters more than you think: Even if your mix looks perfect, old or improperly stored seed starting soil can harbor mold spores that will kill your seedlings before they sprout.
Frequently asked questions
Got questions about seed-starting soil?
You’re not alone! Here are answers to the most common ones to help you grow confidently.
What’s the best soil mix for seed starting?
A lightweight, sterile mix with good drainage—like a 50/50 blend of peat moss or coco coir and perlite or vermiculite—works best. Avoid garden soil (it’s too dense and may harbor pests/diseases). For delicate seeds, add a pinch of horticultural charcoal to prevent damping-off.
Can I reuse last year’s seed-starting mix?
Not recommended! Old soil can harbor fungi, bacteria, or pests that stunt seedlings. If you’re set on reusing it, sterilize it first: bake at 200°F (93°C) for 30 minutes or microwave in 30-second bursts (stirring between each). But fresh mix is always safer.
What’s a budget-friendly alternative to pre-mixed seed-starting soil?
DIY it! Mix:
- 50% peat moss or coco coir (absorbs moisture)
- 30% perlite or coarse sand (aids drainage)
- 20% compost or worm castings (adds nutrients)
Why are my seeds rotting in the soil?
Overwatering or poor drainage are the top culprits. Fix it by:
- Using a mix with perlite/vermiculite (improves airflow)
- Watering from below (bottom-watering trays prevent soggy soil)
- Avoiding cold, damp conditions (keep trays in a warm spot, ~70°F/21°C)
How long can I store unused seed-starting mix?
Store it in a cool, dry place (like a sealed bin or bag) for up to 6 months. Add a moisture absorber (like silica packets) to prevent mold. If it smells musty or feels clumpy, toss it—it’s past its prime!
Wrapping up and next steps
Choosing the right soil for seed starting sets the foundation for healthy, thriving plants! A lightweight, well-draining mix—like a blend of peat moss, perlite, and compost—gives seeds the ideal environment to sprout and grow strong roots.
Don’t overcomplicate it: focus on sterility, aeration, and moisture retention to maximize germination rates.
Now that you’re armed with the best practices, it’s time to roll up your sleeves and start sowing! Grab your supplies, prep your trays, and watch your tiny seeds transform into lush seedlings. Happy gardening—your future plants will thank you! 🌱✨