
Vegetables
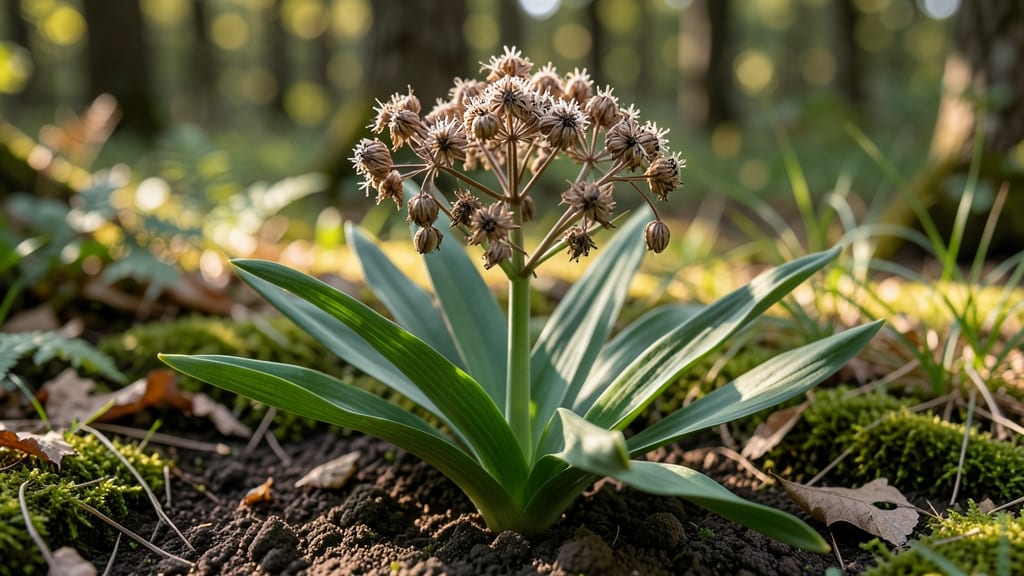
Harvesting wild garlic seed heads lets you grow more of this fragrant, woodland-loving plant for years to come. 🌱 I’ve spent years collecting these seeds—each tiny bulb holds the potential for lush, arrow-shaped leaves that transform any shady spot into a flavorful green haven.
The key is knowing exactly when to harvest and how to dry them properly so they stay viable for planting.
You’ll need just a few simple tools: sharp scissors or pruners, paper bags for drying, and a cool, dry place to store them. The best time to harvest is when the seed heads turn brown and papery—usually in late spring or early summer, depending on your climate.
One mistake I made early on was harvesting too early; the seeds need full maturity to germinate well.
Once dried, these seeds can last 2-3 years in a sealed container, giving you a steady supply for future gardens. The process is simple but requires patience—each seed is tiny, so sow them shallowly in well-draining soil.
In just 4-6 weeks, you’ll see those first delicate shoots pushing through, ready to take over your shady corners.
Wild garlic thrives in moist, wooded areas, so mimic those conditions in your garden. If weeds are a concern, mulch heavily to suppress competition. The payoff? A self-sustaining patch of edible greens that multiplies every year with almost no effort on your part.
📚 In This Guide
- What you need
- Instructions
- Tips and common mistakes
- Wrapping up and next steps
What you need
- ● Fresh wild garlic seed heads: Collect at least 10-15 healthy seed heads (more if you plan to share or experiment with drying techniques). Ensure they’re fully mature but still intact.
- ● Pruning shears or sharp scissors: A pair with clean, sharp blades to avoid crushing the delicate seed stalks.
- ● Paper bags or breathable fabric sacks: 2-3 medium-sized bags (brown paper or mesh works best) to store seed heads during transport and initial drying.
- ● Drying surface: A clean, dry, and well-ventilated area, such as a wooden tray, wire rack, or even a screen placed over a table. Avoid plastic or enclosed spaces to prevent mold.
- ● Twine or rubber bands: For bundling seed heads together to promote even drying.
- ● Air-tight storage containers: Small jars or envelopes (like glass mason jars or resealable plastic bags with silica gel packets) to preserve seeds long-term.
- ● Labeling supplies: Tiny tags or sticky notes to mark seed collection dates or locations.
- ● Fan or dehumidifier: To speed up drying in humid climates.
- ● Magnifying glass: For inspecting seed heads for pests or damage before drying.
- ● Food dehydrator: If you prefer controlled, low-heat drying (set to 95°F or below).
How to harvest and dry wild garlic seed heads for future planting
Here’s my foolproof method for preserving wild garlic’s next generation—no fancy tools, just timing and patience.
🌱 Step 1: Identify and Harvest Mature Seed Heads
Wait until the seed pods turn light brown and begin to split open—this usually happens late spring to early summer, depending on your climate. I avoid harvesting when pods are still green or when rain is forecast, as moisture encourages mold. Use clean pruning shears or your fingers to snip the seed heads just above the first set of leaves, leaving the plant intact for regrowth.
Real talk: If you harvest too early, the seeds won’t fully mature. If you wait too long, they’ll scatter on their own. The best time is when about 30% of the pods have started cracking open—this gives you a buffer for drying.
🌿 Step 2: Bundle and Hang for Air Drying
Gather 4-6 seed heads and tie them together with twine or a rubber band, leaving a 2-inch gap between the bundle and any surface. Hang them upside down in a dry, shaded, well-ventilated spot—like a garage or porch—where temperatures stay between 65-75°F. Avoid direct sunlight, which can scorch the seeds, and keep them away from damp areas to prevent rot.
I like to use a clothesline with clothespins for small batches. Watch for mold or dark spots—if you see these, move the bundle to a drier location immediately. Drying should take 2-3 weeks until the pods are completely brittle and the seeds rattle inside when shaken.
⏰ Step 3: Separate and Store Seeds Properly
Once the seed heads are fully dry, gently crush the pods between your fingers or a clean mortar and pestle to release the seeds. I spread them on a brown paper bag and let them air out for another 24 hours to ensure any lingering moisture evaporates. Then, transfer them to a sealed glass jar or paper envelope and label it with the harvest year and variety (if applicable).
Store the seeds in a cool, dark place—like a pantry or refrigerator—where temperatures stay below 60°F. Wild garlic seeds remain viable for 2-3 years if kept dry. Don’t refrigerate them in a sealed container, though—condensation will ruin them.
💧 Step 4: Test Seed Viability Before Planting
Before sowing, test a few seeds by placing them between damp paper towels in a sealed plastic bag. Keep them in a warm spot (70-75°F) and check daily. If 50% or more sprout within 7-10 days, your seeds are ready to plant. If germination is slow or poor, try stratifying them—mix seeds with damp sand and refrigerate for 4 weeks before retrying.
Here’s the thing—wild garlic seeds are finicky. If they don’t sprout within 2 weeks, they’ve likely lost viability. Don’t waste time on old seeds; start fresh with a new batch.
Tips & tricks for perfect wild garlic seed preservation
Saving wild garlic seeds for next year takes patience—but these small details make all the difference between success and wasted effort.
Timing is Everything: In Step 1, those light brown pods with 30% cracking are your sweet spot. I check them every other day starting in late spring—morning harvests work best because dew can make pods slippery. If you're in a humid climate, harvest on dry mornings to prevent mold from forming on the cut stems. This small window is why I never harvest more than I can dry properly in one batch.
Drying Conditions Matter: The 65-75°F range in Step 2 isn't just arbitrary—it's the Goldilocks zone for seed drying. Too hot and seeds scorch, too cool and they'll develop mold. I've ruined batches by hanging them in direct sunlight (they turned gray!) or in damp basements (mold in 48 hours). A garage with a fan blowing gently across them works perfectly. Watch for that brittle, rattling sound—the moment the seeds shake inside means they're ready.
Storage Wisdom: That 24-hour air-out period in Step 3 is non-negotiable. I've seen seeds clump together in jars and lose viability within months because of trapped moisture. Use a fine mesh strainer to catch any seeds that stick to the paper bag during the final drying. For long-term storage, I add a small silica gel packet to my jars—it absorbs any lingering moisture that might cause condensation when I open the jar later.
Pro Tips for Wild Garlic Seed Heads
- Saving wild garlic seeds for next year takes patience—but these small details make all the difference between success and wasted effort.
- Timing is Everything: In Step 1, those light brown pods with 30% cracking are your sweet spot.
- Drying Conditions Matter: The 65-75°F range in Step 2 isn't just arbitrary—it's the Goldilocks zone for seed drying.
Frequently asked questions
Got questions about wild garlic seed heads?
You’re not alone—harvesting and drying them takes some finesse! Here are answers to the most common queries to help you succeed.
When is the best time to harvest wild garlic seed heads?
Harvest seed heads when they turn light brown and begin to dry on the plant, usually late spring to early summer. Avoid harvesting too early—they won’t store well, and too late means they may scatter seeds naturally. Aim for 60-70% dryness before bringing them indoors.
How long does it take to dry wild garlic seed heads?
Drying time depends on your method. If using a dehydrator, it takes 1-2 hours at 95°F (35°C). For air-drying, hang bundles upside down in a cool, dark, well-ventilated space for 1-2 weeks. Test by crushing a seed head—if it crumbles easily, it’s ready!
Can I save wild garlic seeds from store-bought bulbs?
No—store-bought bulbs are often hybridized or treated to prevent seed production. For true wild garlic seeds, you must harvest from wild plants or organic, seed-saving varieties. Check the bulb’s packaging for "seed-saving" labels if unsure.
What if my seed heads mold or develop pests during drying?
Mold or pests usually mean high humidity or poor airflow. If this happens, discard affected seed heads immediately to prevent spoilage. To avoid issues, ensure your drying space is dry, dark, and well-ventilated, and avoid overcrowding bundles.
Are there alternatives if I can’t find wild garlic seed heads?
Yes! Try garlic chives, elephant garlic, or shallots for similar flavors. If you want true wild garlic, check local foraging groups or seed exchanges—they often share wild-harvested seeds. Just confirm the plant is Allium ursinum before consuming!
Wrapping up and next steps
Harvesting and drying wild garlic seed heads is a rewarding way to preserve nature’s bounty for future seasons! With the right tools and techniques—like timing your harvest and ensuring proper airflow—you’ll keep those seeds viable for years.
Whether you’re a forager, gardener, or just love the flavor, these seeds are a game-changer for culinary adventures.
Ready to grow your own wild garlic patch? Start by planting your dried seeds in well-draining soil this fall—soon, you’ll be savoring fresh, homegrown garlic in every dish! 🌱