
Lawn
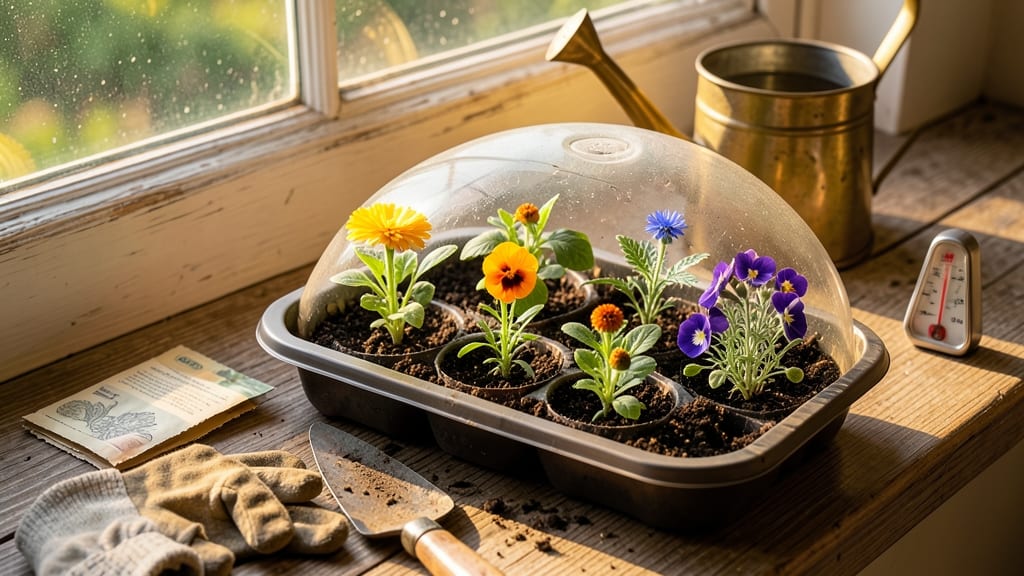
An edible flower seed mix transforms your garden into a fragrant, colorful kitchen. 🌸 I’ve grown mine for three years, and every spring, the blooms outshine store-bought flowers—plus, they’re safe to eat. The secret? A blend of nasturtiums, calendula, and borage, each with its own flavor and beauty.
Start with well-draining soil and full sun—most edible flowers thrive in 6+ hours of light daily. Plant seeds ¼ inch deep, spacing them 12-18 inches apart for full growth.
Water gently to avoid disturbing the soil, and expect blooms in 6-8 weeks. The key is consistency: too much water drowns roots, while too little stunts growth.
By midsummer, you’ll have vibrant blooms perfect for garnishes, teas, or salads. Nasturtiums add peppery crunch, calendula brightens soups, and borage lends a cucumber-like zing. Harvest in the morning when flavors peak, and always rinse gently before using.
Pair with herbs like thyme or chives to repel pests naturally, and deadhead spent blooms to encourage more flowers. This mix works in containers, garden beds, or even hanging baskets—ideal for small spaces or urban gardens. Ready to grow your own edible beauty?
📚 In This Guide
- What you need
- Instructions
- Tips and common mistakes
- Wrapping up and next steps
What you need
- ● Edible Flower Seed Mix: 1 packet (check for varieties like nasturtium, calendula, borage, or pansies—all safe and delicious!). Look for organic, non-GMO seeds for the best quality.
- ● Well-draining potting soil: 5-10 lbs (or a 10-12 inch pot per plant if container gardening). A mix with compost or coconut coir works best!
- ● Containers or garden bed: Containers: 6+ inch deep pots with drainage holes (1 pot per 3-5 seeds). Terracotta or fabric grow bags are great options.
- ● Garden bed: A sunny spot (6+ hours of light daily) with loose, fertile soil. Raised beds are ideal for better drainage.
- ● Watering can or spray bottle: With a gentle nozzle to avoid disturbing seeds.
- ○ Plant labels (optional but helpful): Small stakes or biodegradable markers to track varieties.
- ● Gloves: Lightweight gardening gloves to protect your hands from soil and tiny seeds.
- ● Trowel or small hand shovel: For transplanting seedlings or loosening soil.
- ○ Mulch (optional): Straw or shredded leaves to retain moisture and suppress weeds.
- ○ Fertilizer (optional): Balanced organic fertilizer (e.g., 5-5-5) for planting.
- ● Fish emulsion or compost tea every 4-6 weeks for established plants.
- ○ Row cover or shade cloth (optional): For young seedlings if your climate has harsh sun or pests.
- ● Sunlight: Confirm your planting spot gets at least 6 hours of direct sunlight daily—most edible flowers thrive in full sun!
- ● Weather check: Avoid planting seeds during frost (check your USDA Plant Hardiness Zone). Start indoors 4-6 weeks before the last frost if needed.
- ● Patience: Germination times vary (5-21 days), so keep soil moist and consistent!
Step-by-step guide to growing year-round edible flowers
Here's how to transform a single packet into a vibrant, harvestable garden that thrives through all seasons.
🌱 Step 1: Select and Prepare Your Planting Sites
Choose locations that receive at least 6 hours of sunlight daily—most edible flowers thrive in full sun, though some like nasturtiums tolerate partial shade. I prefer raised beds or containers for better drainage, especially in heavy clay soil. Divide your growing space into four distinct zones to stagger planting and ensure continuous blooms.
Loosen the soil to a depth of 12 inches with a garden fork, breaking up any compacted layers. Mix in 2-3 inches of compost to enrich the soil naturally. Avoid fresh manure—it can burn delicate flower roots and disrupt germination. Test your soil's pH; most edible flowers prefer a slightly acidic to neutral range (6.0-7.0). If your soil is too alkaline, amend it with sulfur or peat moss before planting.
🌿 Step 2: Plant Seeds at Optimal Depths and Spacing
Sow seeds according to the packet's depth guidelines—typically twice the seed diameter—but never deeper than ¼ inch. I like to use a small hand trowel to create precise furrows, spacing seeds 6-12 inches apart depending on the variety. Larger flowers like calendula need more room, while tiny varieties like Johnny jump-ups can be planted closer together.
Cover seeds lightly with soil and mist the area with water until the surface is evenly moist but not soggy. Press gently to ensure good seed-to-soil contact. Label each section with the variety and planting date—this helps track growth stages and harvest times. For a continuous bloom cycle, plant one zone every 3-4 weeks throughout the growing season.
☀️ Step 3: Provide Consistent Moisture and Light
Water deeply once a week, aiming for 1 inch of water per week, but adjust based on rainfall. I check moisture by pushing my finger 1 inch into the soil—if it feels dry, it's time to water. Avoid overhead sprinkling, which can spread disease; instead, use a soaker hose or drip irrigation to deliver water directly to the roots.
Ensure full sun exposure for vibrant blooms and strong flavors. If your garden lacks sufficient sunlight, supplement with a grow light positioned 6-12 inches above the plants for 12-14 hours daily. Watch for leggy growth—a sign of insufficient light—and adjust accordingly. Mulch around plants with 2 inches of organic mulch to retain moisture and suppress weeds.
✂️ Step 4: Prune and Harvest for Continuous Blooms
Deadhead spent blooms regularly to encourage new growth and prolong the flowering season. Use clean, sharp scissors to snip flowers just above the first set of leaves. This redirects the plant's energy toward producing more blooms rather than seed pods. Harvest flowers in the early morning when they're fully open and flavorful.
For culinary use, pick flowers just before they fully bloom—this ensures the best flavor and texture. Rinse gently with cold water and pat dry with a paper towel. Store harvested flowers in a paper bag in the refrigerator for up to 3 days, or dry them by hanging upside down in a well-ventilated, dark place for 1-2 weeks. Rotate your planting zones so you always have fresh blooms ready for harvest.
⏰ Step 5: Extend the Season with Seasonal Adjustments
To enjoy edible flowers year-round, plan for seasonal transitions. In spring, start seeds indoors 6-8 weeks before the last frost date and transplant outdoors after temperatures stabilize above 50°F. In fall, sow cold-hardy varieties like pansies and violas 8-10 weeks before the first frost for winter color.
Use row covers or cold frames to protect tender varieties during unexpected frosts. In winter, grow edible flowers indoors under grow lights or in a sunny windowsill. Choose compact varieties like nasturtiums or alyssum for container growing. With careful planning, your edible flower garden can provide continuous blooms and harvests from early spring through late fall—and even into winter with the right adjustments.**
Tips & tricks for perfect year-round edible flower gardens
Growing edible flowers from a single packet doesn't have to be complicated—these insider tricks will help you maximize your harvest and avoid common pitfalls.
Sunlight Strategy: While most edible flowers thrive in full sun, don't assume every spot gets equal light. I've found that even in sunny gardens, some areas receive only 4-5 hours of direct sun—perfect for shade-tolerant varieties like violas or nasturtiums. Use a sun tracker app for a week to map your garden's light patterns before planting. This ensures you place heat-sensitive varieties in the right spots and prevents leggy growth from insufficient light.
Soil Preparation Secret: The 12-inch soil depth recommendation might seem excessive, but it's worth the effort. Compacted soil can strangle young roots, so I use a broadfork to loosen the soil without turning it over completely. This preserves soil structure while improving drainage. For containers, mix equal parts potting soil and perlite to create an airy growing medium that prevents root rot—especially important for delicate flowers.
Watering Wisdom: That "1 inch per week" guideline works for established plants, but newly planted seeds need different care. After sowing, I water lightly every other day until seeds germinate, keeping the soil consistently moist but never soggy. Once seedlings emerge, gradually reduce to the weekly schedule. A drip irrigation system on a timer eliminates guesswork—just set it for 15 minutes every 7 days and let it do the work.
Harvest Timing: The early morning harvest window is crucial for both flavor and appearance. Flowers picked at this time contain the most nectar and have their brightest color. I use a small spray bottle with plain water to refresh flowers after harvesting if I can't use them immediately. For drying, I tie small bundles with twine and hang them in a dark, well-ventilated space—this preserves color and prevents mold better than heat drying methods.
Pro Tips for Edible Flower Seed Mix
- Growing edible flowers from a single packet doesn't have to be complicated—these insider tricks will help you maximize your harvest and avoid common pitfalls.
- Sunlight Strategy: While most edible flowers thrive in full sun, don't assume every spot gets equal light.
- Soil Preparation Secret: The 12-inch soil depth recommendation might seem excessive, but it's worth the effort.
Frequently asked questions
Got questions about growing your own edible flower seed mix? We’ve got answers!
Whether you’re a beginner or a seasoned gardener, these FAQs will help you navigate everything from planting to harvesting. Let’s dive in!
When is the best time to plant edible flower seeds?
The ideal time depends on your climate! For most regions, plant seeds in early spring (after the last frost) or late summer for a fall harvest. In warmer zones, you can even sow seeds year-round. Check your seed packet for specific timing—some flowers, like nasturtiums, thrive in cooler weather, while others, like sunflowers, need heat.
How long does it take for edible flowers to grow from seed?
Growth time varies by flower type! Fast growers like nasturtiums or calendula may bloom in as little as 4–6 weeks, while sunflowers or borage can take 8–12 weeks. Always read the seed packet for exact timelines—patience pays off with vibrant, edible blooms!
Are all edible flowers safe to eat raw?
Not all edible flowers are safe raw—some need cooking! For example, violas and pansies are great raw, while squash blossoms taste best sautéed. Always research each flower or stick to pre-labeled edible seed mixes. When in doubt, cook them lightly to reduce risk.
What if my edible flowers aren’t blooming?
Lack of blooms often means your plants need more sunlight, water, or nutrients. Most edible flowers need 6+ hours of sun daily and well-draining soil. Try fertilizing lightly with compost or a balanced organic fertilizer. Deadhead spent blooms to encourage new growth!
Can I grow edible flowers in containers?
Many edible flowers thrive in containers, including nasturtiums, marigolds, and pansies. Use a 5–7 gallon pot with drainage holes and well-draining potting mix. Just ensure containers get enough sunlight—balconies and patios work great!
Wrapping up and next steps
Transforming your garden—or even a sunny windowsill—into a vibrant, edible paradise has never been easier! With an edible flower seed mix, you’re not just growing beauty; you’re cultivating flavor, nutrition, and joy year-round.
Whether you’re a seasoned gardener or a curious beginner, this mix opens doors to endless culinary and decorative possibilities—so why wait?
🌱 Your next step: Grab that seed packet, pick your perfect spot, and let nature do the rest. Share your blooms (and maybe a recipe or two!) with fellow gardeners—you’ll inspire others to grow their own edible magic. Happy planting! 🌸