
Planting
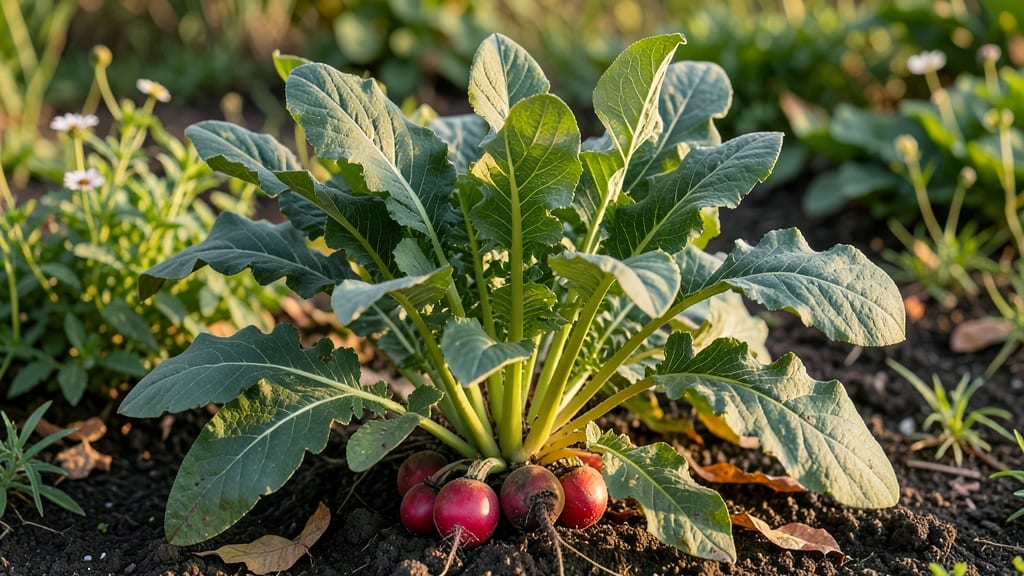
Saving radish plant seed pods from your garden means next year’s harvest starts with plants that already know your soil. 🌱 The trick is letting a few radishes bolt and go to seed—something most gardeners rush to pull before it happens.
I learned the hard way that patience here pays off with seeds that germinate faster and stronger than store-bought varieties.
Start by leaving the best-performing radishes in the ground after they’ve finished producing. Once the pods turn brown and papery, twist them off by hand—no need for tools. Let them dry completely on paper towels for a week before cracking them open to remove the seeds inside.
This method guarantees seeds that match your climate and soil conditions perfectly.
Store the dried seeds in a cool, dark place in an airtight container, and they’ll stay viable for up to 3 years. When spring rolls around, you’ll have radishes ready to sprout in as little as 7-10 days, giving you an early harvest that store-bought seeds can’t match.
This works for any radish variety—round, long, or spicy—but save seeds from your favorite types to maintain those exact flavors and textures. The first year might take some trial and error, but once you’ve mastered it, you’ll never buy radish seeds again.
📚 In This Guide
- What you need
- Instructions
- Tips and common mistakes
- Wrapping up and next steps
What you need
- ● Mature radish plants: Choose healthy, disease-free radishes with fully developed seed pods (typically from varieties like Daikon or Watermelon Radish). Aim for at least 5–10 plants for a reliable seed harvest.
- ● Seed pods: Allow pods to turn brown and dry on the plant (or after harvesting) before collecting. Expect 20–50 pods per plant, depending on variety.
- ● Scissors or pruners: Sharp, clean tools to snip pods without damaging stems.
- ● Paper bags or breathable mesh bags: 2–3 bags (labeled with the radish variety and year) for drying pods indoors.
- ● Envelope or airtight container: For long-term seed storage (e.g., 1–2 envelopes or a small mason jar with a silica gel packet).
- ● Magnifying glass: For inspecting pods for pests or damage.
- ● Desiccant (silica gel) or rice: Absorbs moisture in storage containers (place 1–2 packets in the jar).
- ● Labeled seed-saving kit: Pre-made kits with envelopes and storage instructions.
- ● Notebook or app: To track varieties, harvest dates, and germination notes.
- ● Dry, shaded indoor space: 60–70°F (15–21°C) and low humidity for 2–4 weeks to dry pods fully.
- ● Cool, dark storage: 35–40°F (2–4°C) (e.g., fridge or root cellar) for seed longevity.
Step-by-Step guide to harvesting and storing radish seed pods
Here's how I save seeds from my best radish plants—simple, reliable, and ready for next season.
🌱 Step 1: Identify and Select Healthy Radish Plants
Wait until your radishes produce long, dry seed pods that turn from green to brown—this usually happens 60-90 days after planting. Choose the straightest, most vigorous plants with no signs of disease or pest damage. These will yield the best seeds for next year. Avoid plants with yellowing leaves or soft stems, as they may carry poor-quality seeds.
Harvest pods when they’re completely dry and crisp—they’ll rattle slightly when shaken. If you pick them too early, the seeds won’t mature fully. I like to harvest on a warm, dry afternoon so the pods have time to finish drying naturally on the plant.
✂️ Step 2: Harvest and Dry the Seed Pods
Use clean pruning shears to snip the pods from the plant, leaving a ½-inch stem attached. Lay them out in a single layer on a paper towel-lined tray in a warm, dry, well-ventilated area—a sunny windowsill or a spot under a fan works well. Avoid direct sunlight, which can overheat and damage the pods.
Let them dry for 7-10 days until the pods are completely brittle and the seeds inside rattle freely. If humidity is high, drying may take longer. I check daily by gently pressing a pod—if it crumbles easily, it’s ready. Store any pods that develop mold immediately, as they’ll ruin the entire batch.
🪴 Step 3: Extract and Clean the Seeds
Once fully dry, crush each pod between your fingers over a clean sheet of paper to release the seeds. Discard any discolored, shriveled, or damaged seeds—they won’t germinate well. Sift the seeds through a fine mesh strainer to remove debris, then spread them on a clean, dry surface to air-dry for another 24 hours. This final step ensures maximum viability.
For extra cleanliness, I use a small paintbrush to gently sweep away any remaining chaff or pod fragments. Store the seeds in a small envelope or airtight container labeled with the variety name and harvest date. Keeping them in a cool, dark place (like a pantry) preserves their freshness for 3-5 years.
⏰ Step 4: Test Seed Viability Before Next Season
Before planting, test a few seeds by placing 5-10 in a moist paper towel inside a sealed plastic bag. Keep them in a warm spot (70-75°F) and check daily. If 50% or more sprout within 7-10 days, your seeds are still good. If germination is poor, try storing them in the fridge for a week to break dormancy—sometimes radish seeds need a cold snap to wake up.
If viability is low, consider sourcing new seeds or adjusting your storage conditions. I’ve found that humidity control is key—never store seeds in a damp basement or garage. With proper care, your homegrown radish seeds will give you bold, true-to-type plants next season.
Tips & tricks for perfect radish seed pod harvesting
A few simple tricks that’ll help you save the best radish seeds for next season without any of the common pitfalls.
Pod Selection: I can’t stress enough how important it is to pick only the straightest, healthiest pods in Step 1. Look for pods that are completely brown and dry—if they still have any green, they’re not ready. The pods should feel crisp and rattle when shaken. I’ve learned the hard way that harvesting too early means seeds that won’t germinate properly. Confession: I skipped this step for years and wondered why my seeds always performed poorly.
Drying Environment: The 7-10 day drying period in Step 2 is where most people go wrong. If your kitchen is humid, you might need to extend this to 12-14 days. I’ve found that a small fan blowing gently over the pods speeds up the process without overheating them. Place your drying tray near a window but avoid direct sunlight—it can cause the pods to overheat and crack open prematurely.
Seed Viability Test: That 70-75°F warm spot for testing seeds in Step 4 is crucial for accurate results. I’ve had the best luck using a seedling heat mat set to 72°F—it keeps the temperature perfectly consistent. If you don’t have one, a sunny windowsill works fine, but check the temperature with a thermometer. If your test seeds don’t sprout well after 10 days, try the fridge trick—sometimes radish seeds need that cold shock to break dormancy.
Storage Wisdom: For long-term storage, I’ve found that small glass jars with tight-sealing lids work even better than envelopes. The glass protects against moisture better, and I can see the seeds without opening the container. Label each jar with the variety name and harvest date—next year’s you won’t remember which jar contains your prized French Breakfast radishes! Store them in the darkest corner of your pantry where the temperature stays most consistent.
Pro Tips for Radish Plant Seed Pods
- A few simple tricks that’ll help you save the best radish seeds for next season without any of the common pitfalls.
- Pod Selection: I can’t stress enough how important it is to pick only the straightest, healthiest pods in Step 1.
- Drying Environment: The 7-10 day drying period in Step 2 is where most people go wrong.
Frequently asked questions
about radish plant seed pods can help you avoid common pitfalls and maximize your harvest. Here are some of the most common queries answered in a nutshell!How do I know when radish seed pods are ready to harvest?
Radish seed pods mature when they turn dry, brown, and papery—usually 45–60 days after flowering. Gently twist or cut them off the plant to avoid damaging the stems. Harvest on a dry day to prevent mold. If left too long, pods may shatter, scattering seeds everywhere!
Can I save seeds from store-bought radishes?
No—store-bought radishes are often hybrid varieties and won’t produce true-to-type seeds. For seed saving, grow open-pollinated (heirloom) radishes like French Breakfast or Cherry Belle. Cross-pollination is rare in radishes, but isolation (10+ feet from other radish varieties) ensures purity.
What’s the best way to dry radish seed pods?
Spread pods in a single layer on a mesh screen or paper towel in a cool, dry, well-ventilated spot (60–70°F). Avoid direct sunlight or heat sources. Stir occasionally to prevent mold. Fully dried pods will rattle when shaken. Store in a sealed container once completely desiccated (usually 1–2 weeks).
How long do radish seeds stay viable for storage?
Properly stored radish seeds retain viability for 2–4 years in a cool (32–40°F), dark, and dry environment (like a sealed jar in the fridge). Test germination by planting a few seeds—if <50% sprout, replace your seed stock. Label pods with the variety and harvest year!
What if my radish plants bolt before producing pods?
Bolting (rapid flowering/stem elongation) happens due to heat, drought, or small seeds. To prevent it:
- Plant cool-season varieties (like Easter Egg) in early spring/fall.
- Keep soil moist and mulch to retain moisture.
- Use larger seeds (they germinate faster and handle heat better).
- Try shade cloth in hot climates.
Wrapping up and next steps
Growing and storing radish plant seed pods is a rewarding way to ensure a bountiful harvest next season!
By following the right techniques—like timing your harvest, drying pods properly, and storing them in a cool, dry place—you’ll keep your garden thriving with fresh, homegrown radishes year after year. You’ve got this! 🌱
Ready to take the next step? Start a seed-saving journal to track your radish varieties, storage success, and germination rates. Share your tips with fellow gardeners—every seed saved is a step toward a greener future! 🌍✨